
Table of Contents
This process uses a modified version of the official Raspberry Pi OS (2020-02-13-raspbian-buster-lite.img). It has been configured with the tools necessary to burn an Arduino style bootloader using the Raspberry Pi’s GPIO pins (described here).
Brief summary of steps:
- Wire Raspberry Pi GPIO pins to Arduino ICSP pins
- Boot the custom Raspberry Pi image
- Connect a computer to Raspberry Pi WiFi
- SSH into Raspberry Pi
- cd to ‘/arduino’ and run ‘./burn.sh’
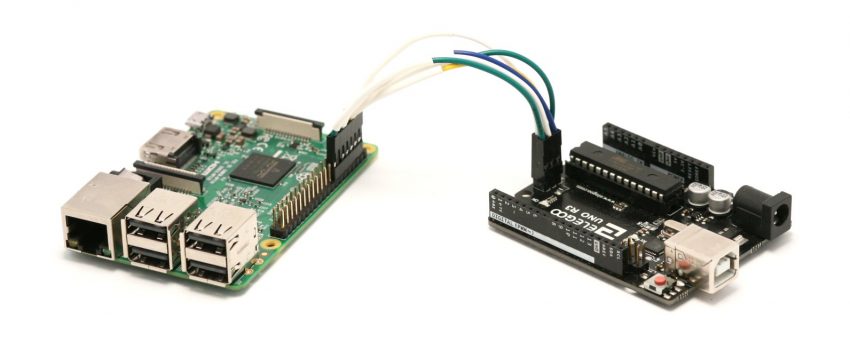
This requires a Raspberry Pi and six jumper wires to connect to your target Arduino or similar microcontroller. Once the Raspberry Pi is booted, it will broadcast an SSID (unsecured). Once connected to the Raspberry Pi, an SSH client such as PuTTY can be used login and execute commands. Alternatively, a keyboard and monitor can be attached directly.
I will be using an Arduino Uno with the 328p microcontroller, but multiple microcontrollers are supported.
Getting Started
Download the image
Download Link – 460MB
MD5: 543417af80e140c609b8dec69a09f229
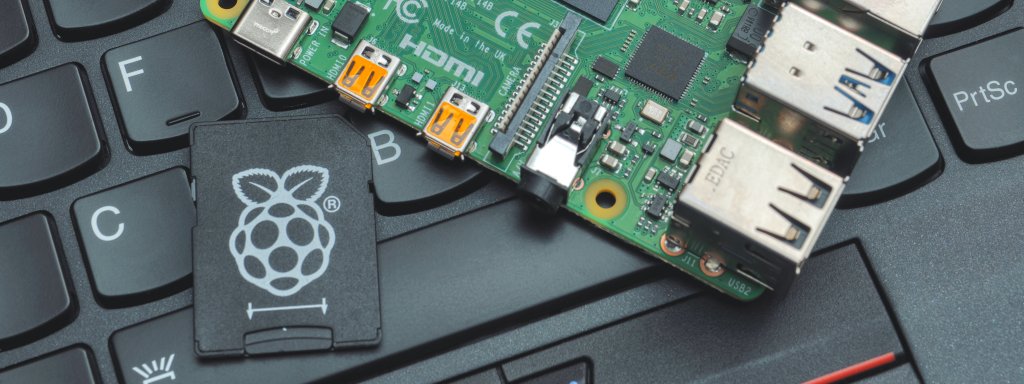
Write the image to an SD card
I recommend using the official Raspberry Pi imager. Linux’s ‘dd’, Balena Etcher, or similar programs can also work. The image file is compressed using ‘xz’ — the Raspberry Pi imager will automatically decompress the image, but you may need to do this manually for other programs.
You will need a 4GB microSD card.
Booting and credentials
Once booted, the Raspberry Pi should broadcast an SSID of “raspberry”. This is an open wifi hotspot. You will need to connect and login using any SSH client.
You can also connect a keyboard and monitor directly.
SSID: raspberry
passkey: none (open)

IP Address: 192.168.2.1
username: root
password: pi
Wiring Example
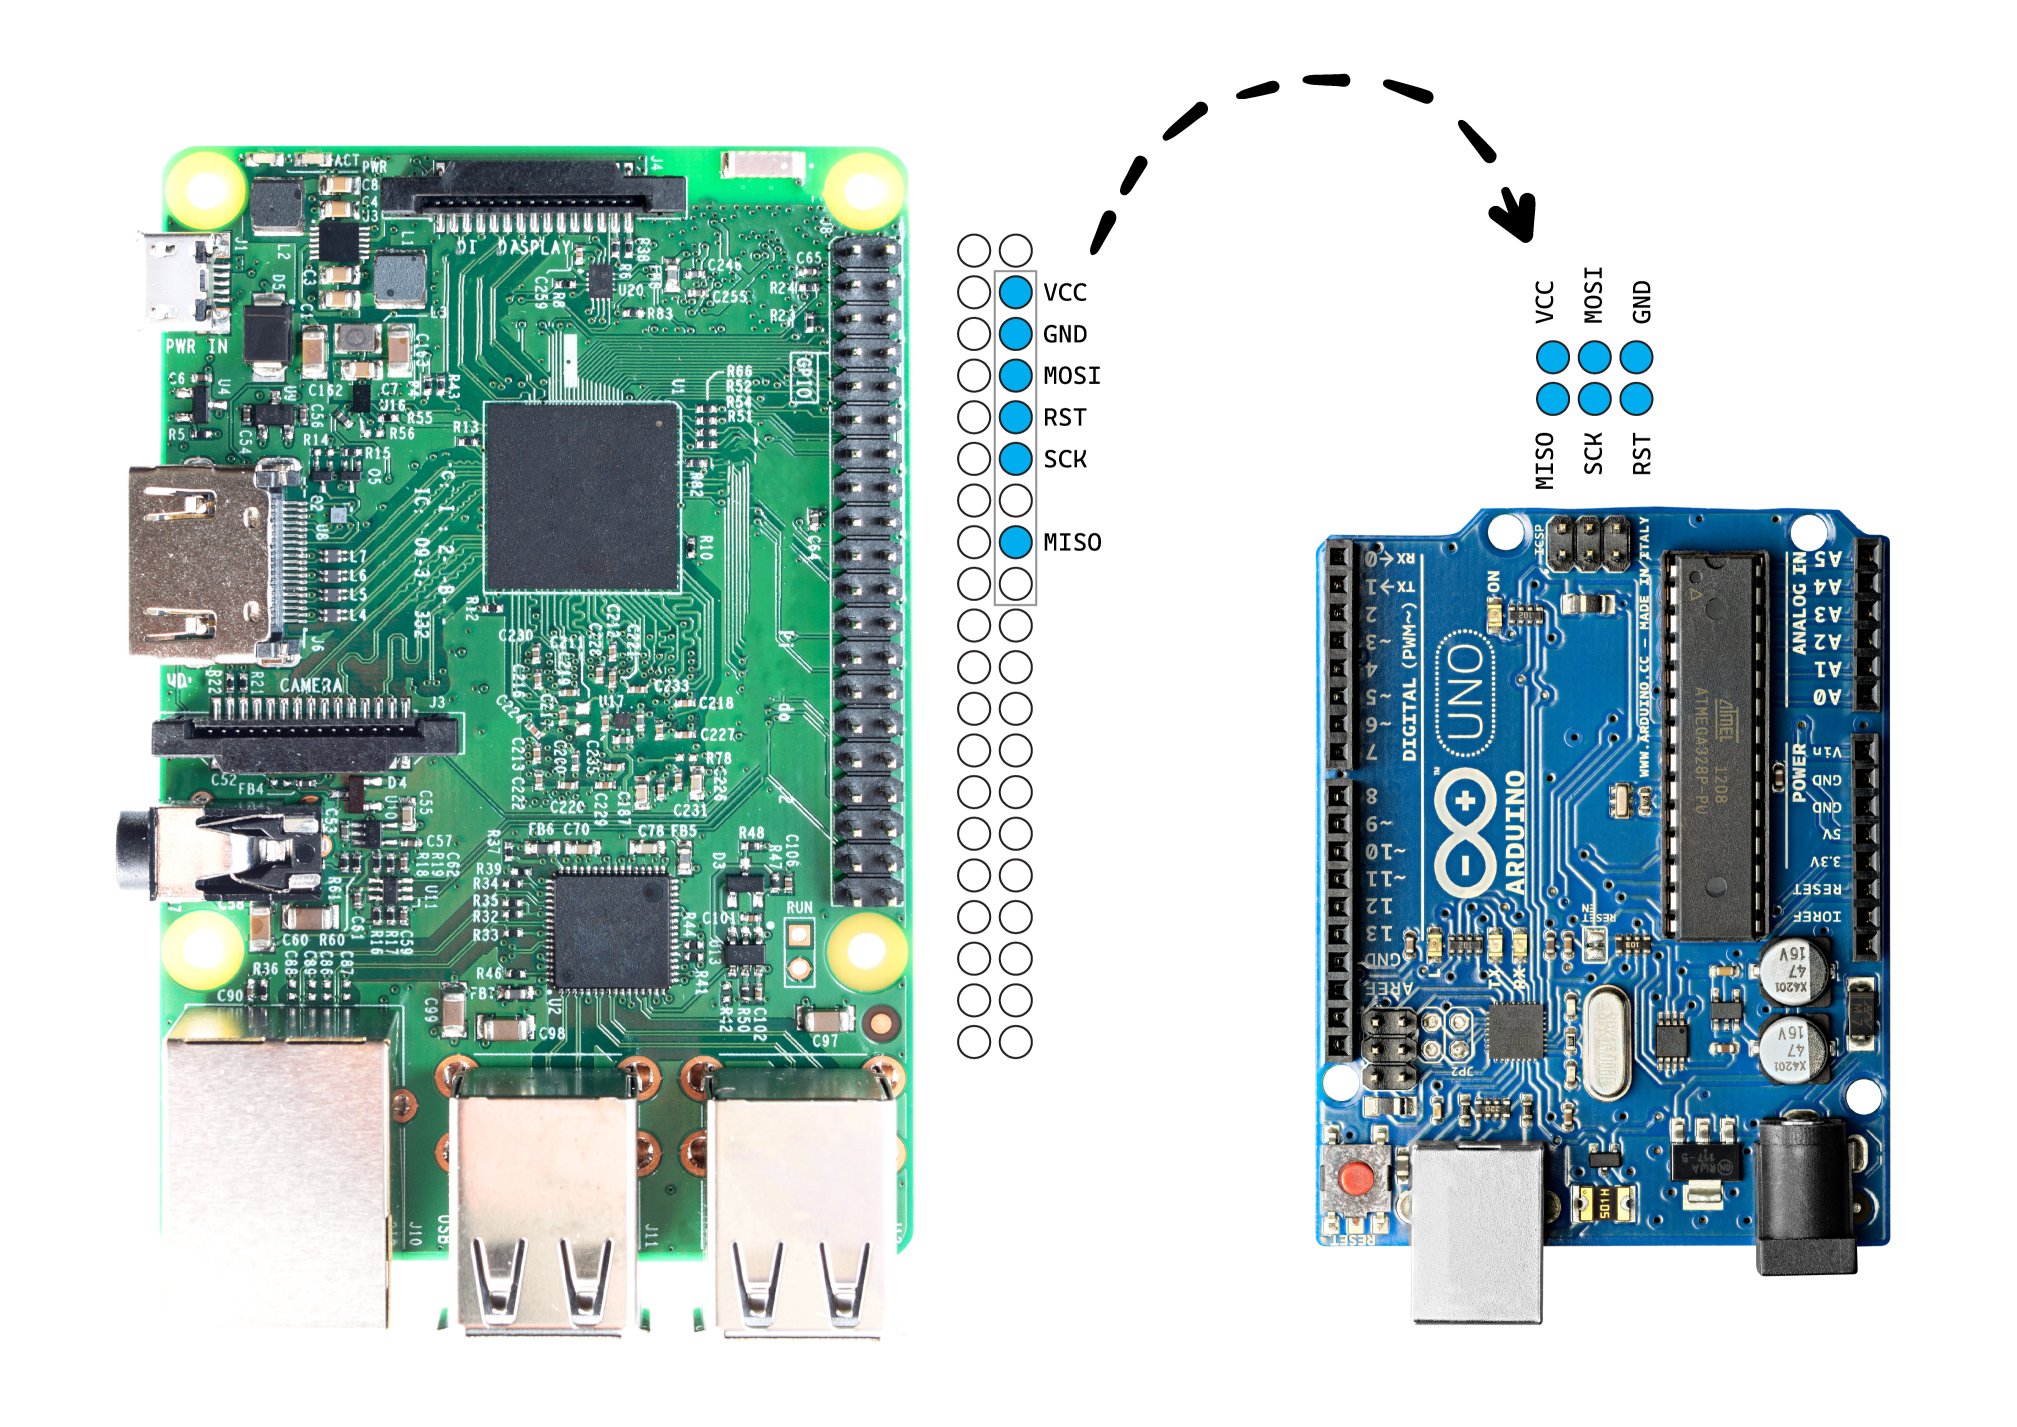
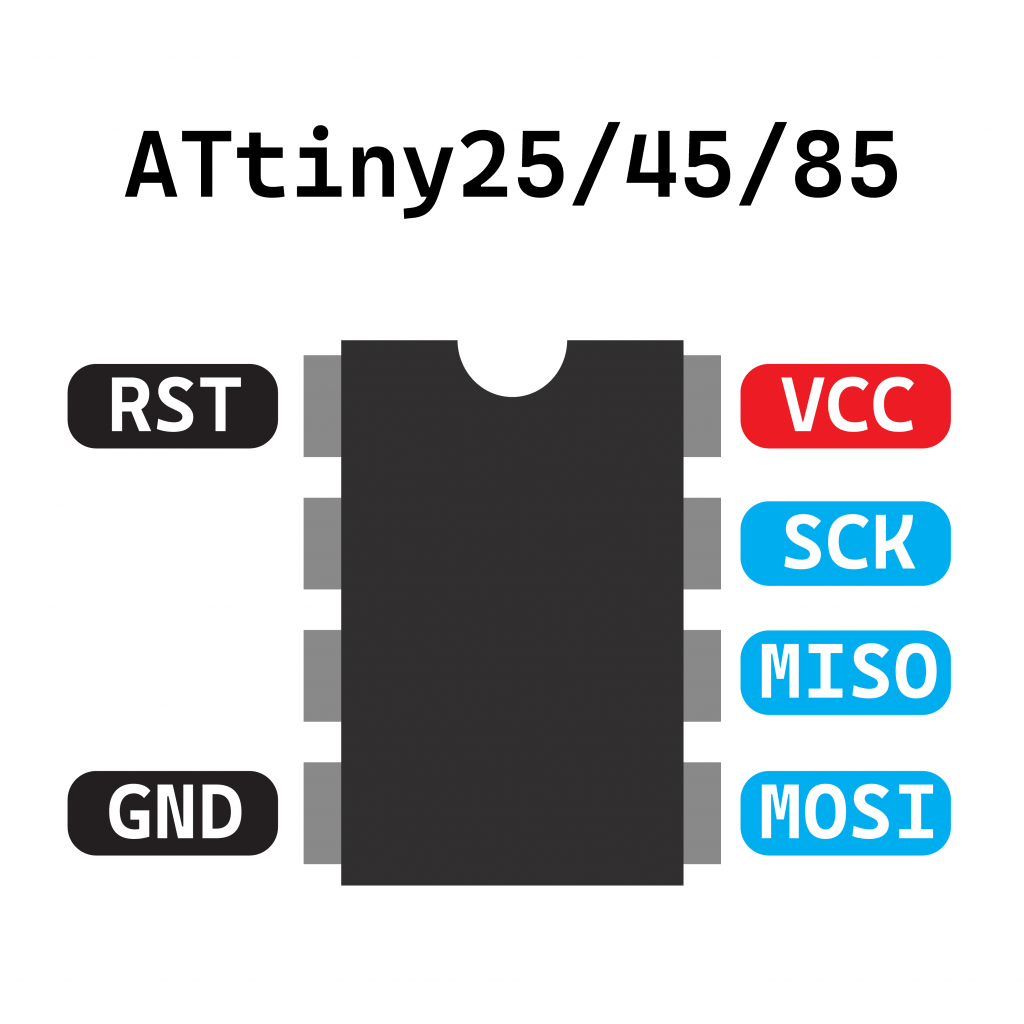
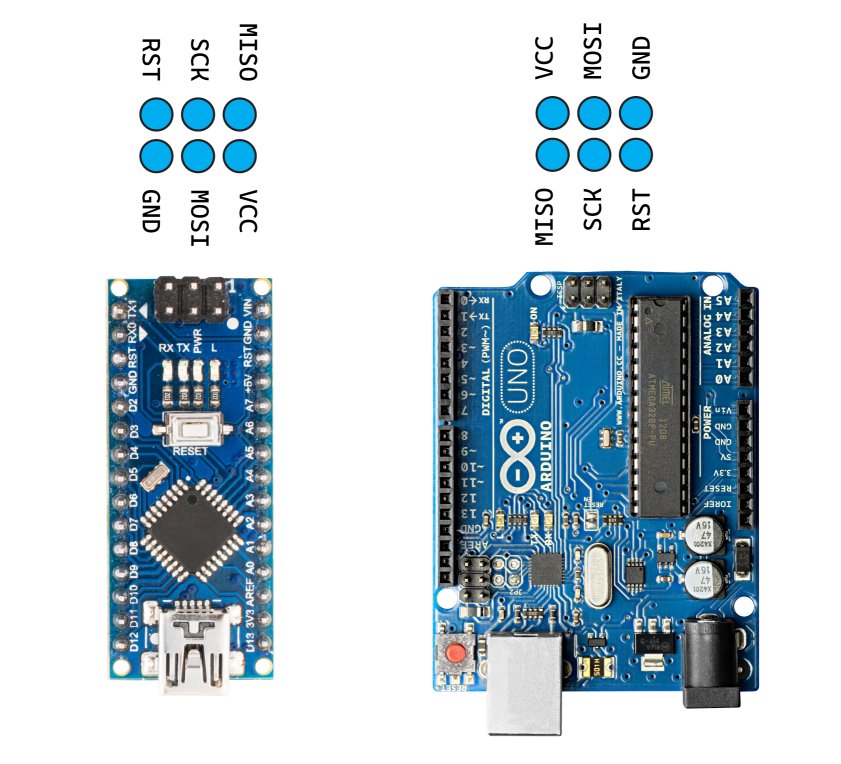
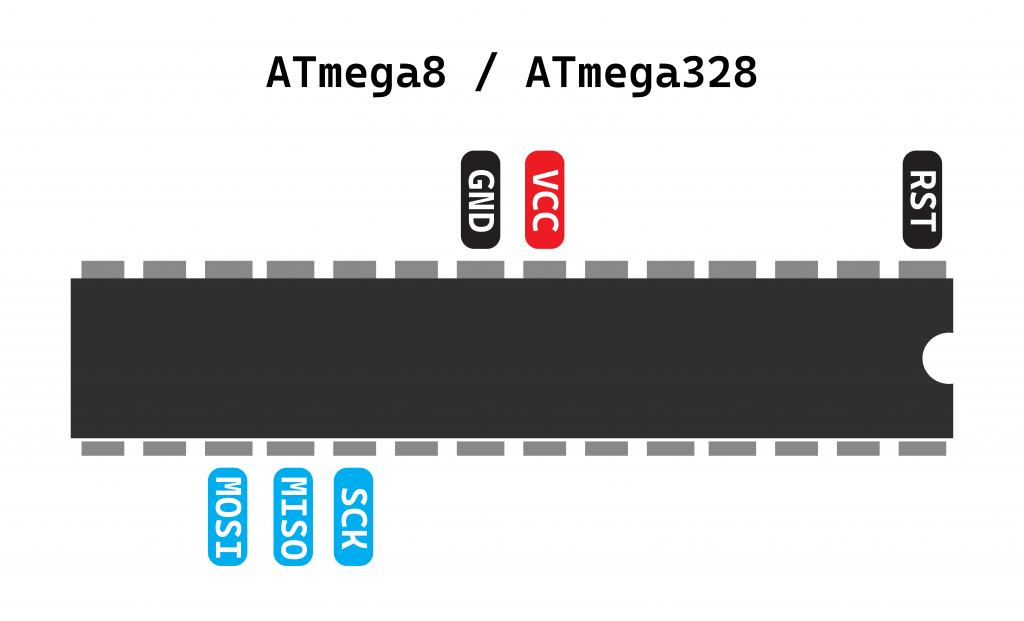
This image shows the wiring from the Raspberry Pi to the Arduino Uno’s ICSP pin header. Not all ICSP pin headers are the same. If you don’t have any ICSP headers, you will need to determine which pins directly correspond to the SCK/MOSI/MISO and VCC/GND/RST.
avrdude Command
Once you’re connected to the Raspberry Pi, there is a directory called ‘/arduino’ that contains the avrdude configuration file, different bootloaders, and a script called ‘burn.sh’ that has examples of how to burn programs to different Arduino boards.
‘burn.sh’ contains a few examples. You will need to use the correct command and fuse settings to match your microcontroller.
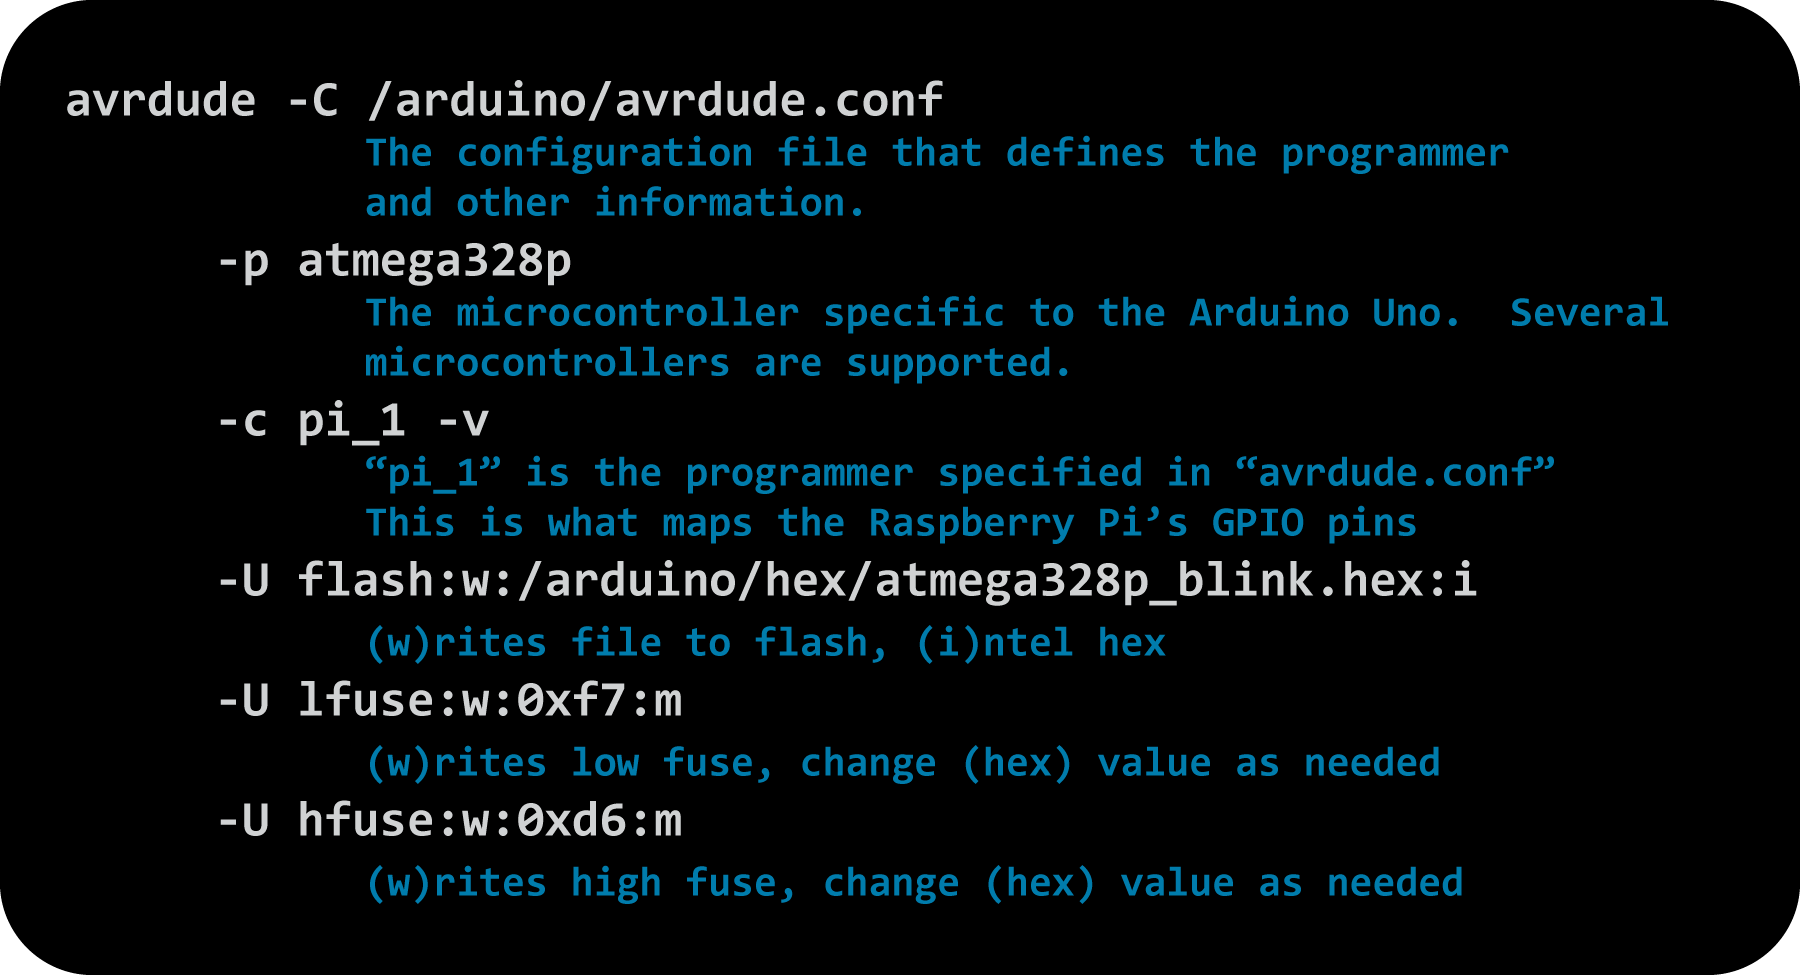
Below is the command to burn the blink program (which happens to include a bootloader) to the Arduino Uno. The fuse bytes are included, but not necessary if you want to keep the existing fuse settings.
avrdude -C /arduino/avrdude.conf \
	-p atmega328p \
	-c pi_1 -v \
	-U flash:w:/arduino/hex/atmega328p_blink.hex:i \
	-U lfuse:w:0xf7:m \
	-U hfuse:w:0xd6:m
The -U flag, further details
Performs memory operations. Multiple operations can be performed in one command.
-U memtype:op:filename[:format]
memtype
- calibration One or more bytes of RC oscillator calibration data.
- eeprom The EEPROM of the device.
- efuse The extended fuse byte.
- flash The flash ROM of the device.
- fuse The fuse byte in devices that have only a single fuse byte.
- hfuse The high fuse byte.
- lfuse The low fuse byte.
- lock The lock byte.
op
- r read memory and write to file
- w read file and write to memory
- v read memory and file, verify both
format (optional)
- i Intel Hex
- s Motorola S-record
- r binary, little-endian
- m immediate, 0x for HEX values
Examples
Uploading blink sketch to ATtiny85
avrdude -C /arduino/avrdude.conf \
    -p t85 -c pi_1 -v \
    -U flash:w:/arduino/hex/attiny85_blink.hex:i \
    -U lfuse:w:0xE2:m \
    -U hfuse:w:0xDF:m \
    -U efuse:w:0xFF:m \
    -U lock:w:0xFF:m
Uploading Adafruit OLED demo to Nano
This sketch takes a little longer to upload and it’s easier to “see” avrdude doing its thing.
avrdude -C /arduino/avrdude.conf \
    -p atmega328p -c pi_1 -v \
    -U flash:w:/arduino/hex/atmega328p_oled.hex:i \
    -U lfuse:w:0xf7:m \
    -U hfuse:w:0xd6:m
Reading EEPROM from ATmega8
I’ve programmed a message into the EEPROM of an ATmega8A and I will read it back to a file called ‘eeprom.dump’ and then I will hexdump the file to see the message.
avrdude -C /arduino/avrdude.conf \
-p m8 -c pi_1 -v \
-U eeprom:r:/arduino/eeprom.dump:r
Compiling Sketches on the Raspberry Pi
‘arduino-cli’ is installed. Within the ‘/arduino’ directory is the standard ‘blink’ program. The script ‘compile.sh’ has an example of how to compile using ‘arduino-cli’
arduino-cli compile --fqbn arduino:avr:uno -v blink/ --output-dir blink
This command will produce the compiled program, including a HEX file, that can be uploaded.
Samba Filesharing
The Raspberry Pi has Samba installed and is sharing the ‘/arduino’ directory.
Common ‘part’ names
These are used with the ‘avrdude’ command and the ‘-p’ flag.
| uc3a0512 = AT32UC3A0512 c128 = AT90CAN128 c32 = AT90CAN32 c64 = AT90CAN64 pwm2 = AT90PWM2 pwm216 = AT90PWM216 pwm2b = AT90PWM2B pwm3 = AT90PWM3 pwm316 = AT90PWM316 pwm3b = AT90PWM3B 1200 = AT90S1200 2313 = AT90S2313 2333 = AT90S2333 2343 = AT90S2343 4414 = AT90S4414 4433 = AT90S4433 4434 = AT90S4434 8515 = AT90S8515 8535 = AT90S8535 usb1286 = AT90USB1286 usb1287 = AT90USB1287 usb162 = AT90USB162 usb646 = AT90USB646 usb647 = AT90USB647 usb82 = AT90USB82 m103 = ATmega103 m128 = ATmega128 m1280 = ATmega1280 m1281 = ATmega1281 m1284 = ATmega1284 m1284p = ATmega1284P m1284rfr2= ATmega1284RFR2 m128rfa1 = ATmega128RFA1 m128rfr2 = ATmega128RFR2 m16 = ATmega16 m161 = ATmega161 m162 = ATmega162 m163 = ATmega163 m164p = ATmega164P m168 = ATmega168 | m168p = ATmega168P m168pb = ATmega168PB m169 = ATmega169 m16u2 = ATmega16U2 m2560 = ATmega2560 m2561 = ATmega2561 m2564rfr2 = ATmega2564RFR2 m256rfr2 = ATmega256RFR2 m32 = ATmega32 m3208 = ATmega3208 m3209 = ATmega3209 m324p = ATmega324P m324pa = ATmega324PA m325 = ATmega325 m3250 = ATmega3250 m328 = ATmega328 m328p = ATmega328P m328pb = ATmega328PB m329 = ATmega329 m3290 = ATmega3290 m3290p = ATmega3290P m329p = ATmega329P m32m1 = ATmega32M1 m32u2 = ATmega32U2 m32u4 = ATmega32U4 m406 = ATMEGA406 m48 = ATmega48 m4808 = ATmega4808 m4809 = ATmega4809 m48p = ATmega48P m48pb = ATmega48PB m64 = ATmega64 m640 = ATmega640 m644 = ATmega644 m644p = ATmega644P m644rfr2 = ATmega644RFR2 m645 = ATmega645 m6450 = ATmega6450 m649 = ATmega649 m6490 = ATmega6490 | m64m1 = ATmega64M1 m64rfr2 = ATmega64RFR2 m8 = ATmega8 m8515 = ATmega8515 m8535 = ATmega8535 m88 = ATmega88 m88p = ATmega88P m88pb = ATmega88PB m8u2 = ATmega8U2 t10 = ATtiny10 t11 = ATtiny11 t12 = ATtiny12 t13 = ATtiny13 t15 = ATtiny15 t1604 = ATtiny1604 t1606 = ATtiny1606 t1607 = ATtiny1607 t1614 = ATtiny1614 t1616 = ATtiny1616 t1617 = ATtiny1617 t1634 = ATtiny1634 t20 = ATtiny20 t202 = ATtiny202 t204 = ATtiny204 t212 = ATtiny212 t214 = ATtiny214 t2313 = ATtiny2313 t24 = ATtiny24 t25 = ATtiny25 t26 = ATtiny26 t261 = ATtiny261 t28 = ATtiny28 t3214 = ATtiny3214 t3216 = ATtiny3216 t3217 = ATtiny3217 t4 = ATtiny4 t40 = ATtiny40 t402 = ATtiny402 t404 = ATtiny404 t406 = ATtiny406 | t412 = ATtiny412 t414 = ATtiny414 t416 = ATtiny416 t417 = ATtiny417 t4313 = ATtiny4313 t43u = ATtiny43u t44 = ATtiny44 t441 = ATtiny441 t45 = ATtiny45 t461 = ATtiny461 t5 = ATtiny5 t804 = ATtiny804 t806 = ATtiny806 t807 = ATtiny807 t814 = ATtiny814 t816 = ATtiny816 t817 = ATtiny817 t84 = ATtiny84 t841 = ATtiny841 t85 = ATtiny85 t861 = ATtiny861 t88 = ATtiny88 t9 = ATtiny9 x128a1 = ATxmega128A1 x128a1d = ATxmega128A1revD x128a1u = ATxmega128A1U x128a3 = ATxmega128A3 x128a3u = ATxmega128A3U x128a4 = ATxmega128A4 x128a4u = ATxmega128A4U x128b1 = ATxmega128B1 x128b3 = ATxmega128B3 x128c3 = ATxmega128C3 x128d3 = ATxmega128D3 x128d4 = ATxmega128D4 x16a4 = ATxmega16A4 x16a4u = ATxmega16A4U x16c4 = ATxmega16C4 x16d4 = ATxmega16D4 x16e5 = ATxmega16E5 | x192a1 = ATxmega192A1 x192a3 = ATxmega192A3 x192a3u = ATxmega192A3U x192c3 = ATxmega192C3 x192d3 = ATxmega192D3 x256a1 = ATxmega256A1 x256a3 = ATxmega256A3 x256a3b = ATxmega256A3B x256a3bu = ATxmega256A3BU x256a3u = ATxmega256A3U x256c3 = ATxmega256C3 x256d3 = ATxmega256D3 x32a4 = ATxmega32A4 x32a4u = ATxmega32A4U x32c4 = ATxmega32C4 x32d4 = ATxmega32D4 x32e5 = ATxmega32E5 x384c3 = ATxmega384C3 x384d3 = ATxmega384D3 x64a1 = ATxmega64A1 x64a1u = ATxmega64A1U x64a3 = ATxmega64A3 x64a3u = ATxmega64A3U x64a4 = ATxmega64A4 x64a4u = ATxmega64A4U x64b1 = ATxmega64B1 x64b3 = ATxmega64B3 x64c3 = ATxmega64C3 x64d3 = ATxmega64D3 x64d4 = ATxmega64D4 x8e5 = ATxmega8E5 |