
Table of Contents
I’ve been wanting to build a Proxmox cluster for a while — mainly to get a feel for Ceph storage. I’m firmly in the ZFS camp, but I do see the appeal of distributed storage paired with a high availability cluster.
I plan on using this for my web development stack — LAMP, MEAN, etc — so a few thin clients seemed like a good place to start.
Phase 1: Hardware
The Nodes
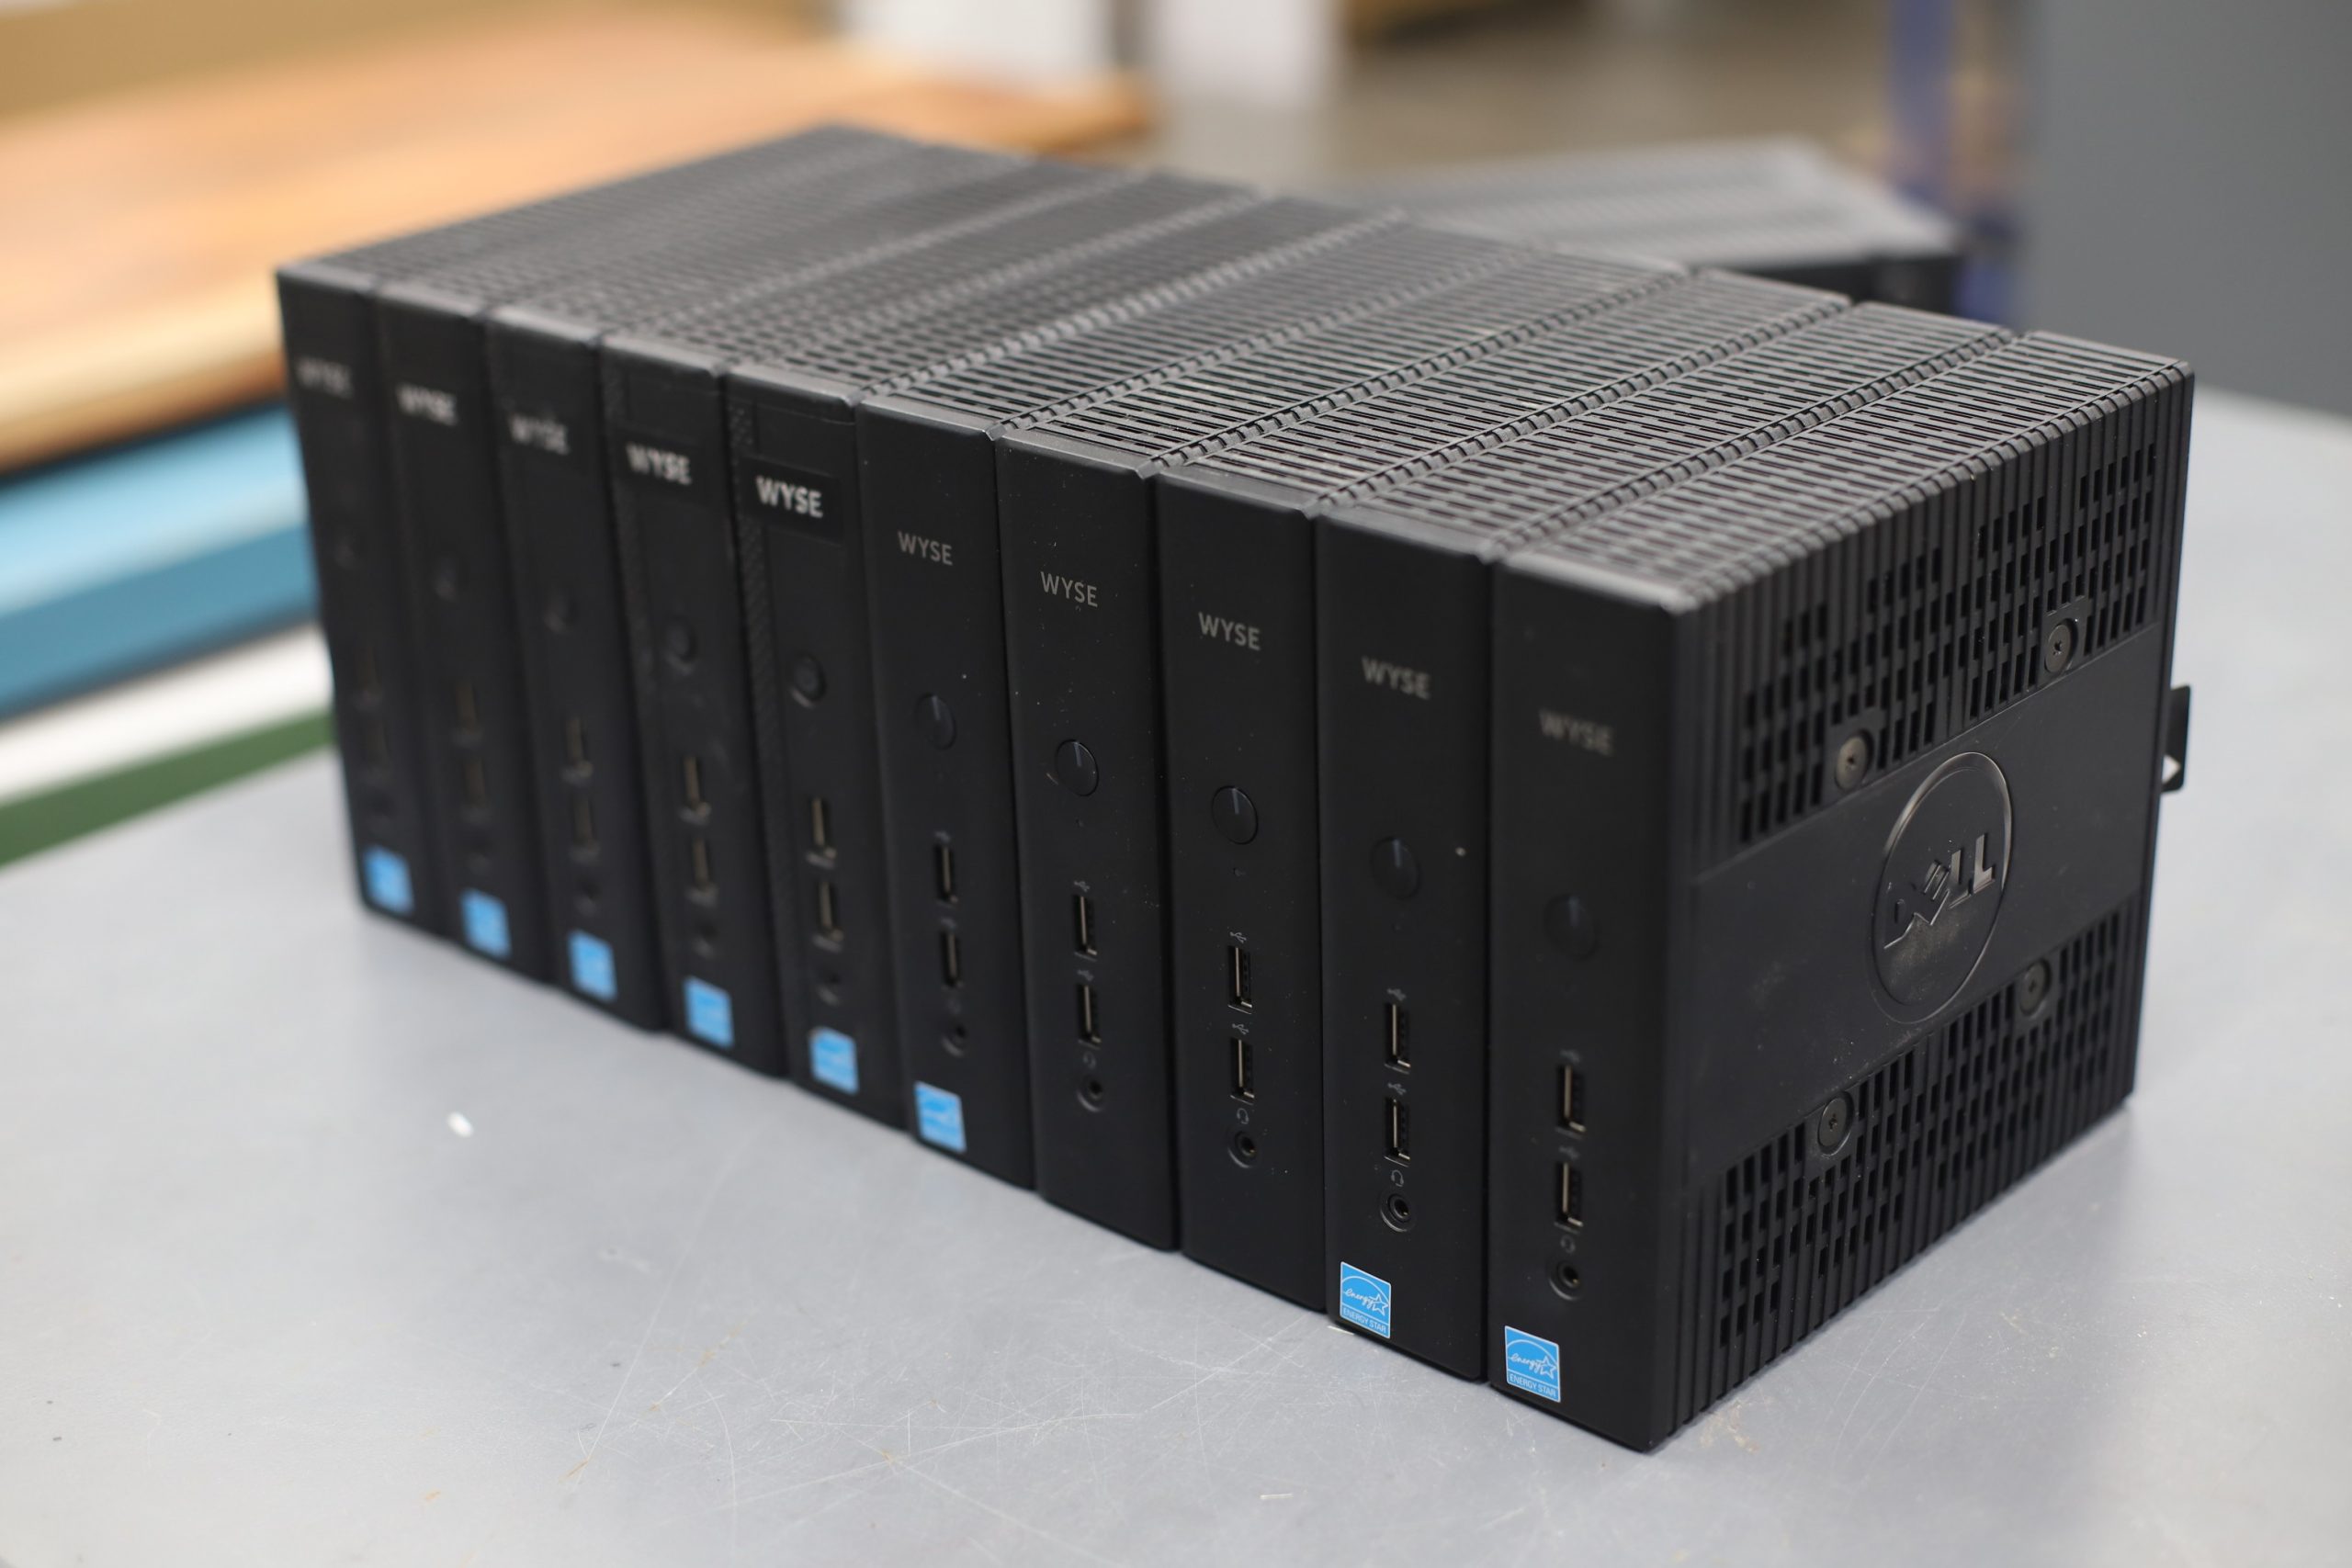
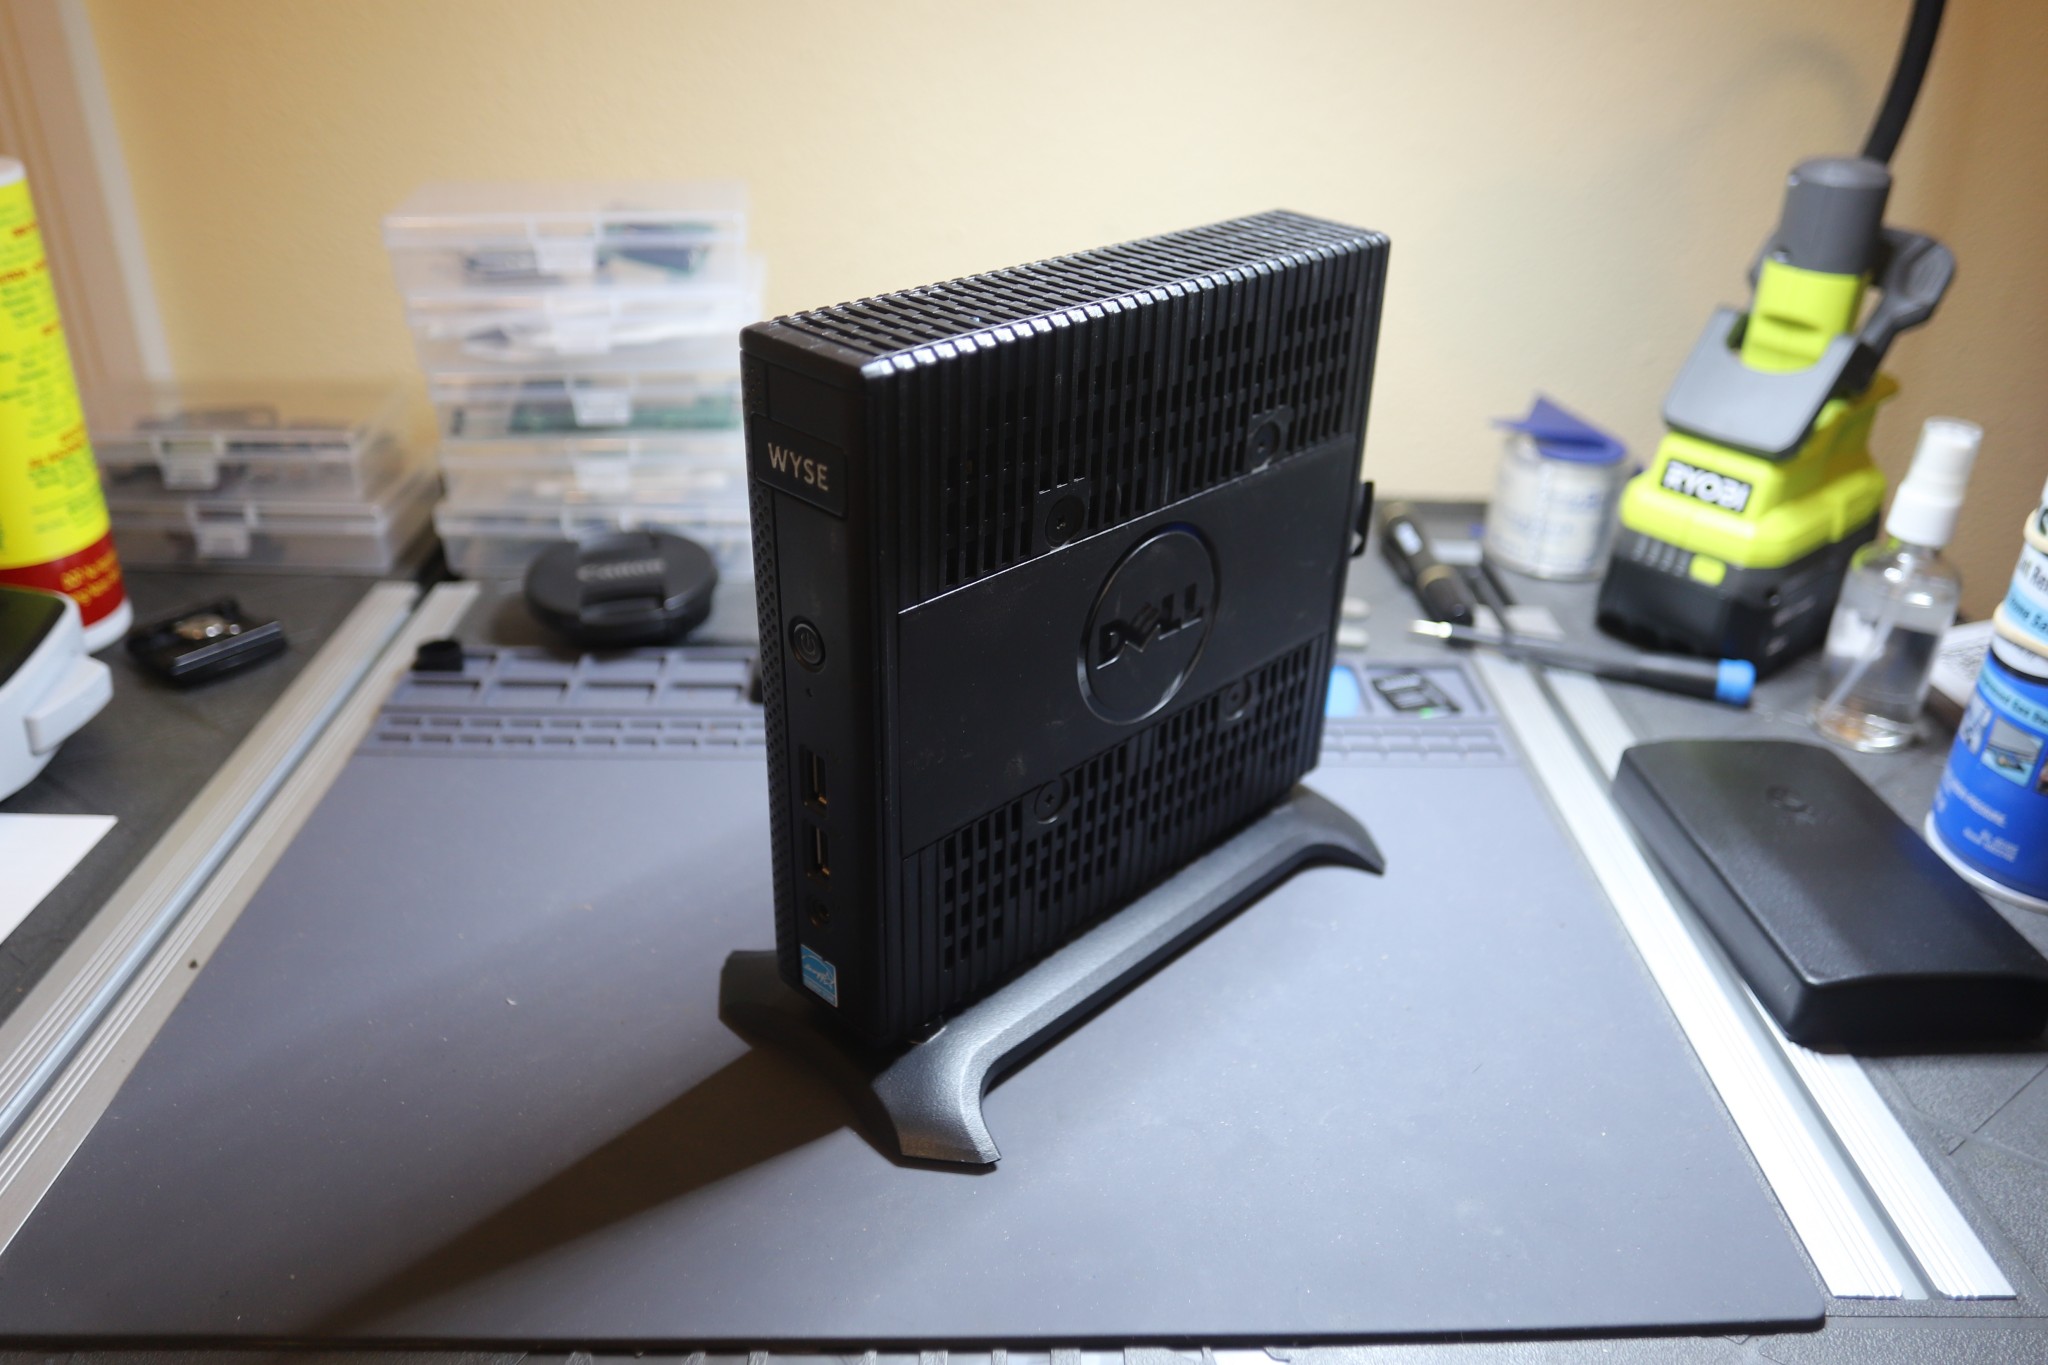
I got a good deal on 5 Dell Wyse 5060 thin clients. They didn’t come with any power adapters. My plan was to power them all with a single power supply. Having a dedicated power brick for each node wouldn’t have been practical anyway.
I already had a few Dell Wyse 5010s before starting this project. They’re the same form factor as the 5060. I almost went with a nine-node cluster, but due to space constraints I settled on seven total – five 5060s and two 5010s.
The 5010s aren’t as powerful as the 5060s, but I like having two extra nodes for storage redundancy.
Dell Wyse 5060 x 5
- AMD GX-424, 2.4GHz Quad Core
- Radeon R5E Graphics
- 4GB DDR3
- Gigabit Ethernet
- 2 x Display Port
- 4 x USB 2.0
- 2 x USB 3.1
- SATA DOM
Dell Wyse 5010 x 2
- AMD G-T48E, 1.4GHz Dual Core
- Radeon HD 6250 Graphics
- 2GB DDR3
- Gigabit Ethernet
- Display Port
- DVI Port
- 4 x USB 2.0
- SATA DOM
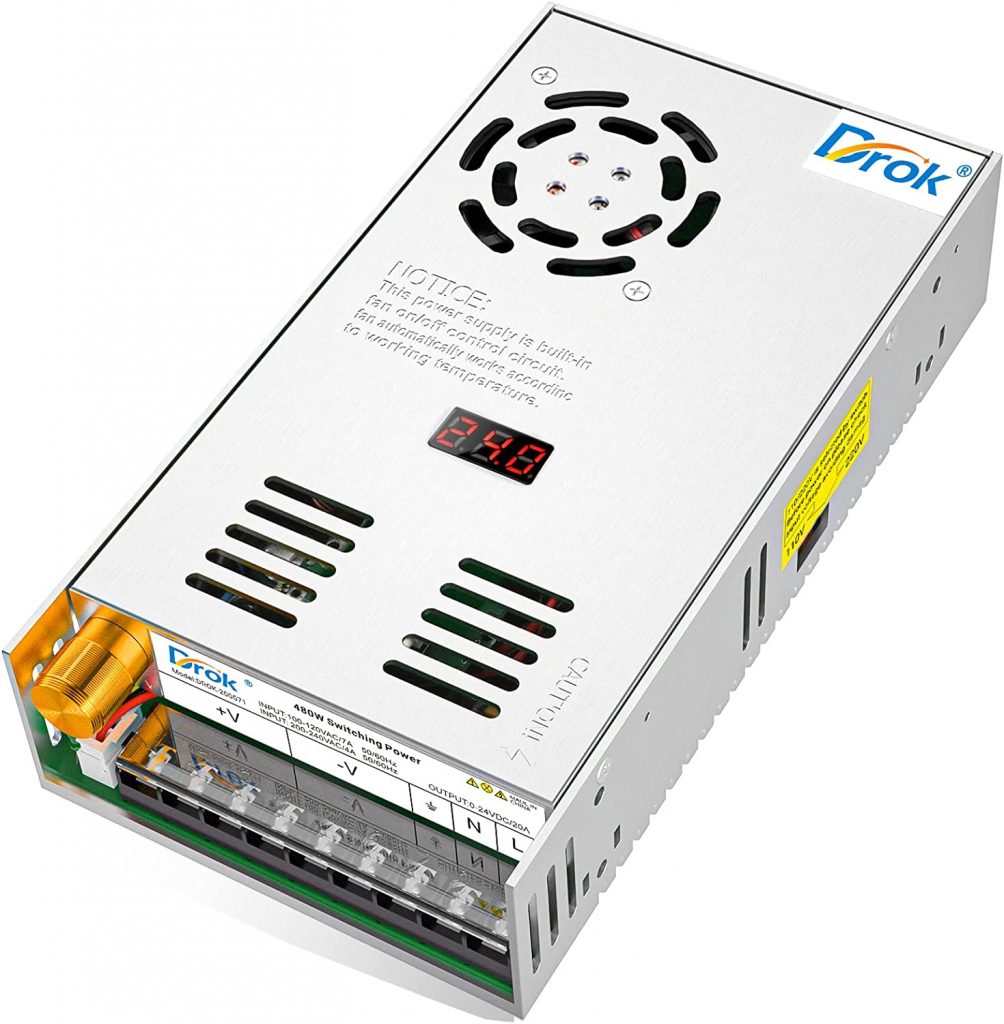
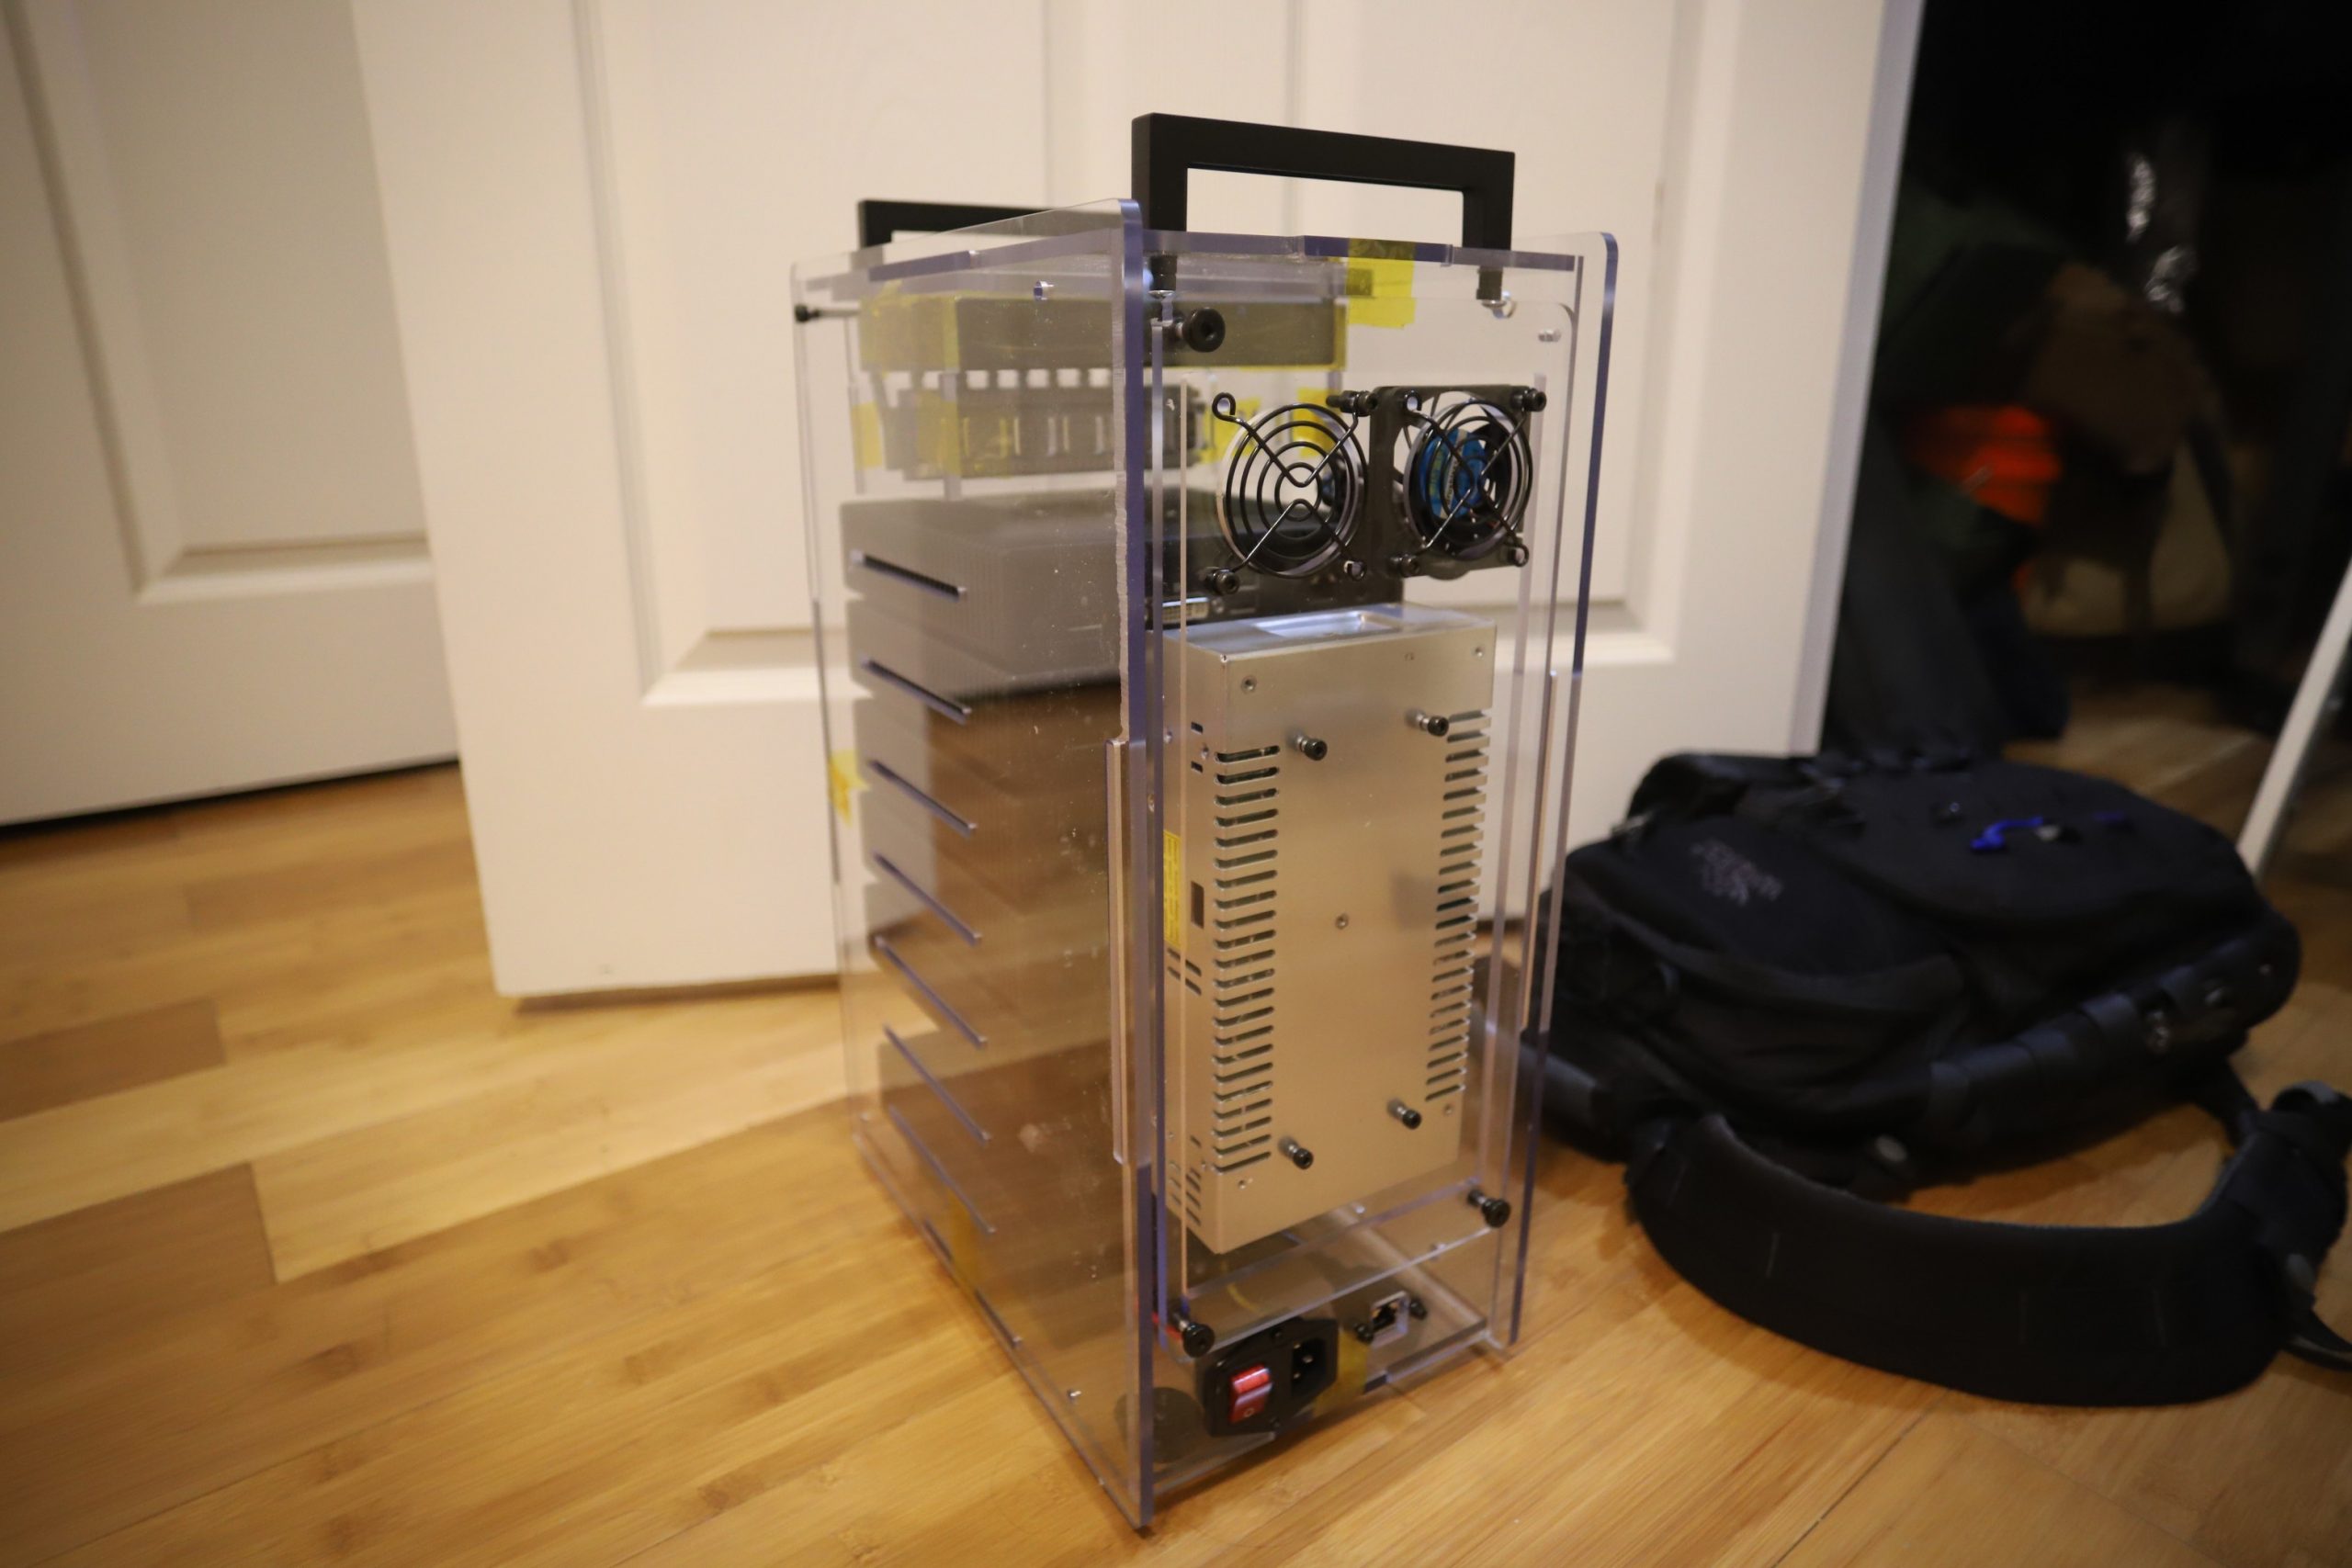
Power Supply
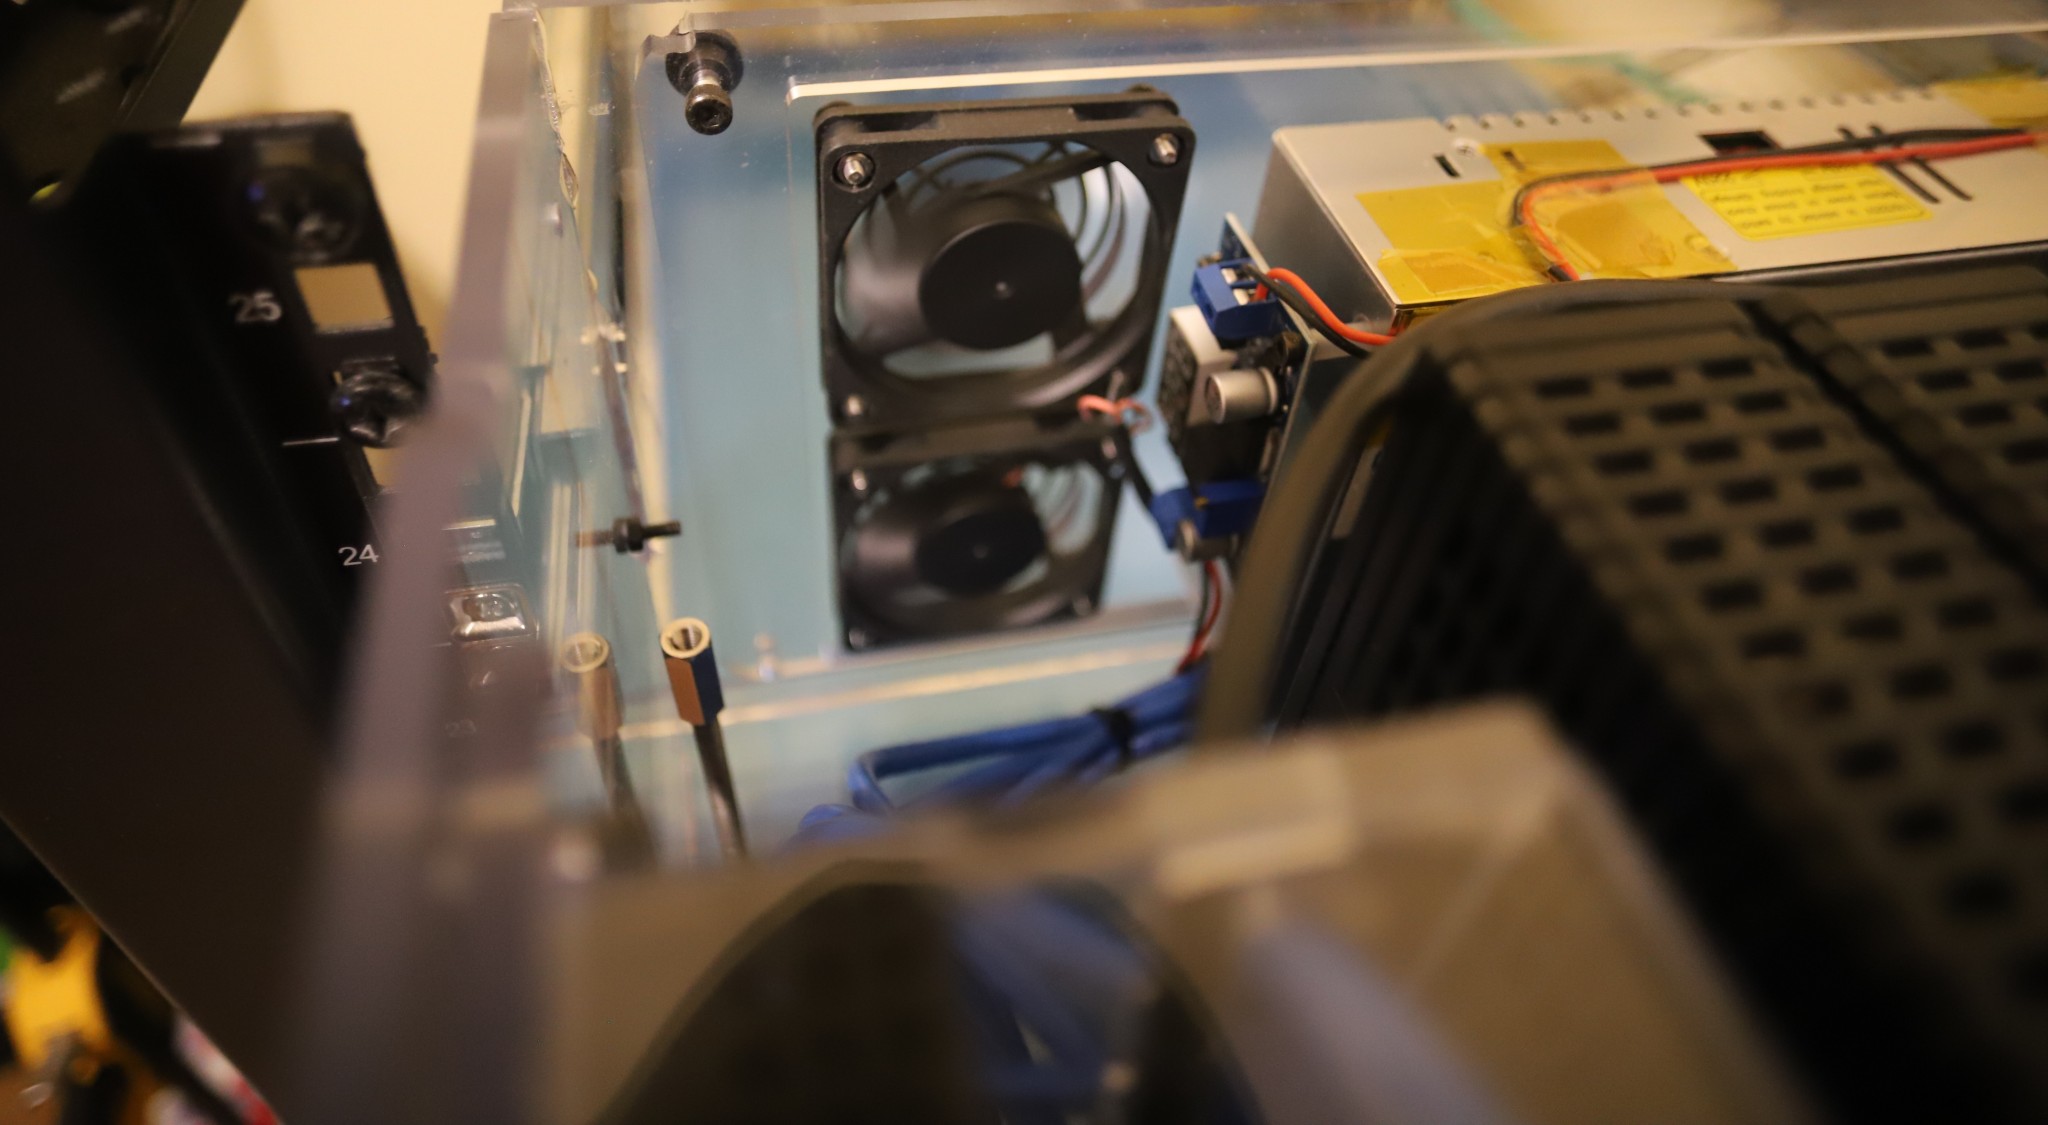
After some tests, I found the 5060s draw about 1A under load. The 5010s pulled about 0.7A. I ended up getting a 24V 20A power supply from Amazon. This one came with a built-in buck converter to step-down to the 19V I needed. I also used a separate buck converter to step-down further to the 5V needed for the case exhaust fans.
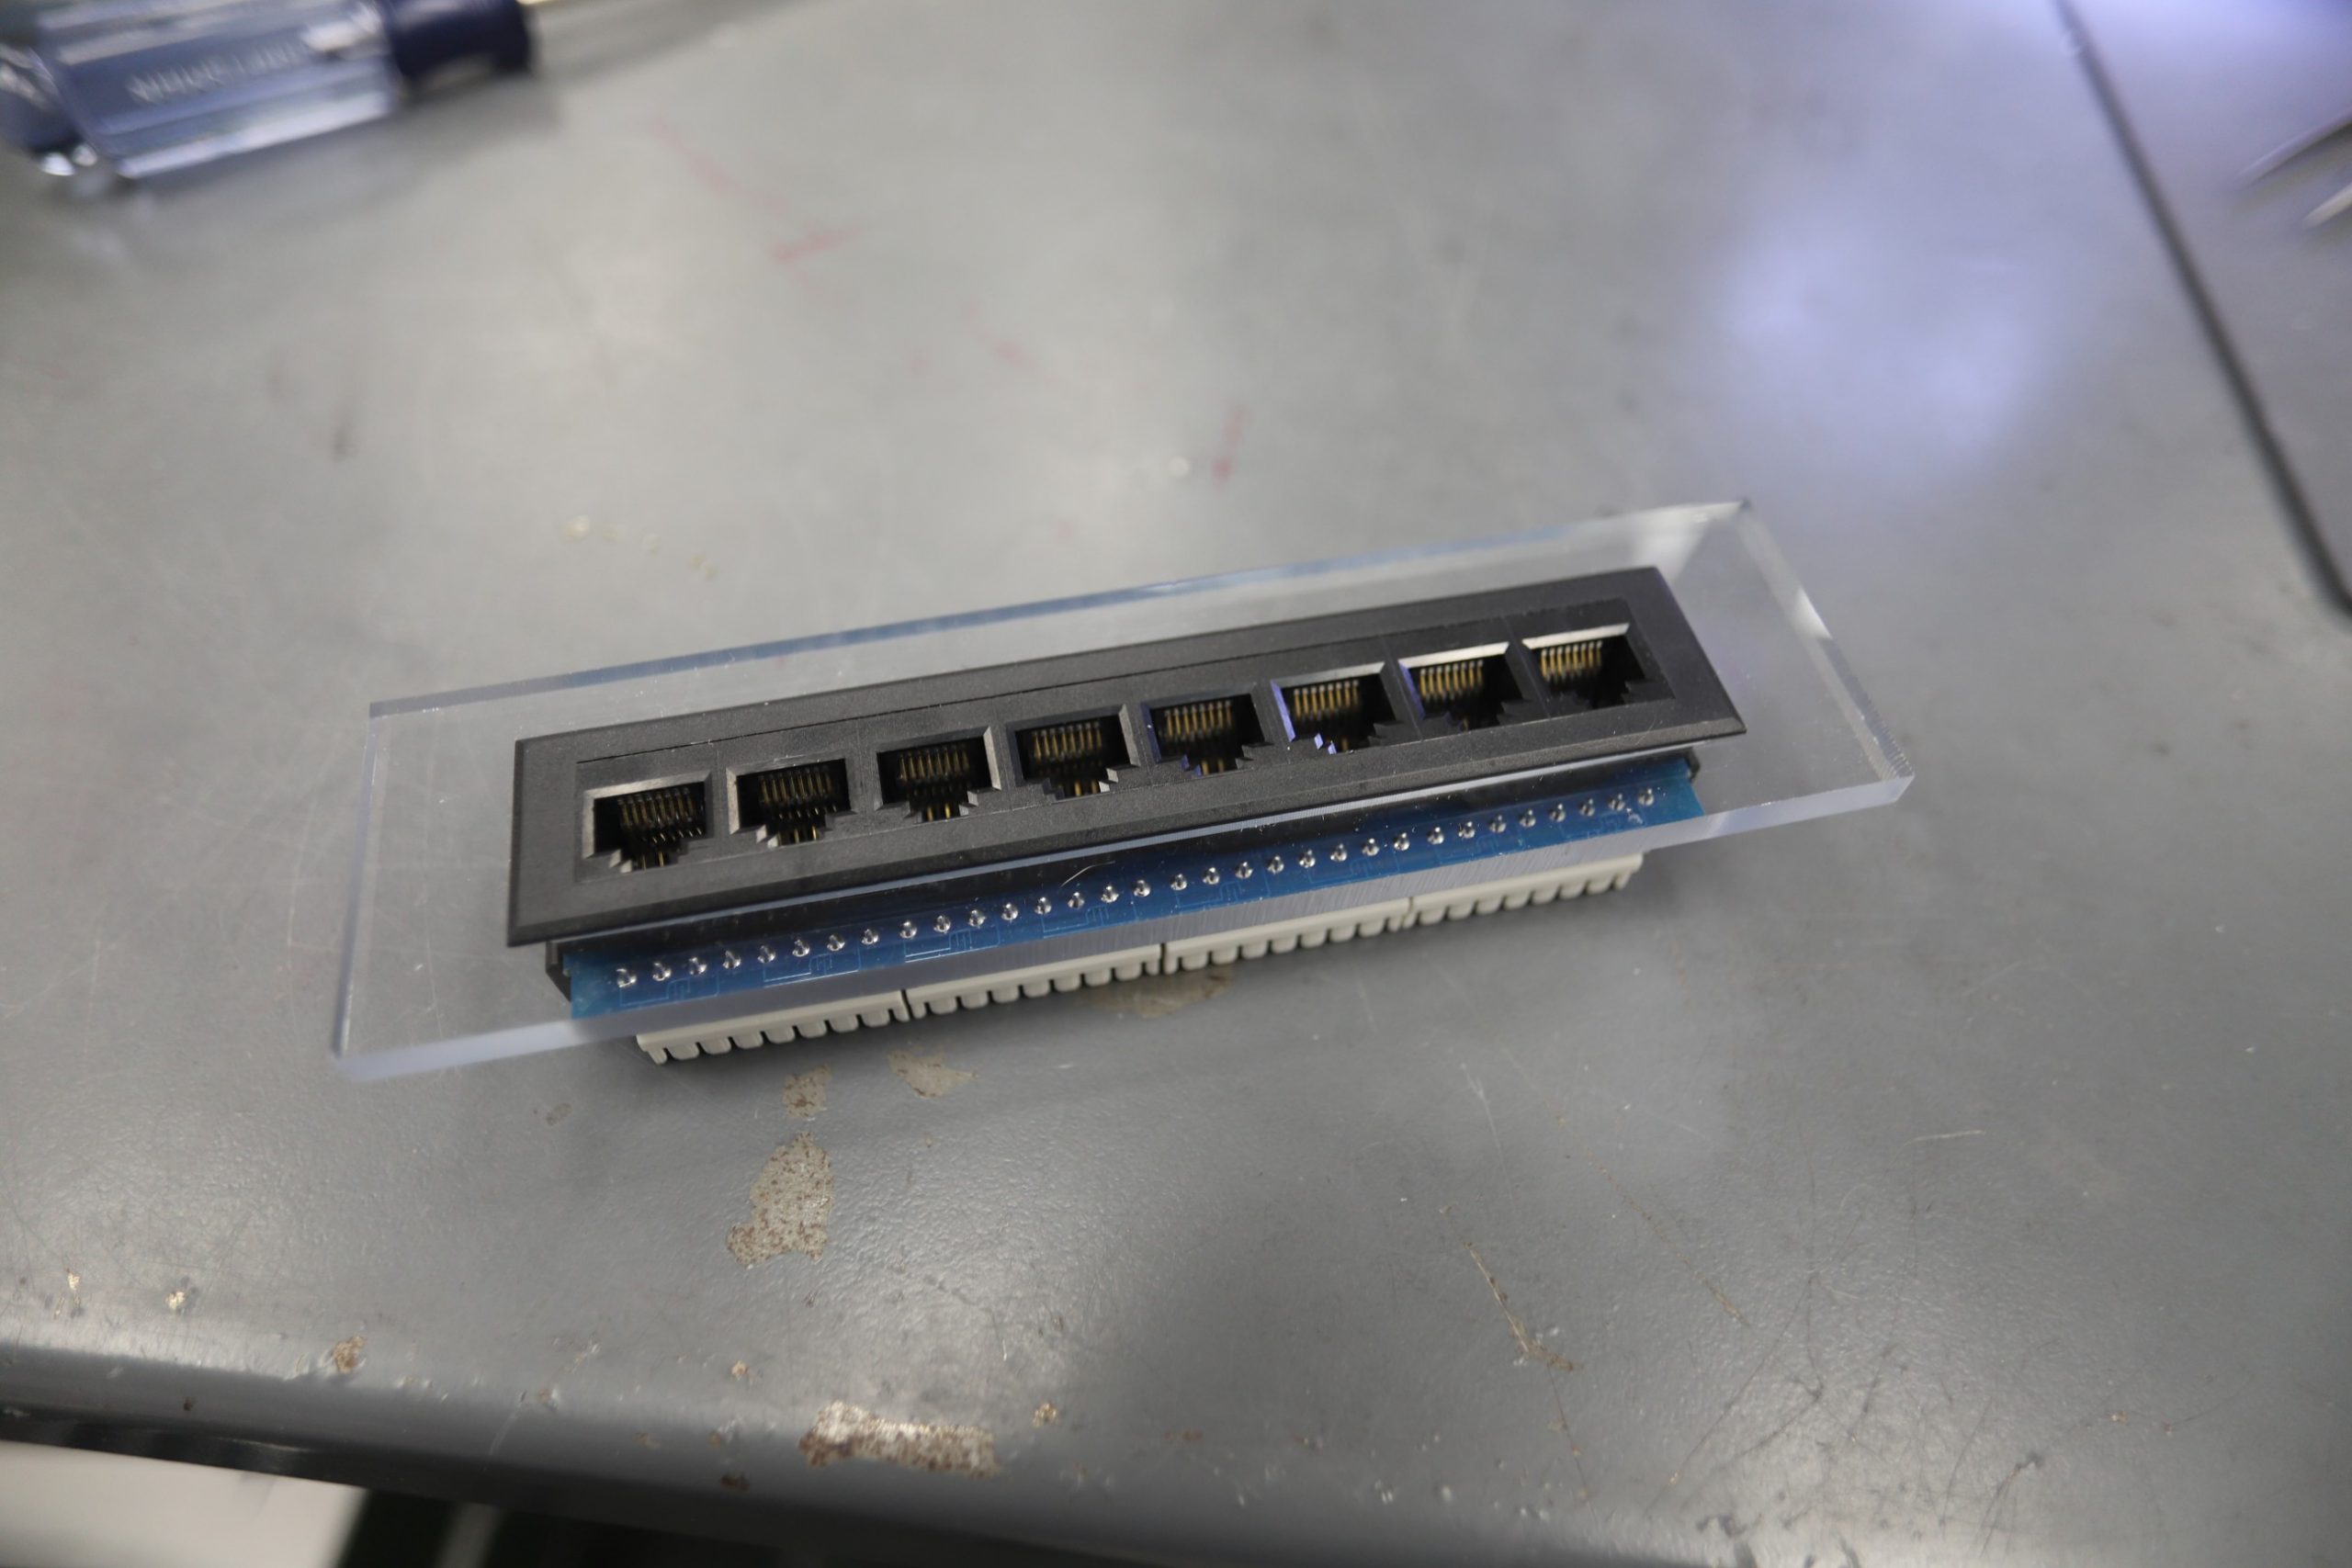
Networking
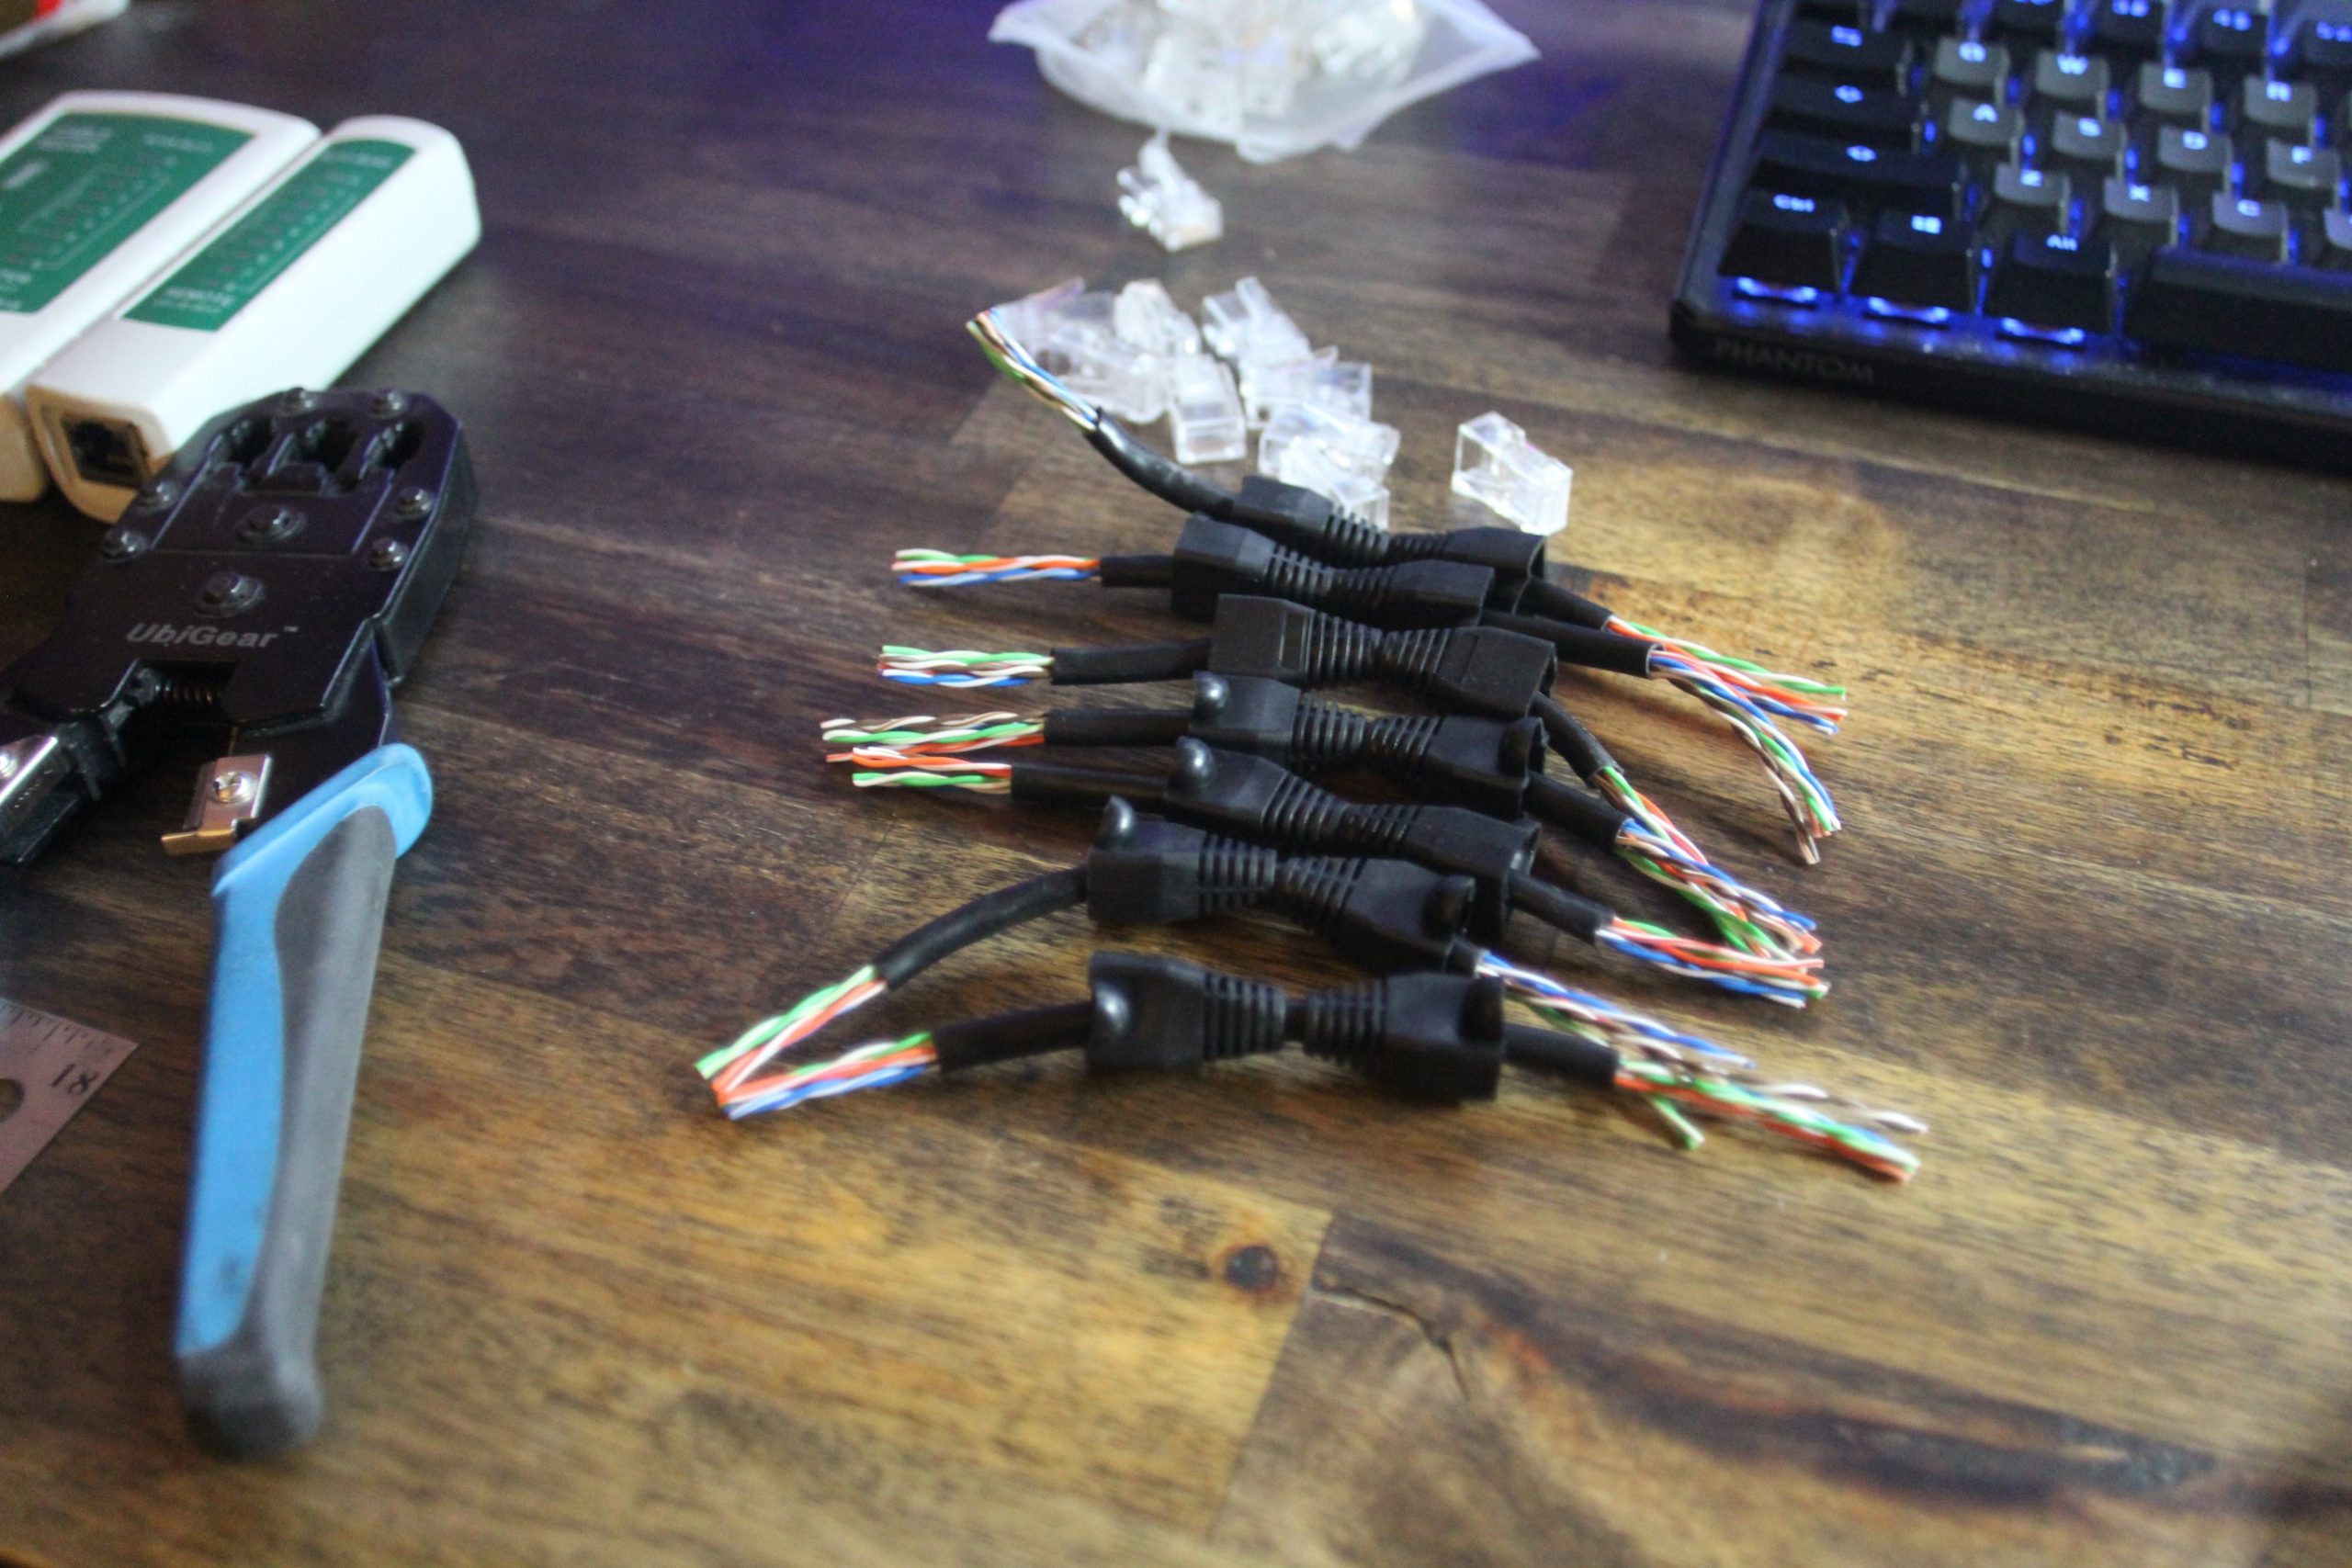
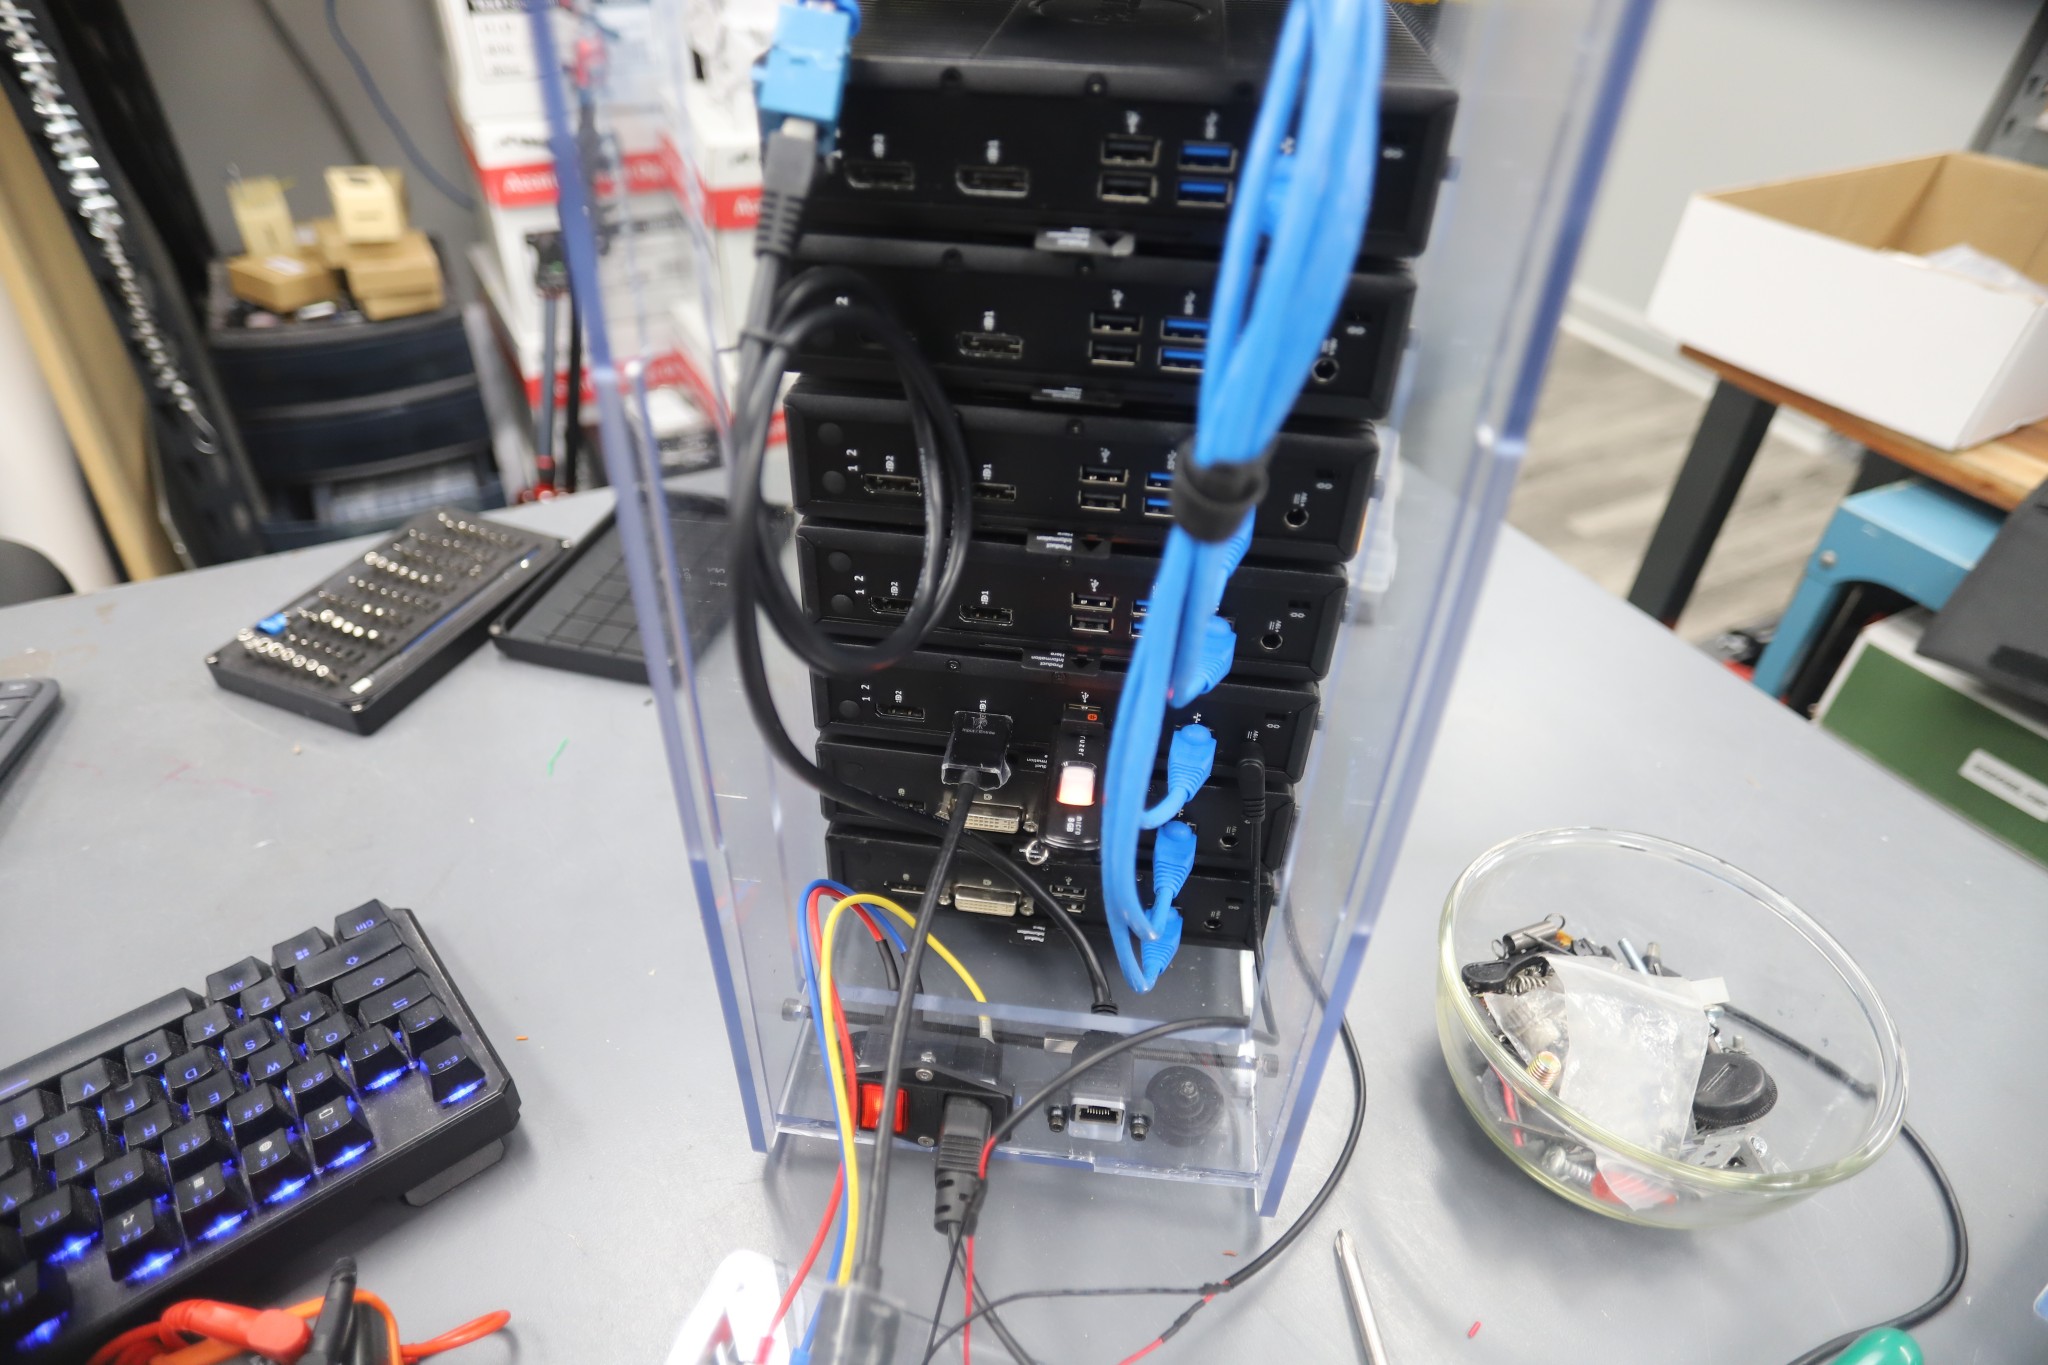
The case will have one ethernet cable running to the back. I used a TP-Link TL-SG108E switch and an 8-port patch panel. I have pictures of these further down.
Hardware Upgrades
RAM
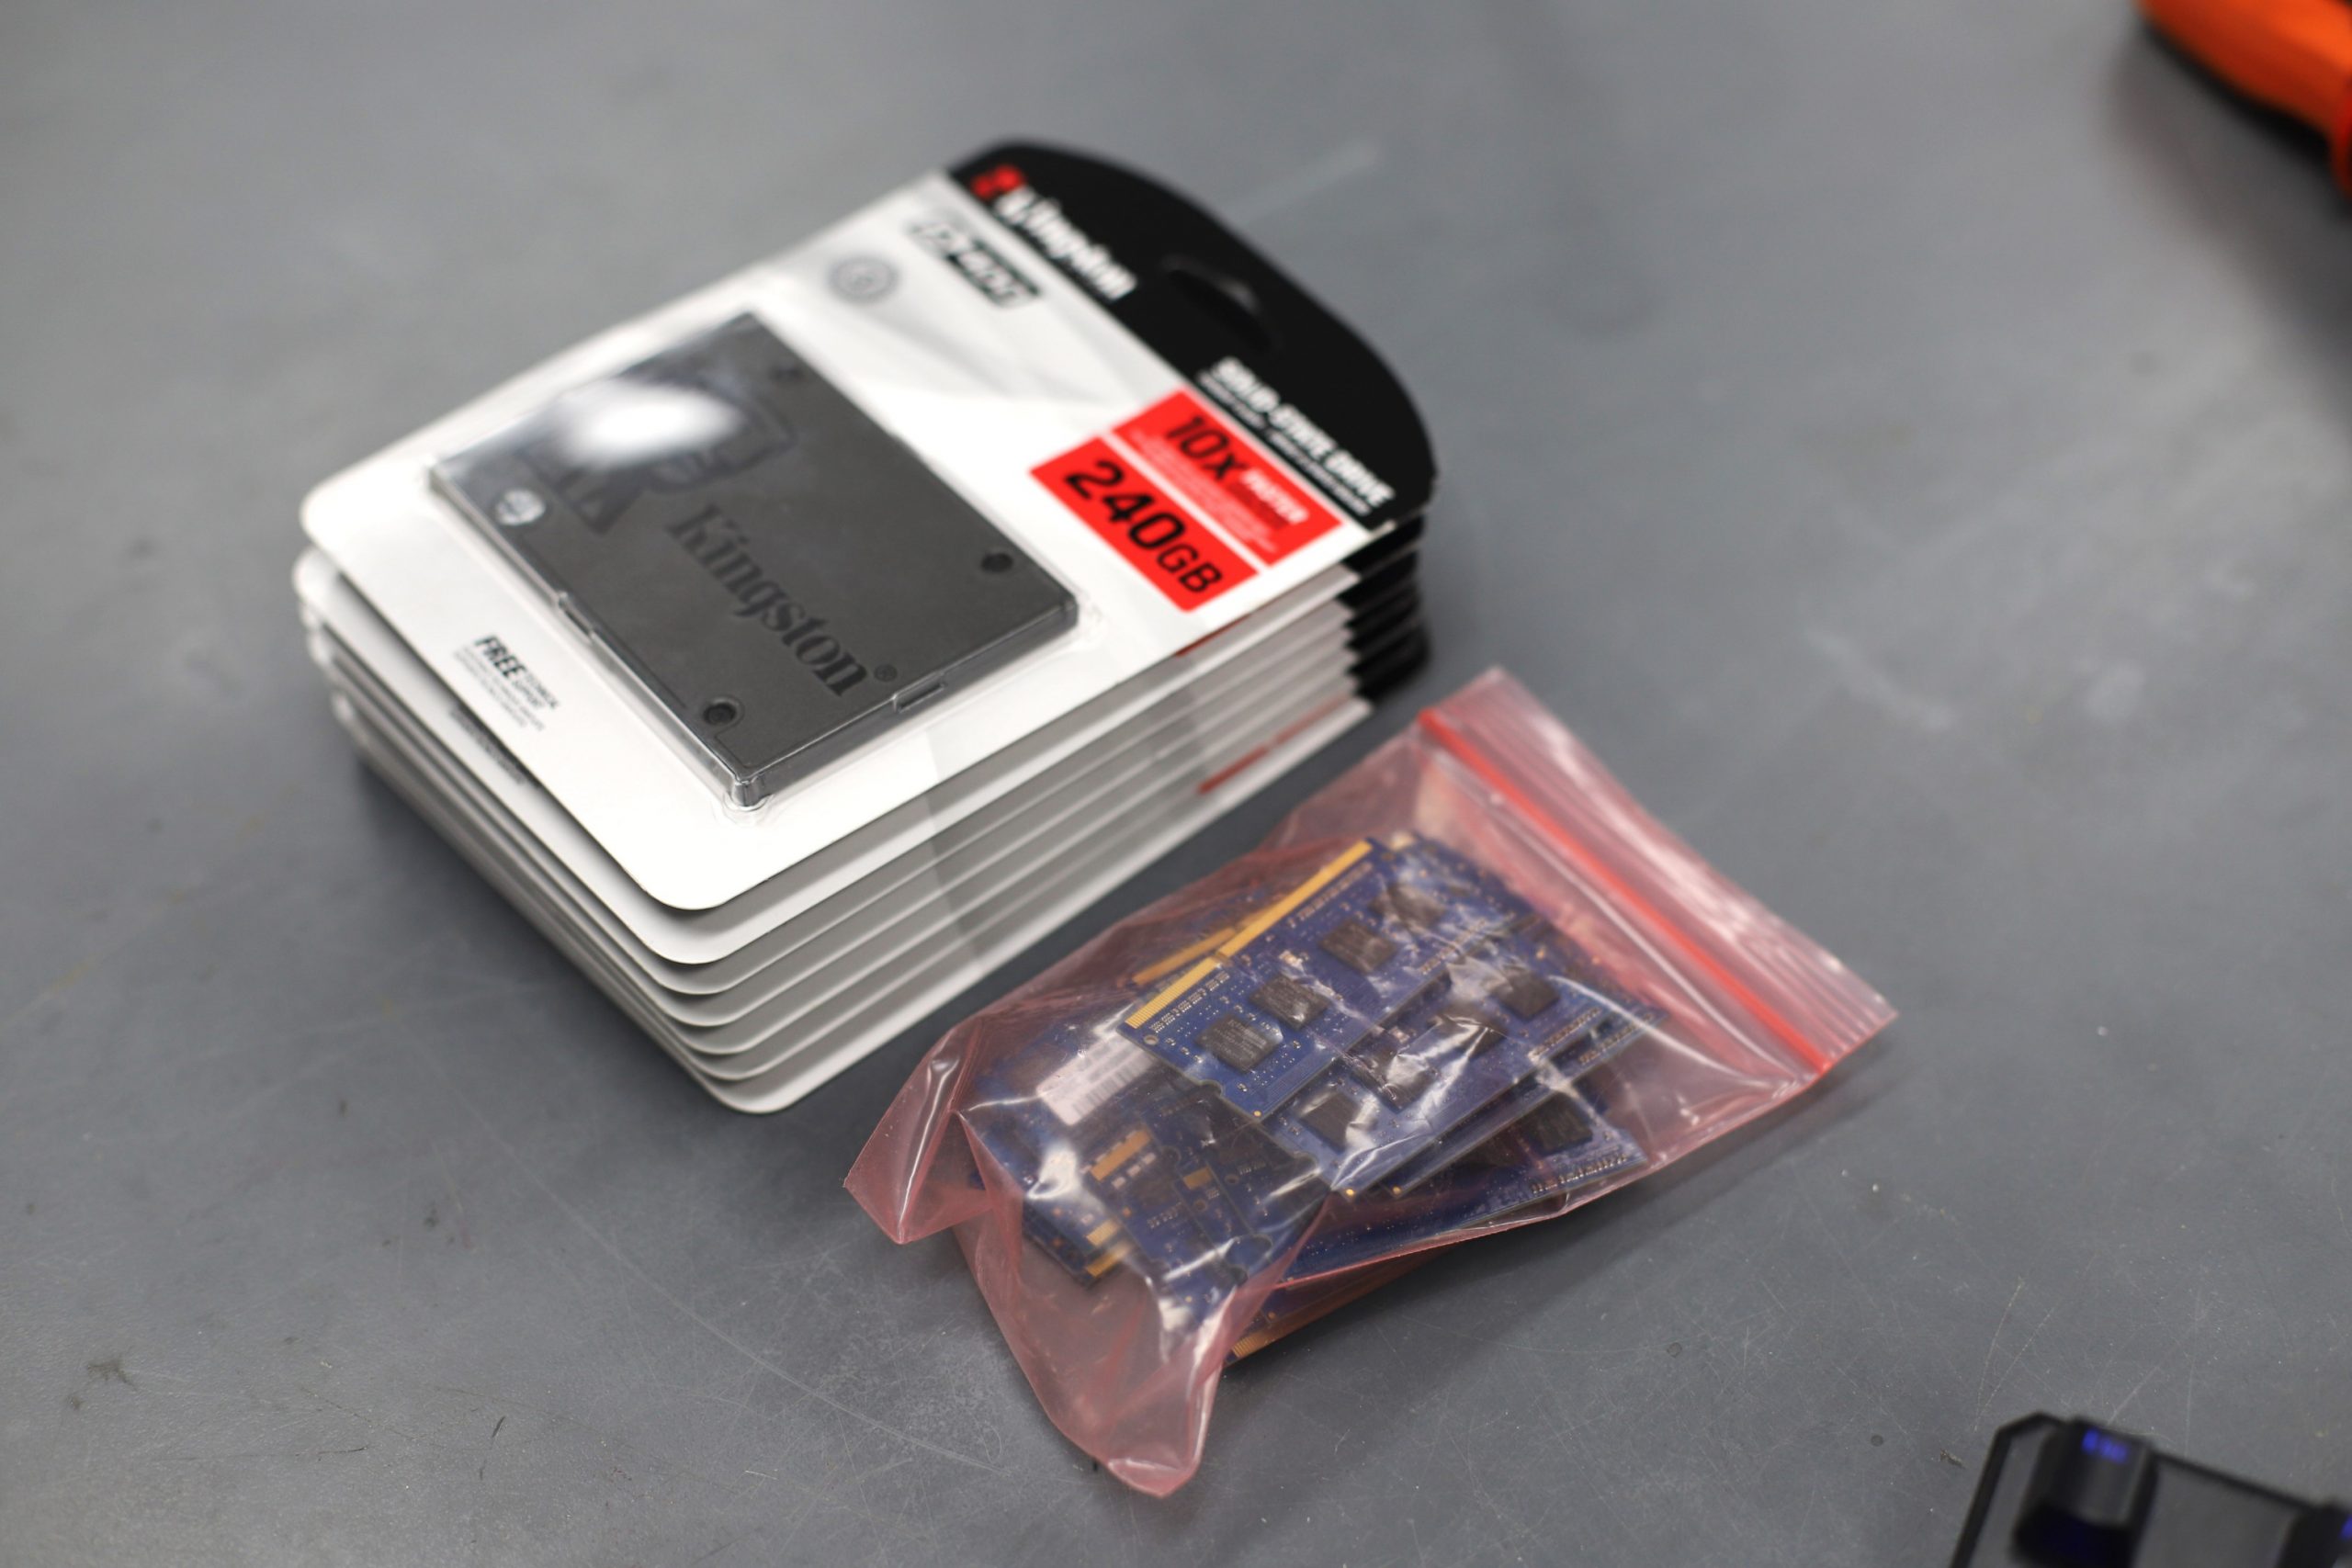
Maxing out RAM was easy, albeit expensive. The 5060s have two DDR3 SODIMM slots and max out at 16GB. These ten sticks of 8GB DDR3 were, by far, the most expensive part of this build. The 2 5010s have a single SODIMM. These two machines are just for storage, so 4GB will have to do.
Storage, Soldering SATA port
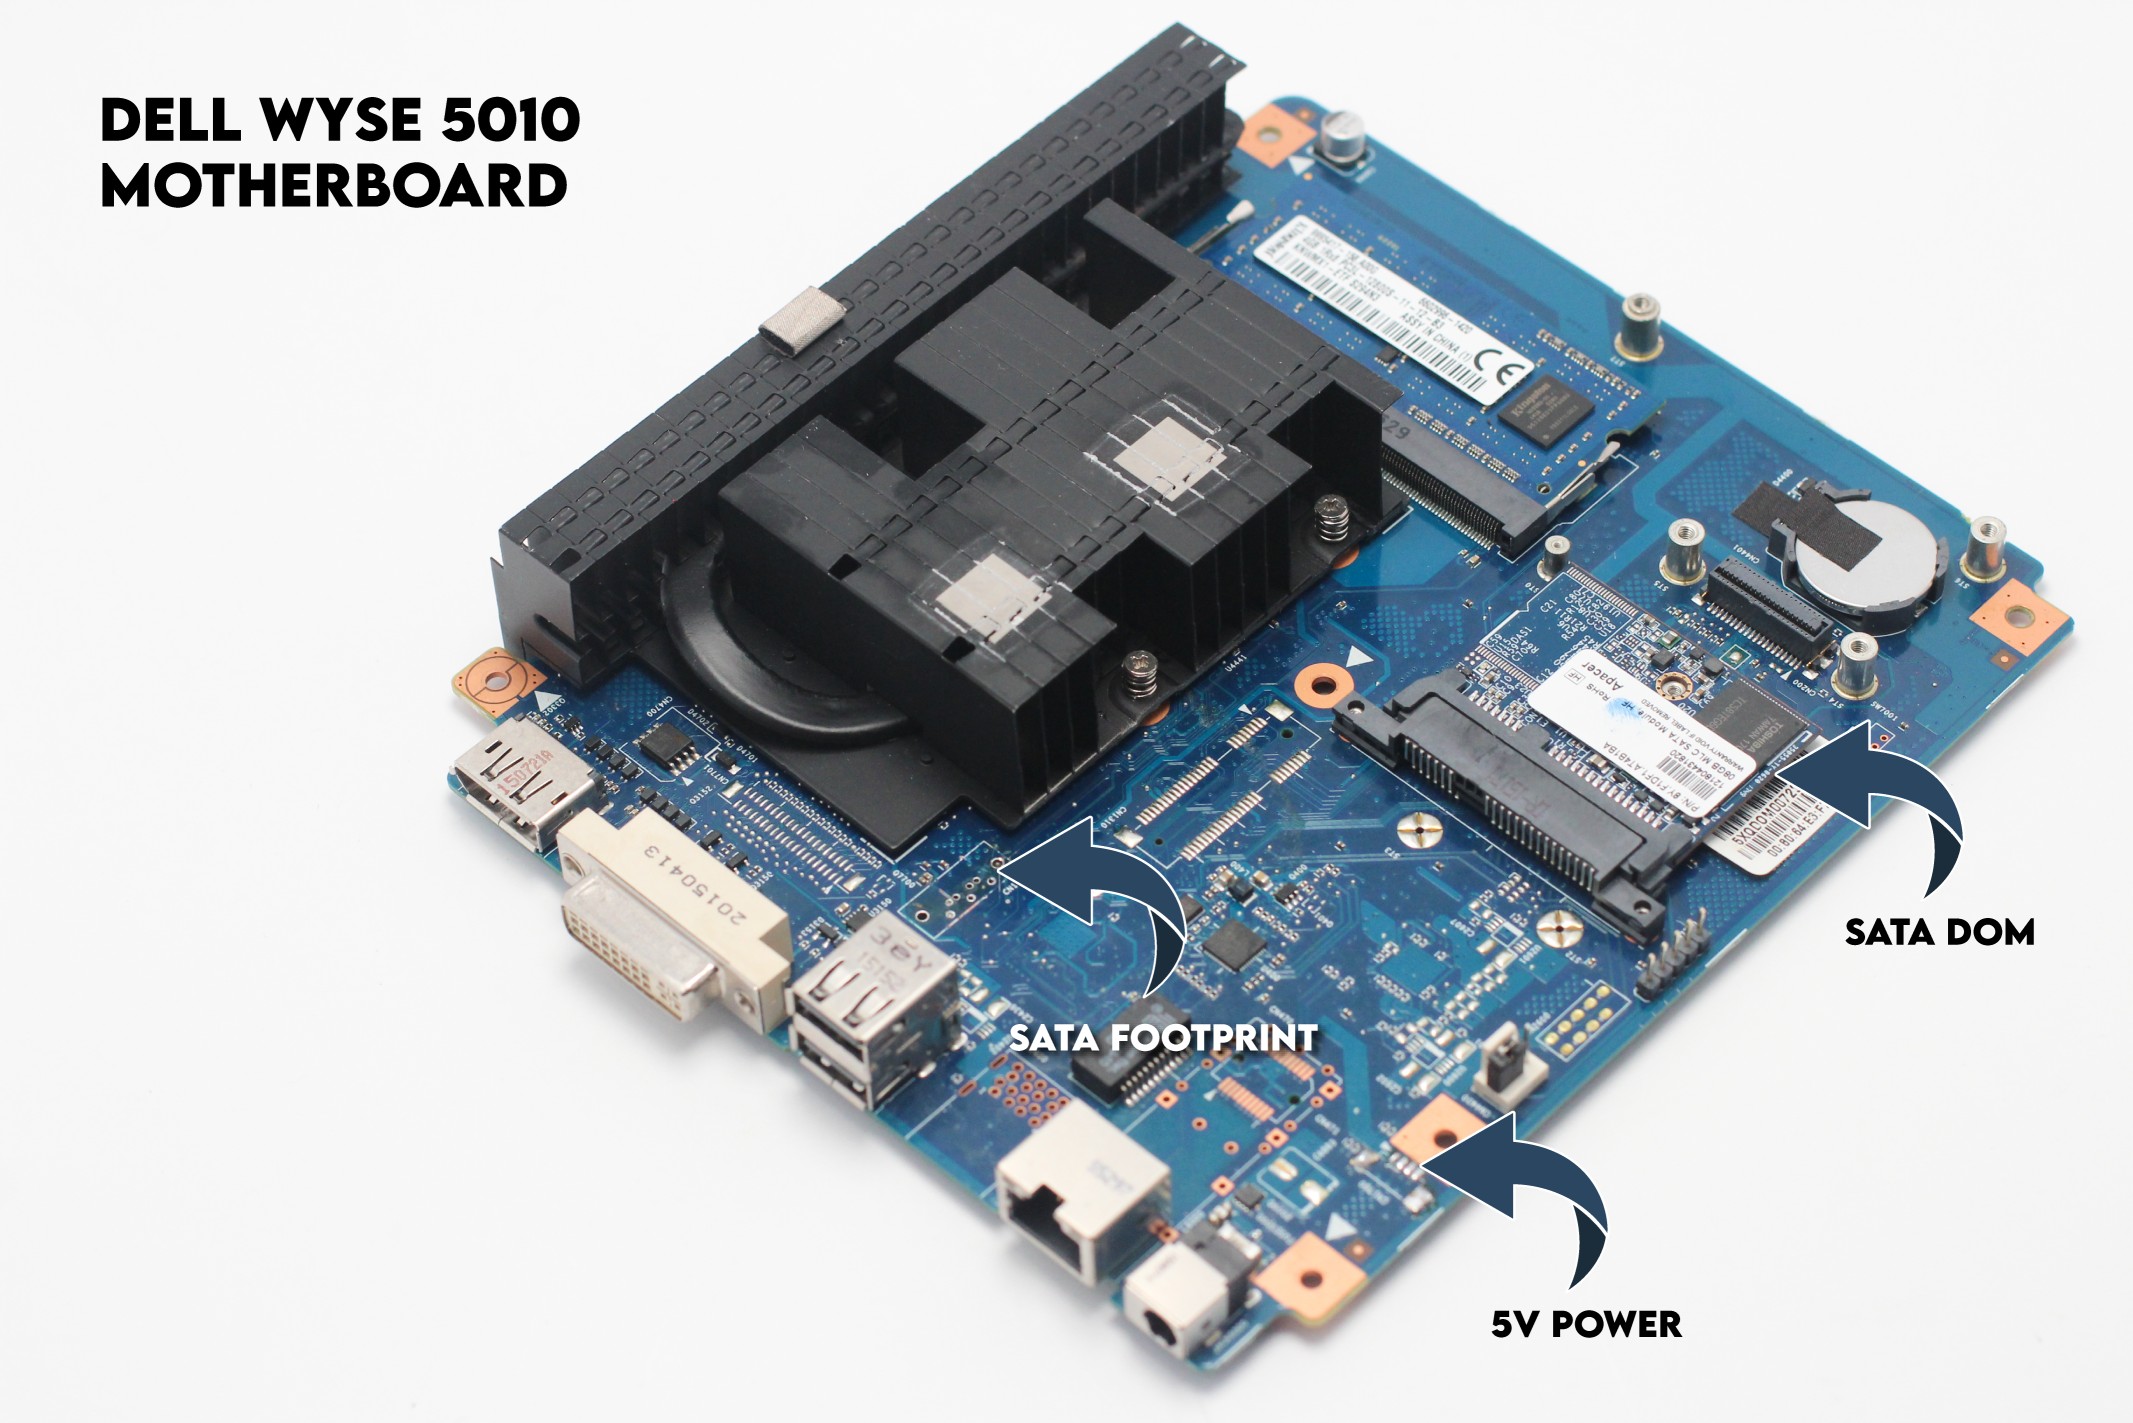
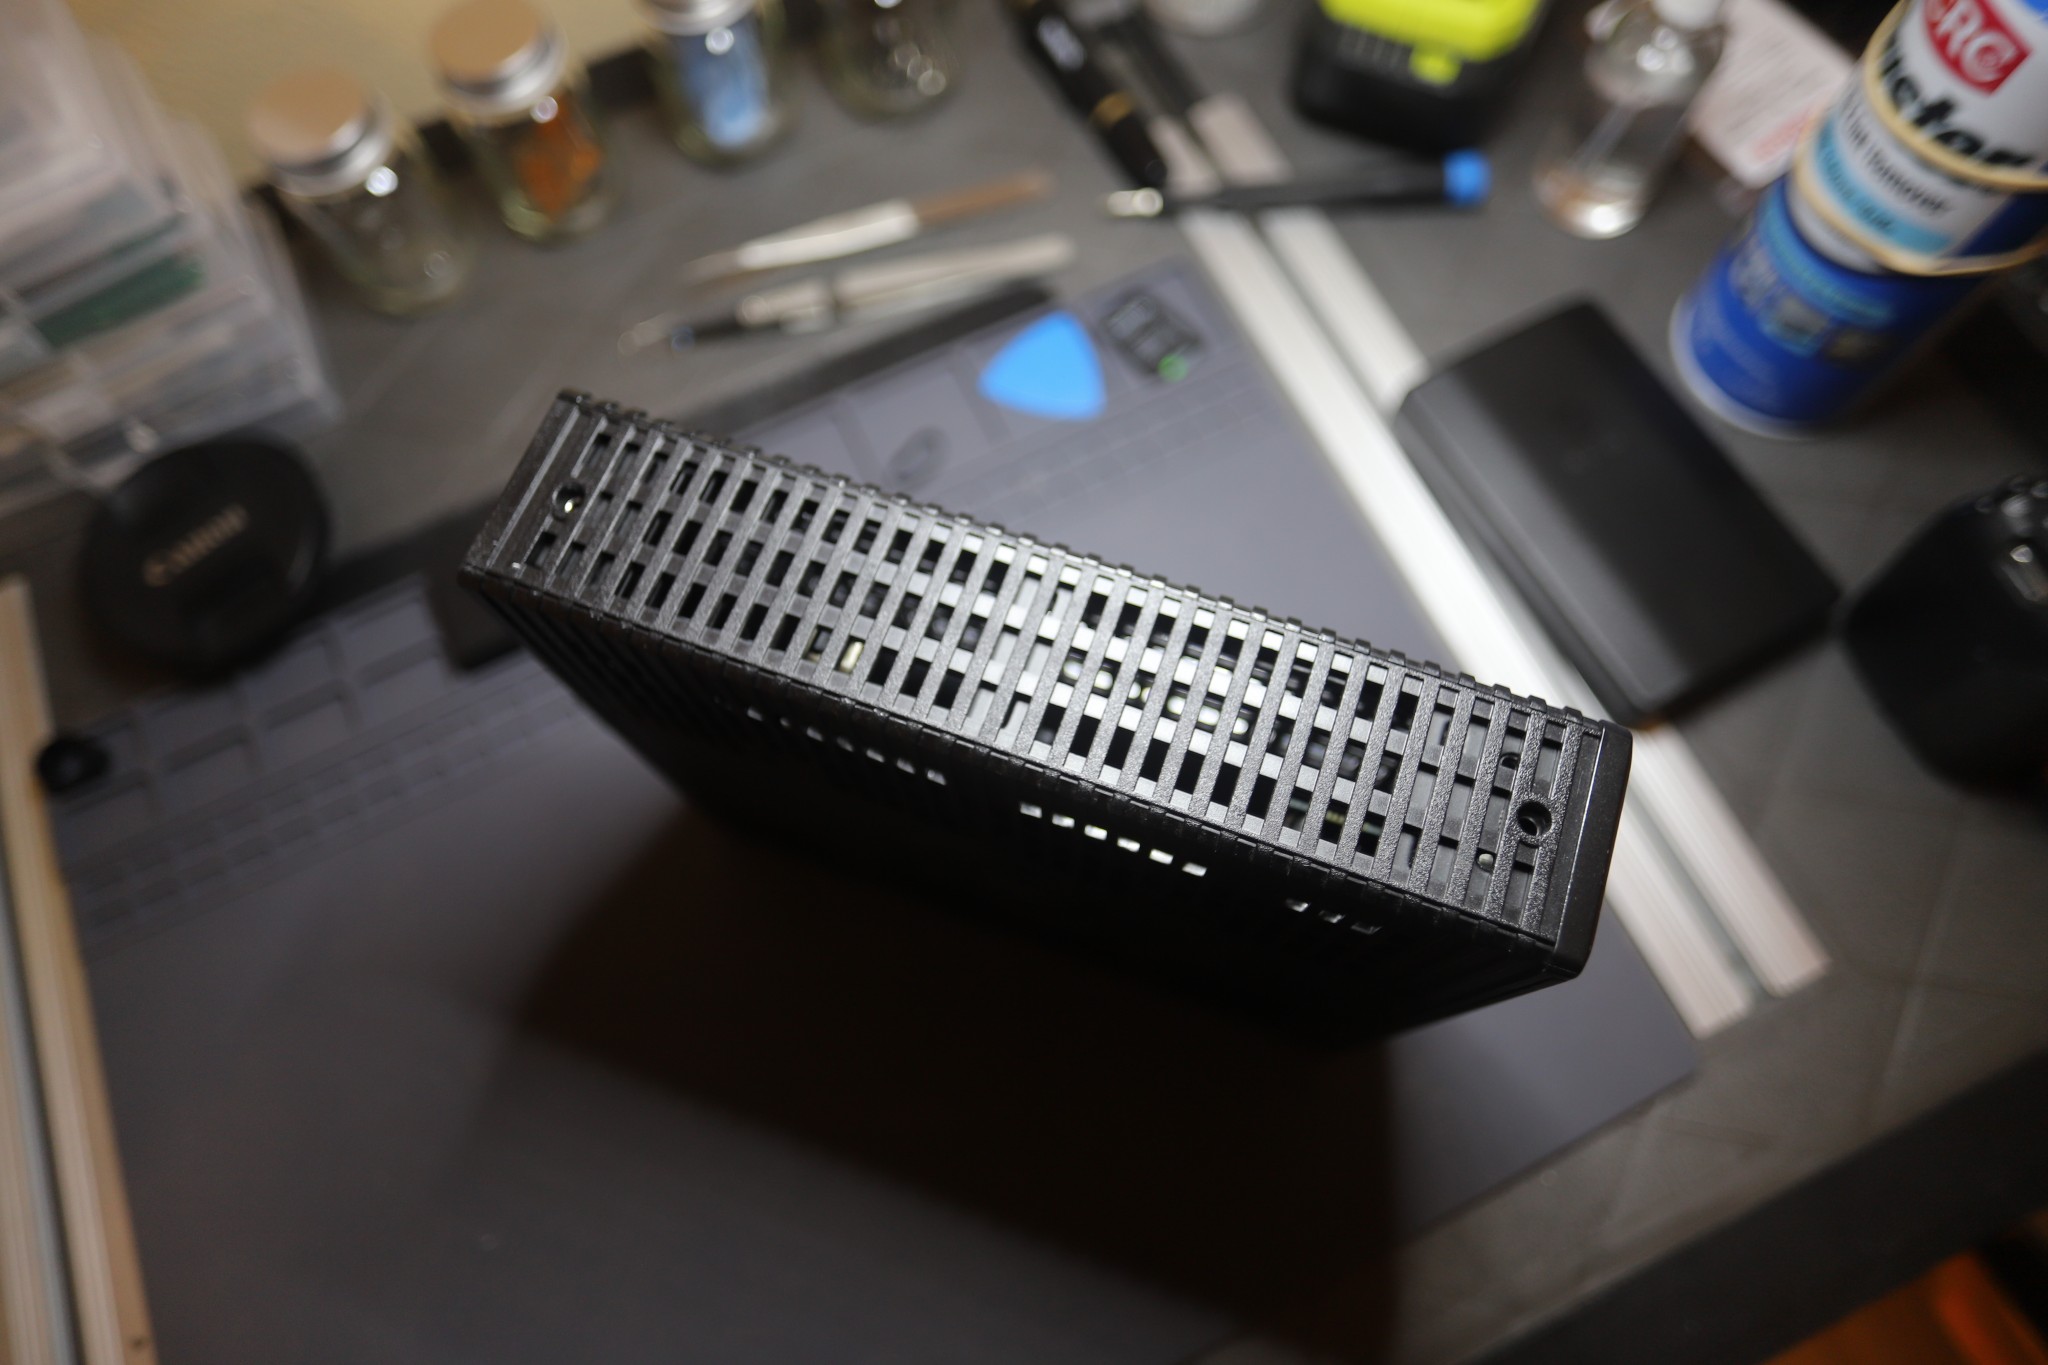
Upgrading storage was the most difficult part. All seven thin clients come with a SATA DOM module — these are basically flash modules in a small SATA package that plug into the motherboard. They come anywhere between 2-16GB. They’re great for small installations of Linux or Windows, but not ideal for VM storage.
Luckily, these thin clients have connections for a second SATA drive.
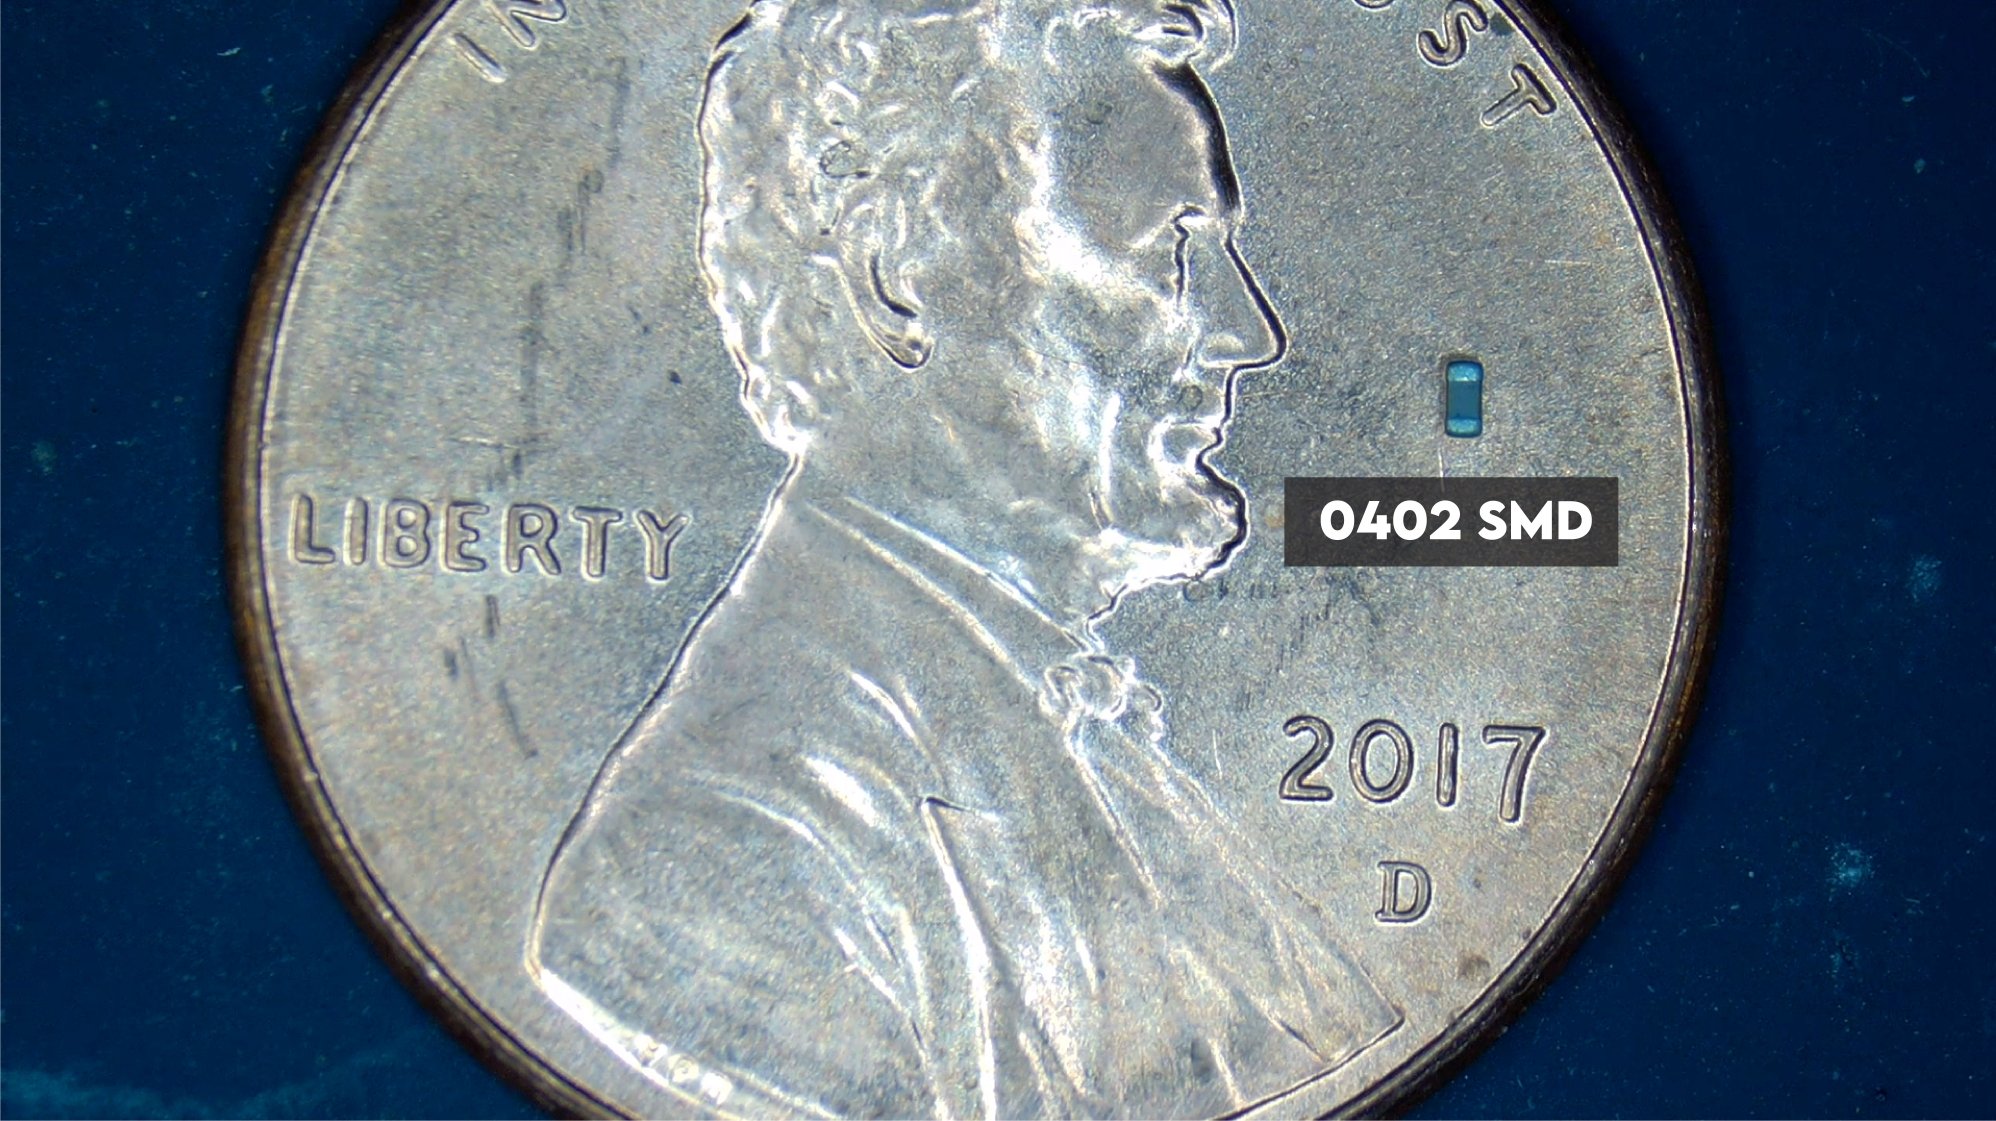
I had to desolder all the SATA holes. I suppose when the entire board is bulk-soldered the unpopulated holes are filled with solder. The SATA data lines need four 10nF capacitors, size 0402. This video is from my soldering camera. 0402 capacitors are very small. This would have been impossible without some kind of magnification.
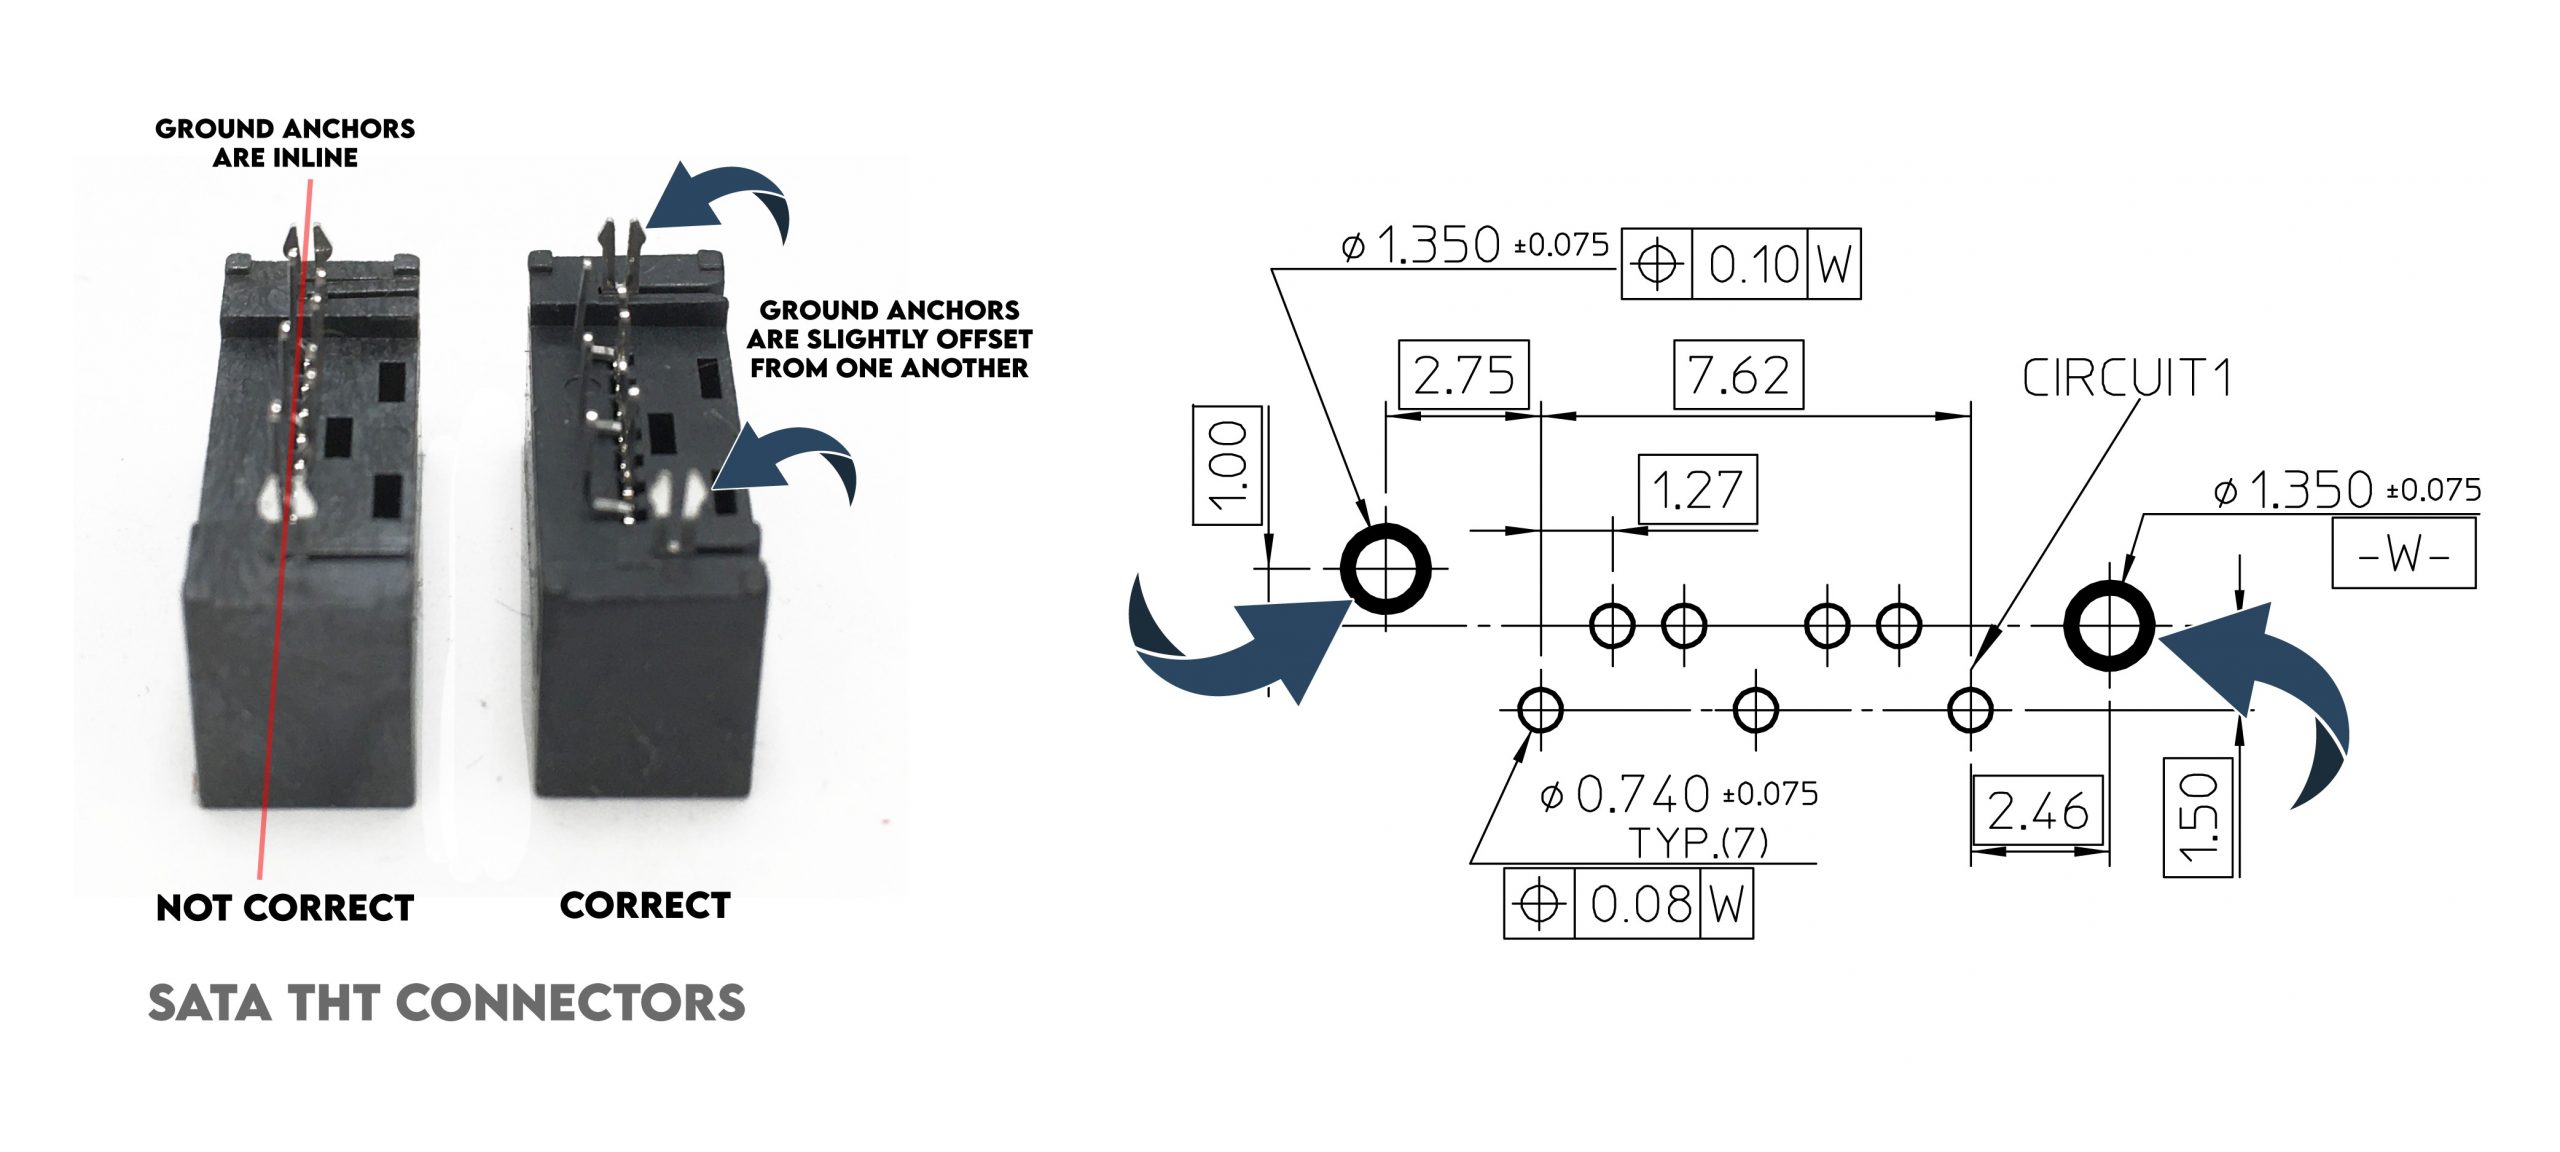
Finding the right SATA connector was difficult. Digikey was sold out and I had to wait for the right ones from Aliexpress. View the datasheet
I used 7 8GB SATA DOM modules for the Proxmox installations and 7 240GB SSD drives for Cephs storage (VM storage). I’m sure I could have skipped adding a second SATA port and just use one large drive for OS and storage, but that goes against my doctrine of having data separate from everything else.
The 5060 does come with USB 3.0. With the right USB-to-SATA cable, I could have gotten decent performance connecting the drives externally. I thought about doing this, but in the end I really wanted the SATA drives to be internal. It looks better anyway.
Phase 2: Design
Major Points
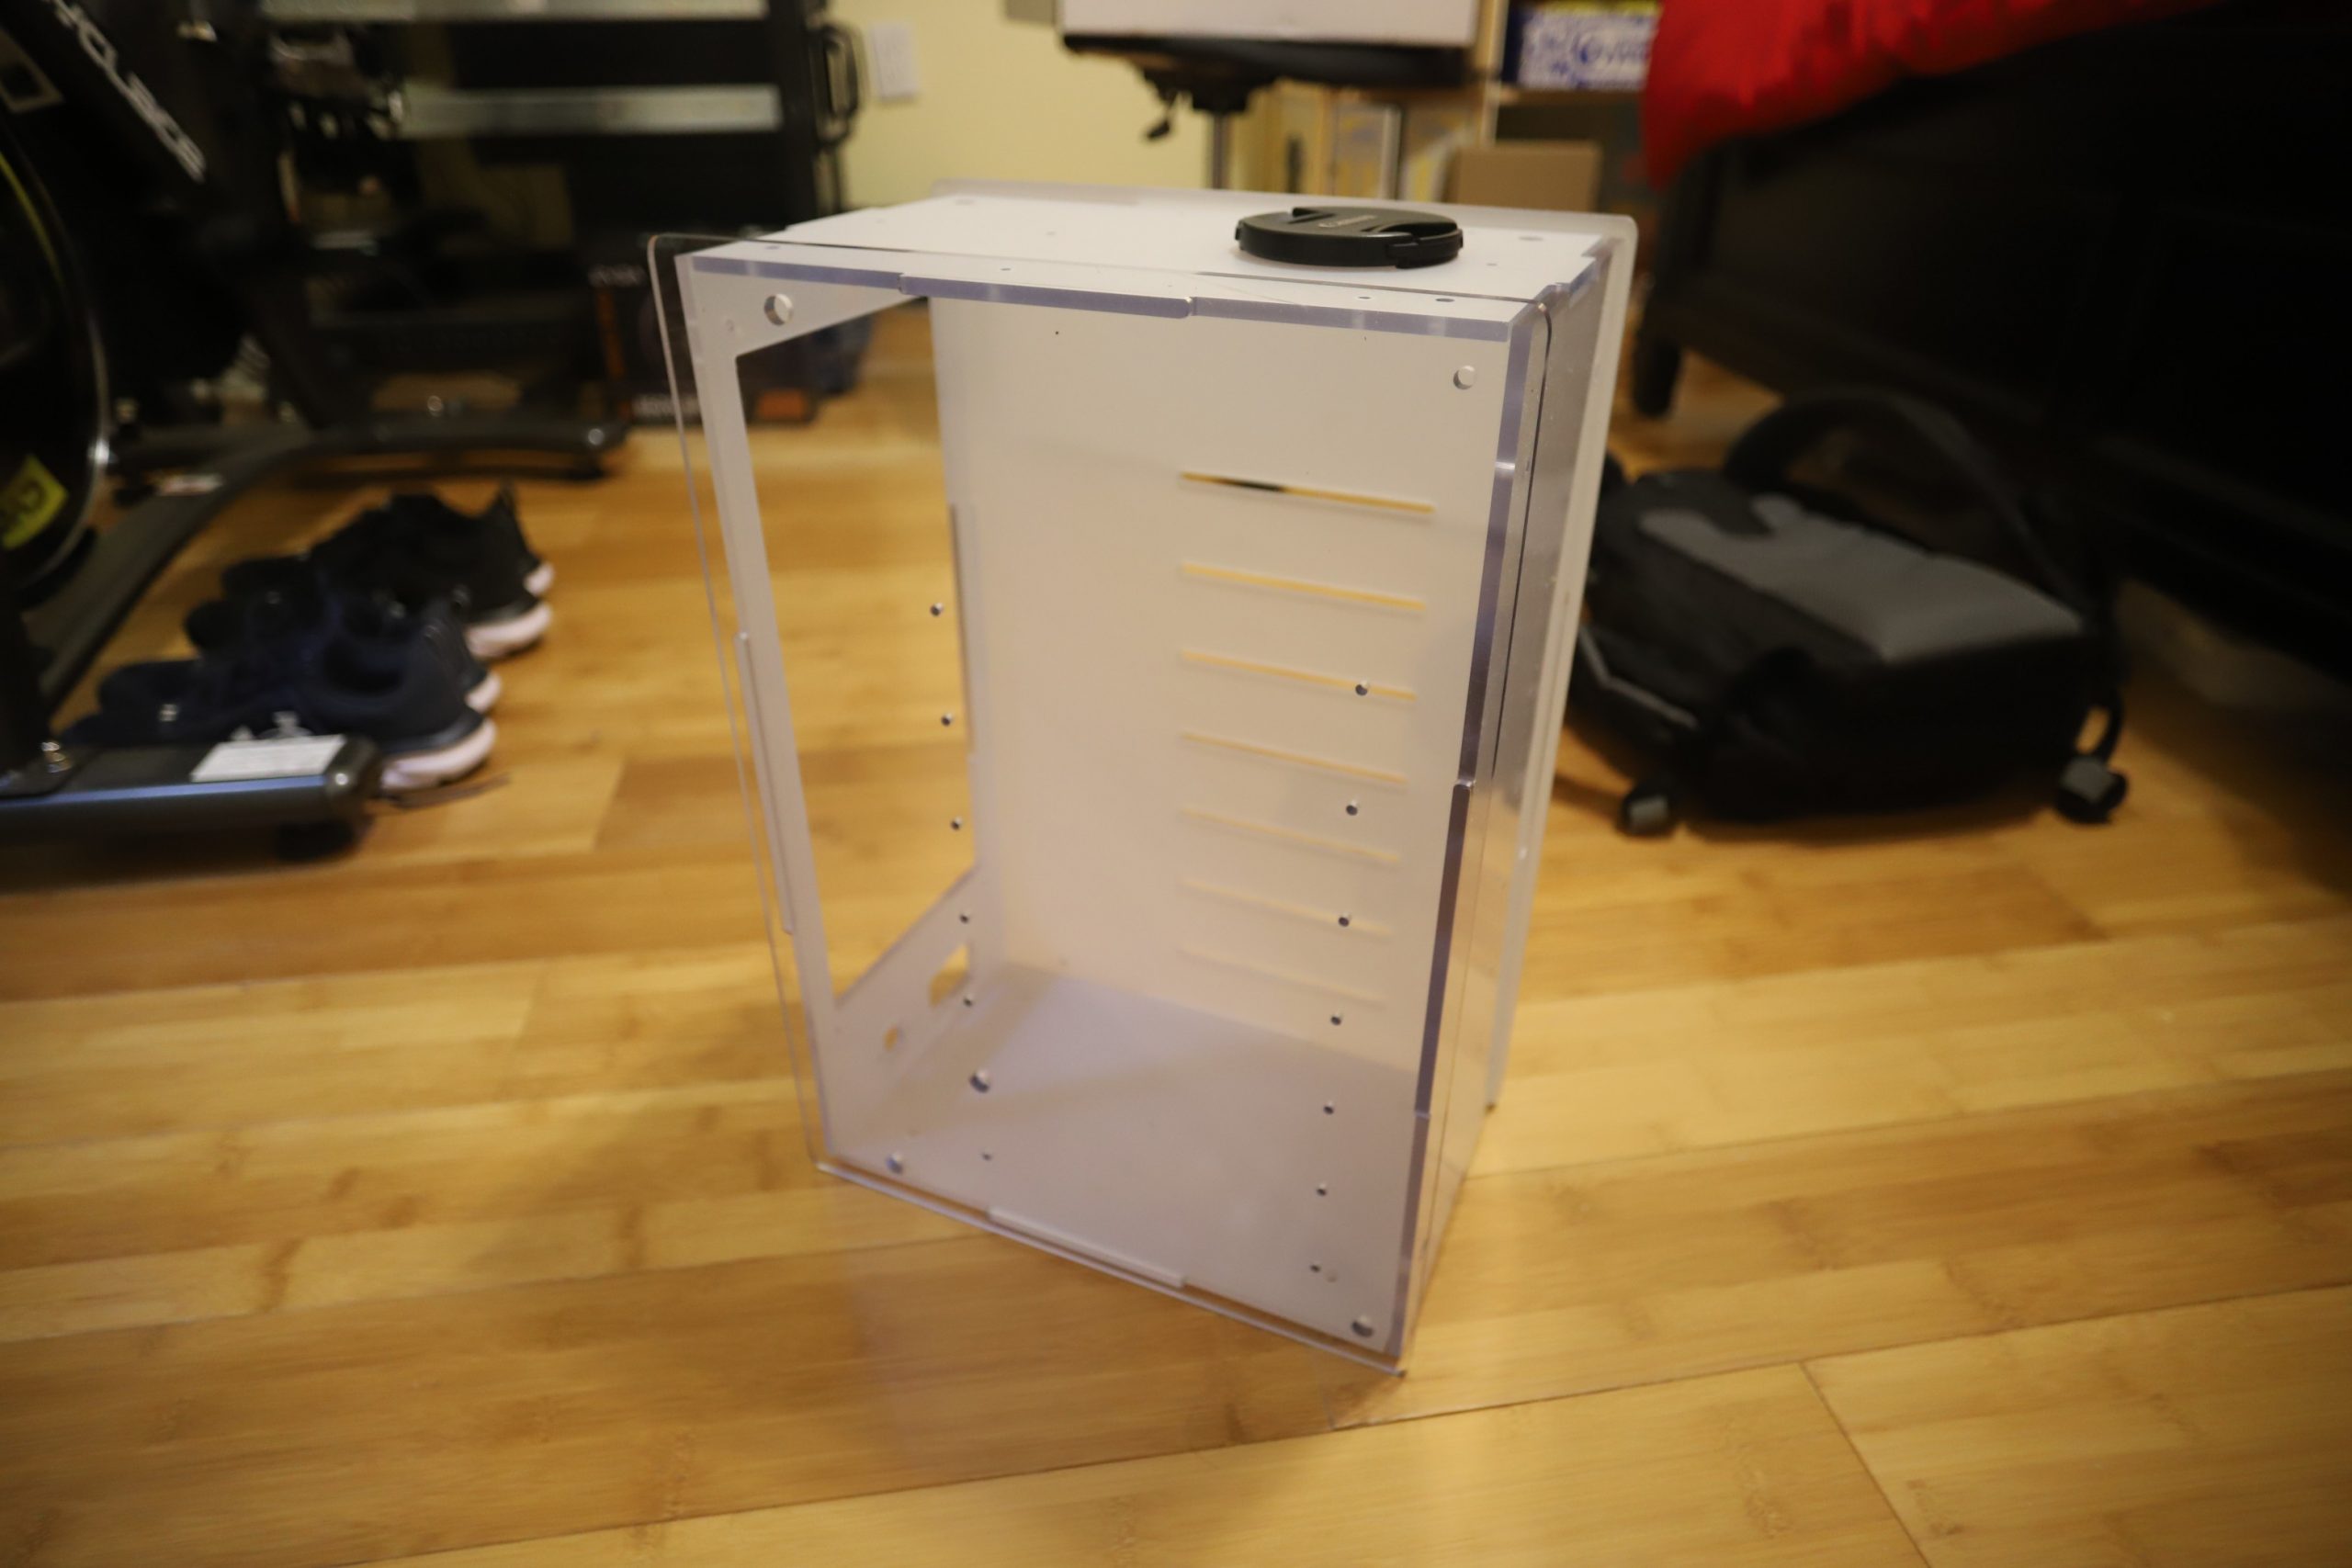
- Polycarbonate shell
- 19″ max width
- Converts between tower or rack mode
- Rubber feet
- 2 exhaust fans
- 2 handles
- Passive air vents
I designed everything in Blender. After taking detailed measurements of all the major component dimensions and mounting points, it gave me the freedom to design and visualize while iterating several different layouts.
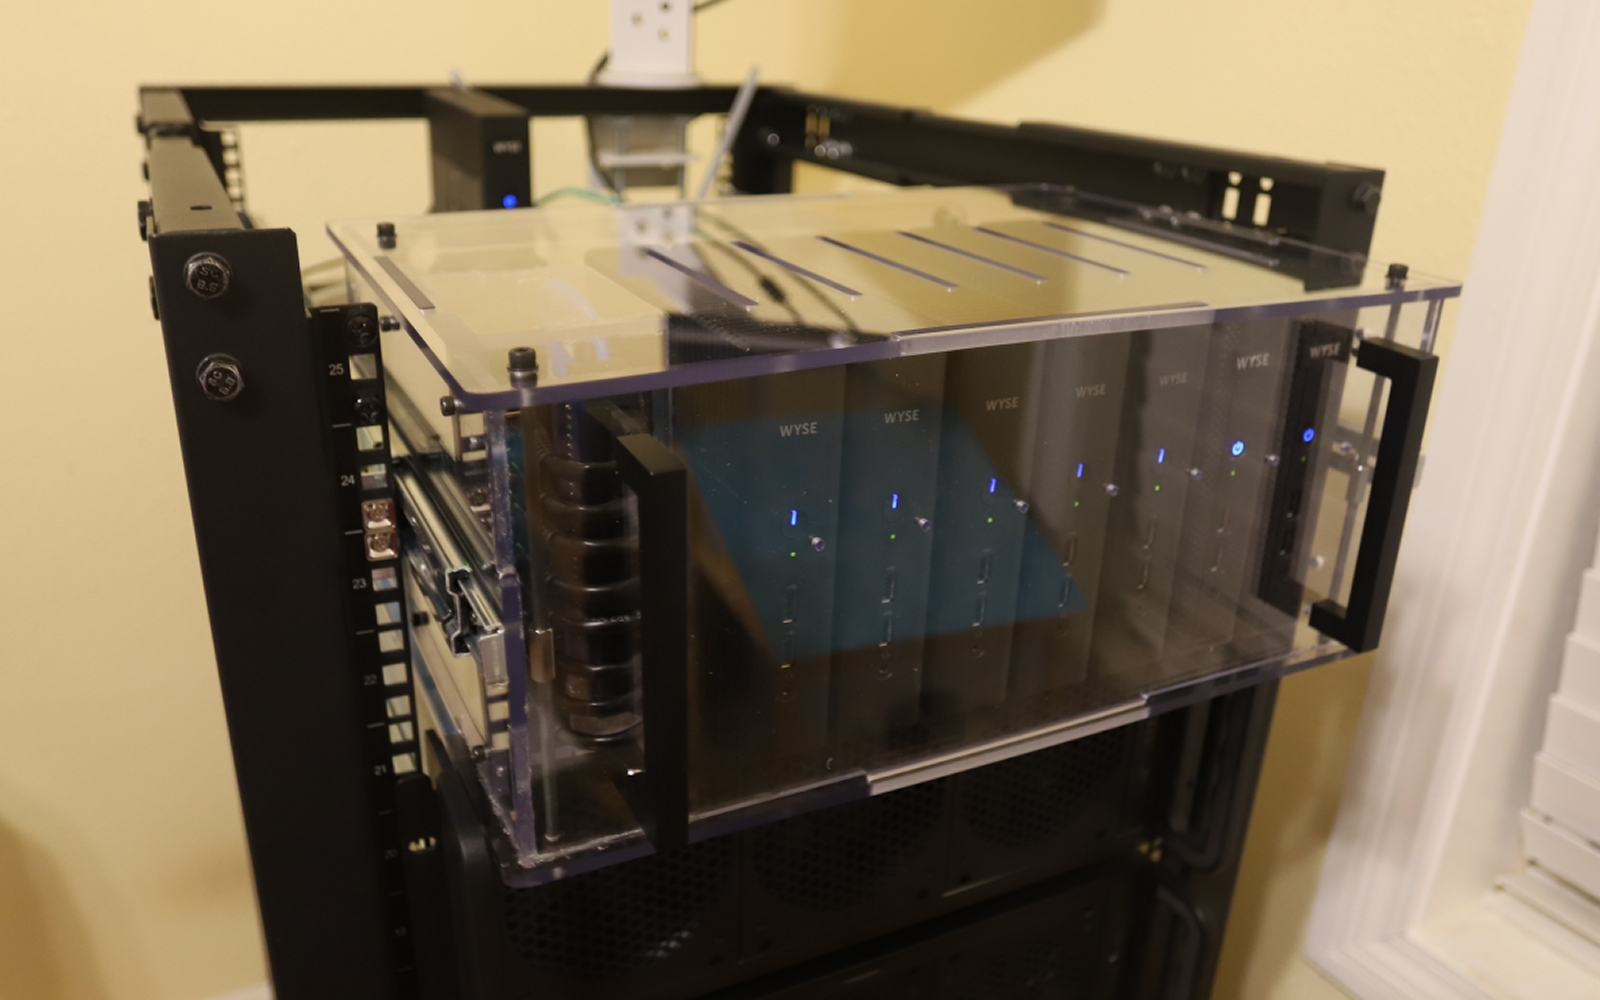
The design can be used either in “tower mode” or “rack mode.” A standard rack is about 19 inches across. This is why I ended up going with seven nodes. The handles are cabinet handles from Home Depot. They can either mount on top in “tower mode” or on the front for “rack mode.”
I wasn’t 100% sure about cooling. The nodes by themselves are passively cooled. I have slits for air flow as well as two exhaust fans. I didn’t know if passively cooling would be enough or even if two active fans were enough.
I had to wait until final assembly to test cooling. I almost went with two or three front intake fans, but I didn’t like the look.
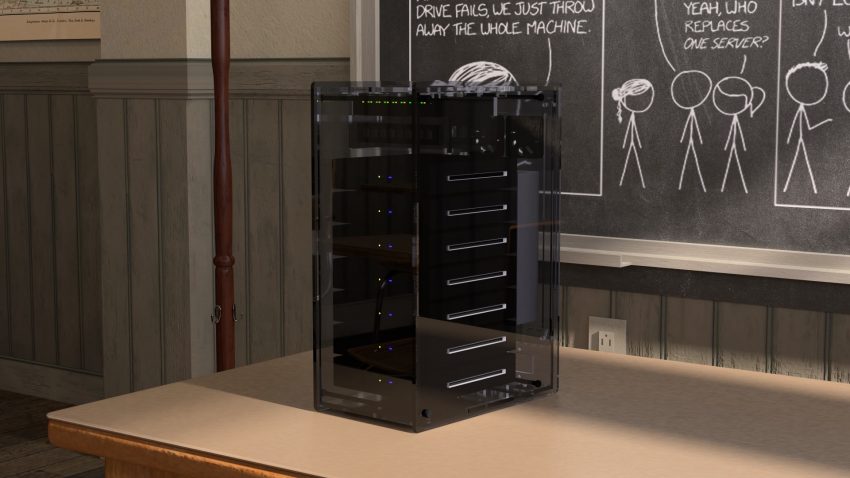
Final Render
Phase 3: Fabrication and Assembly
Networking
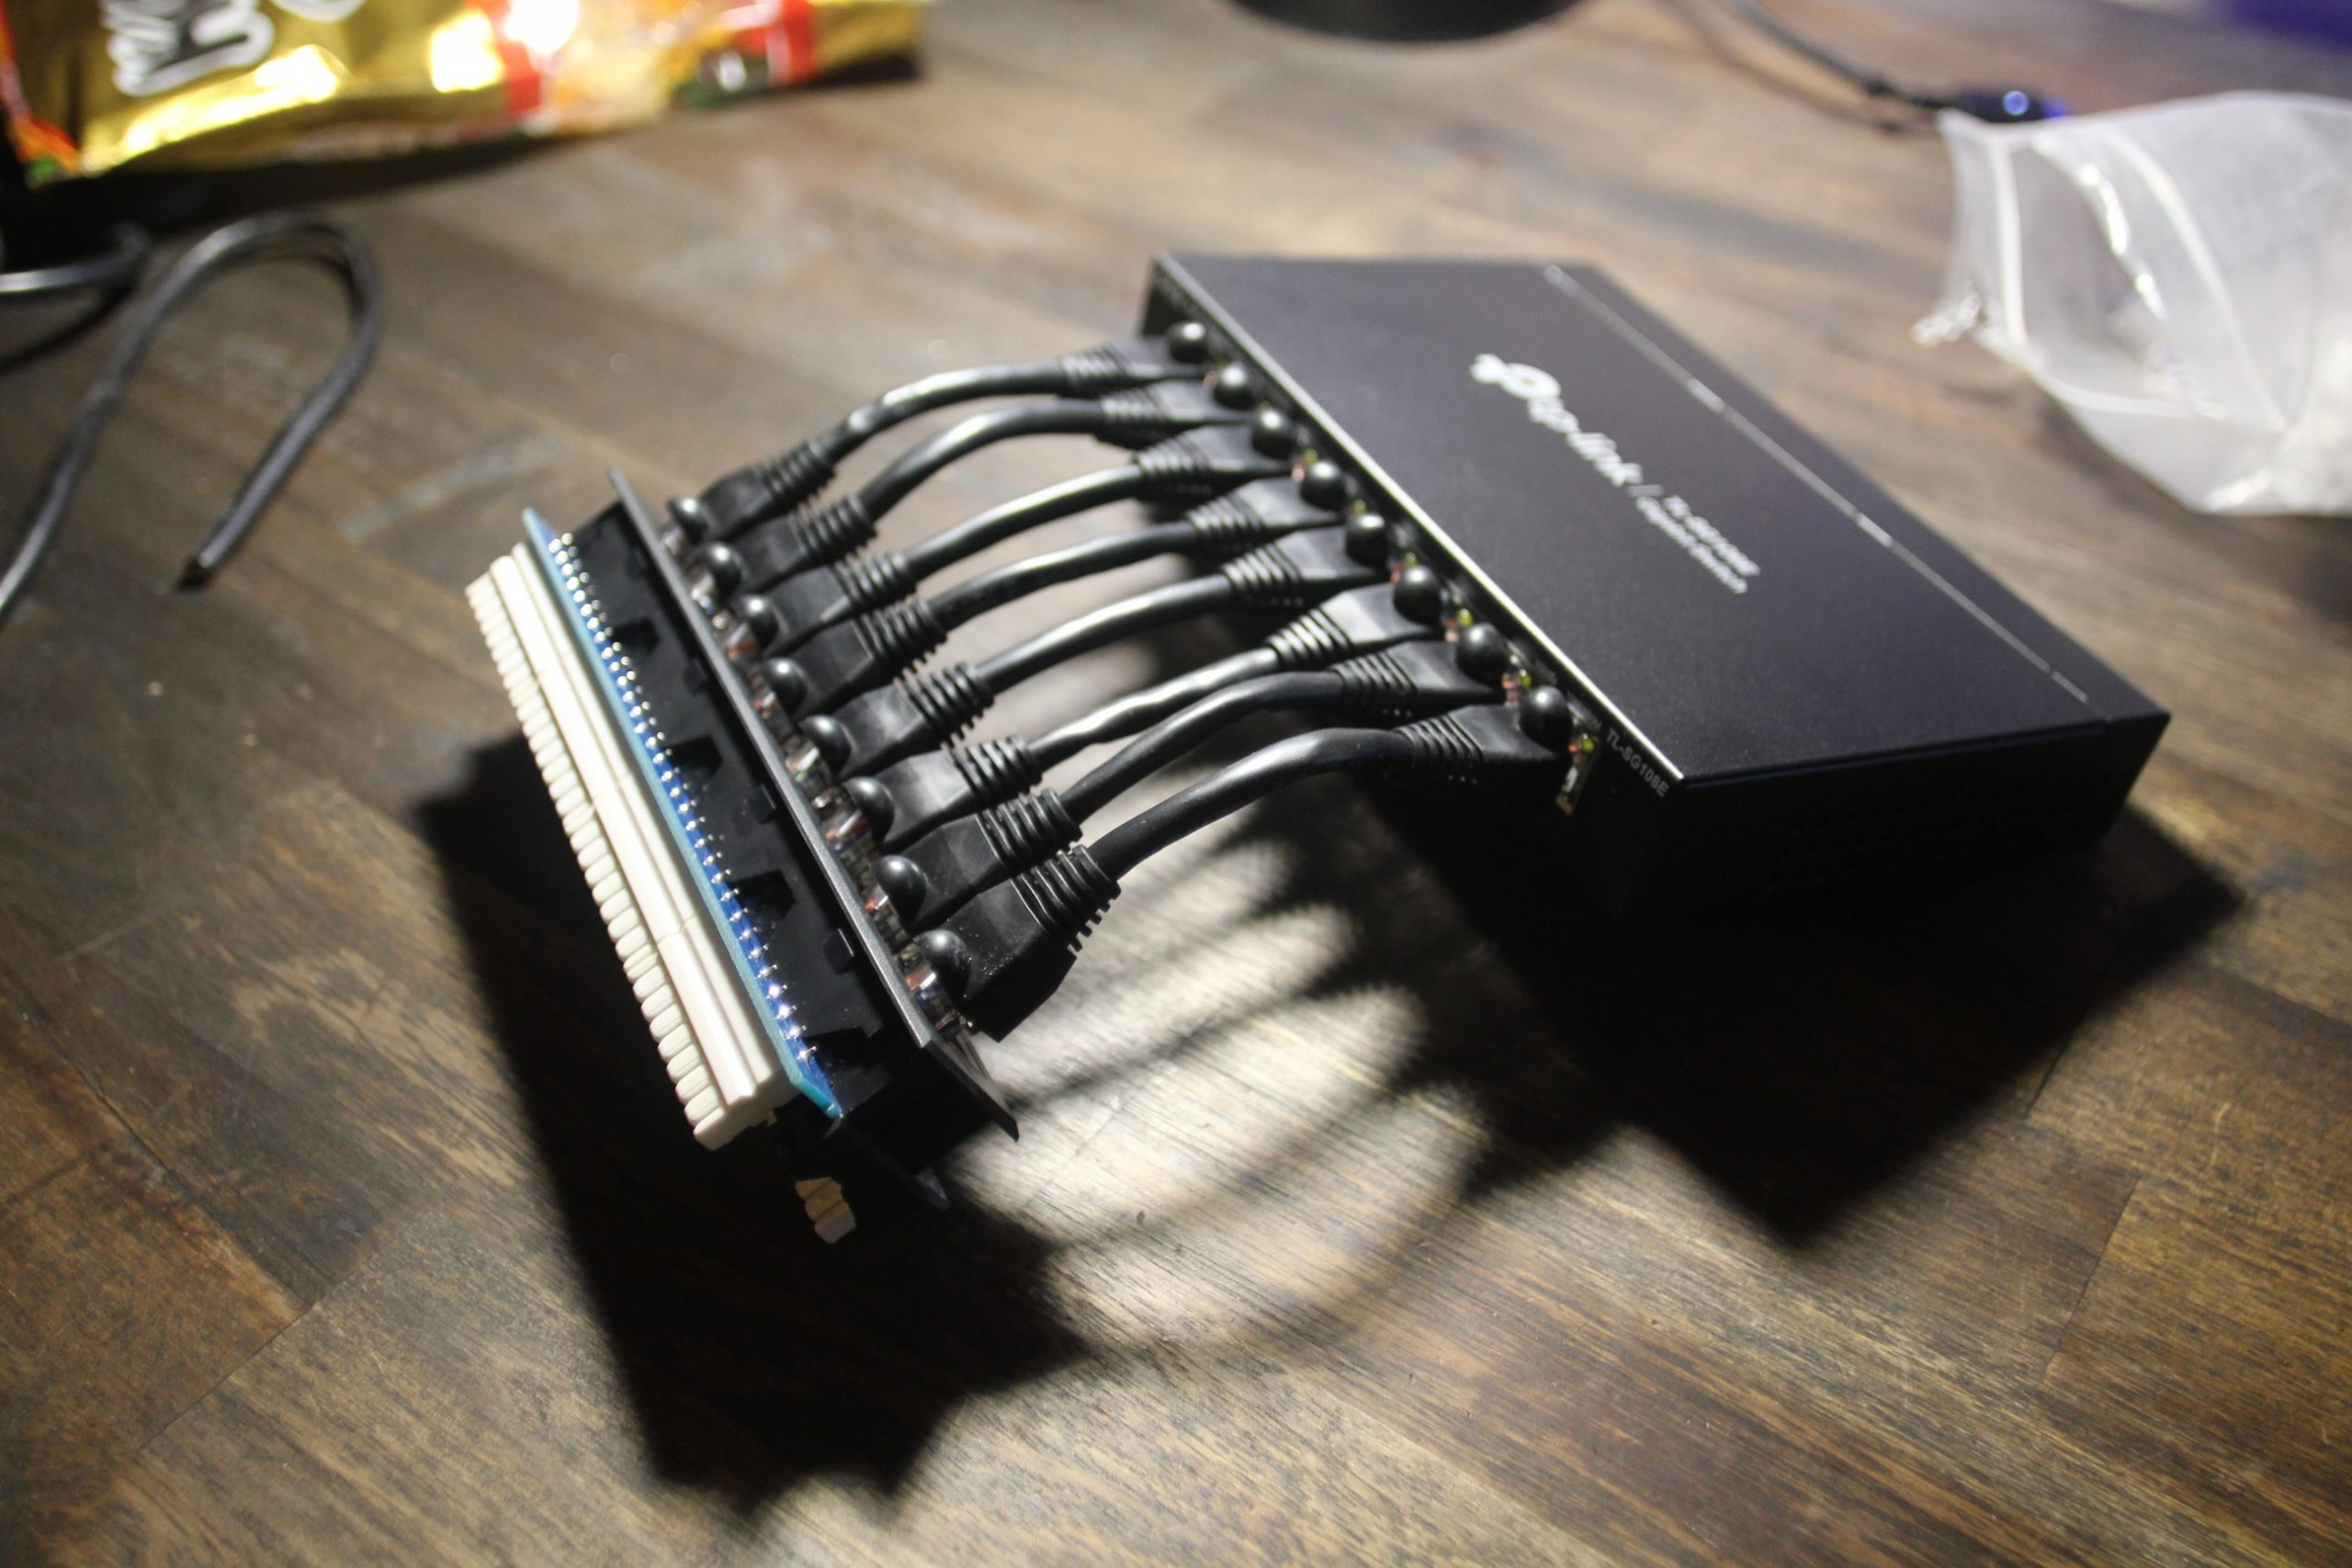
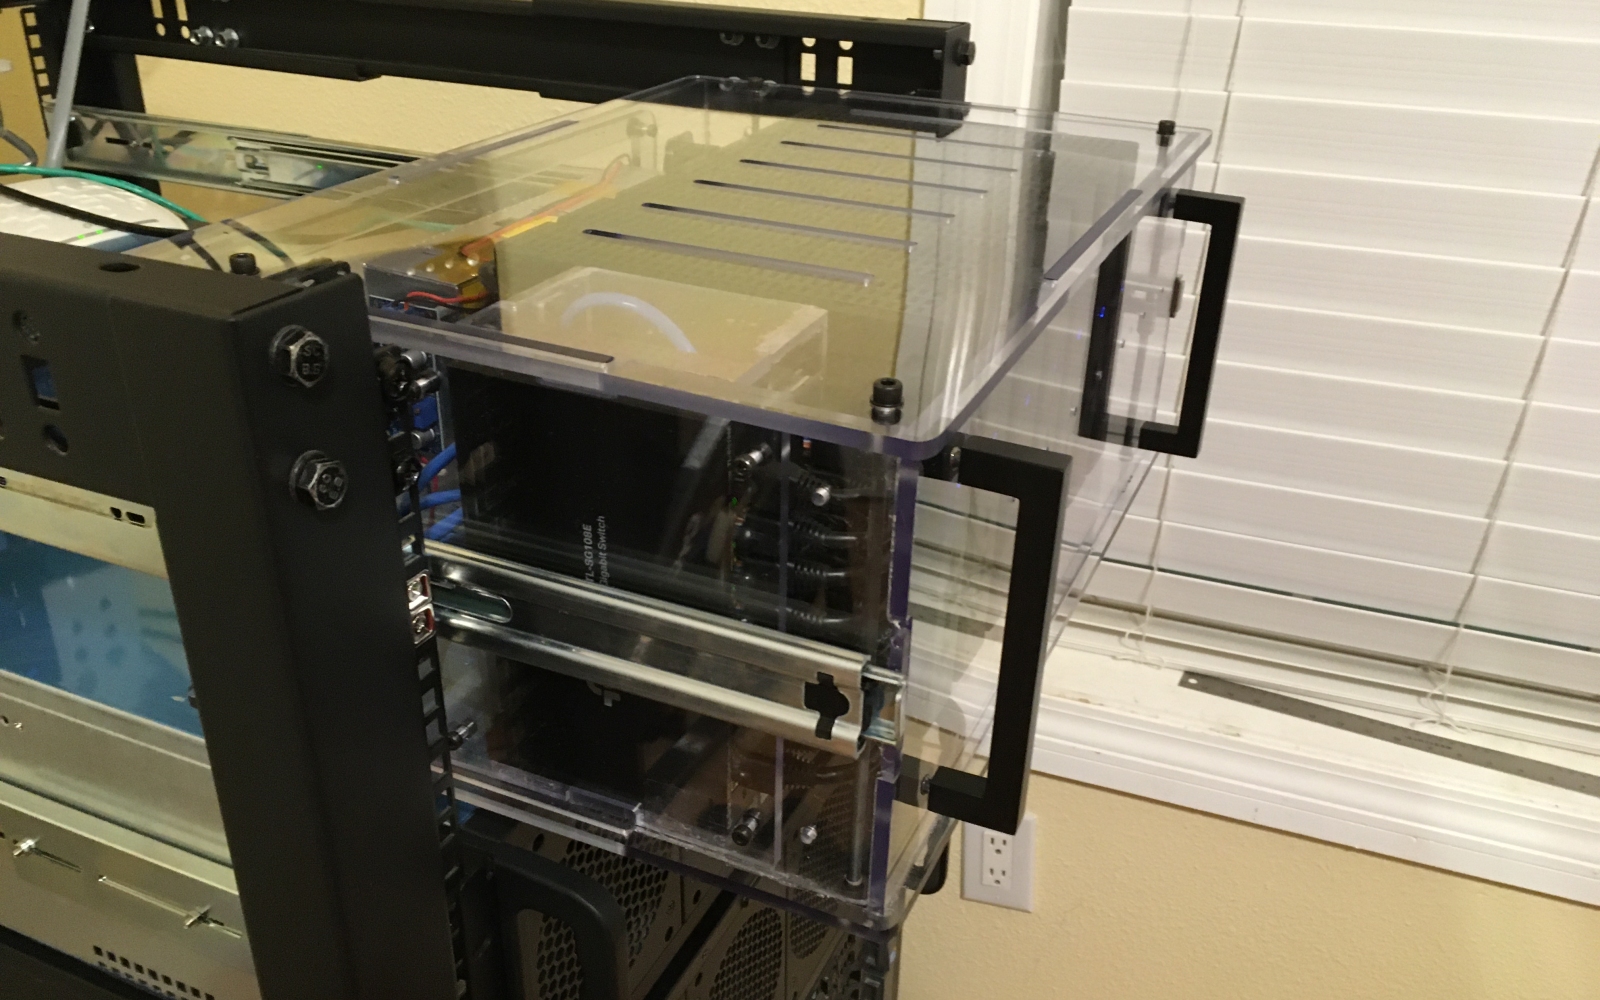
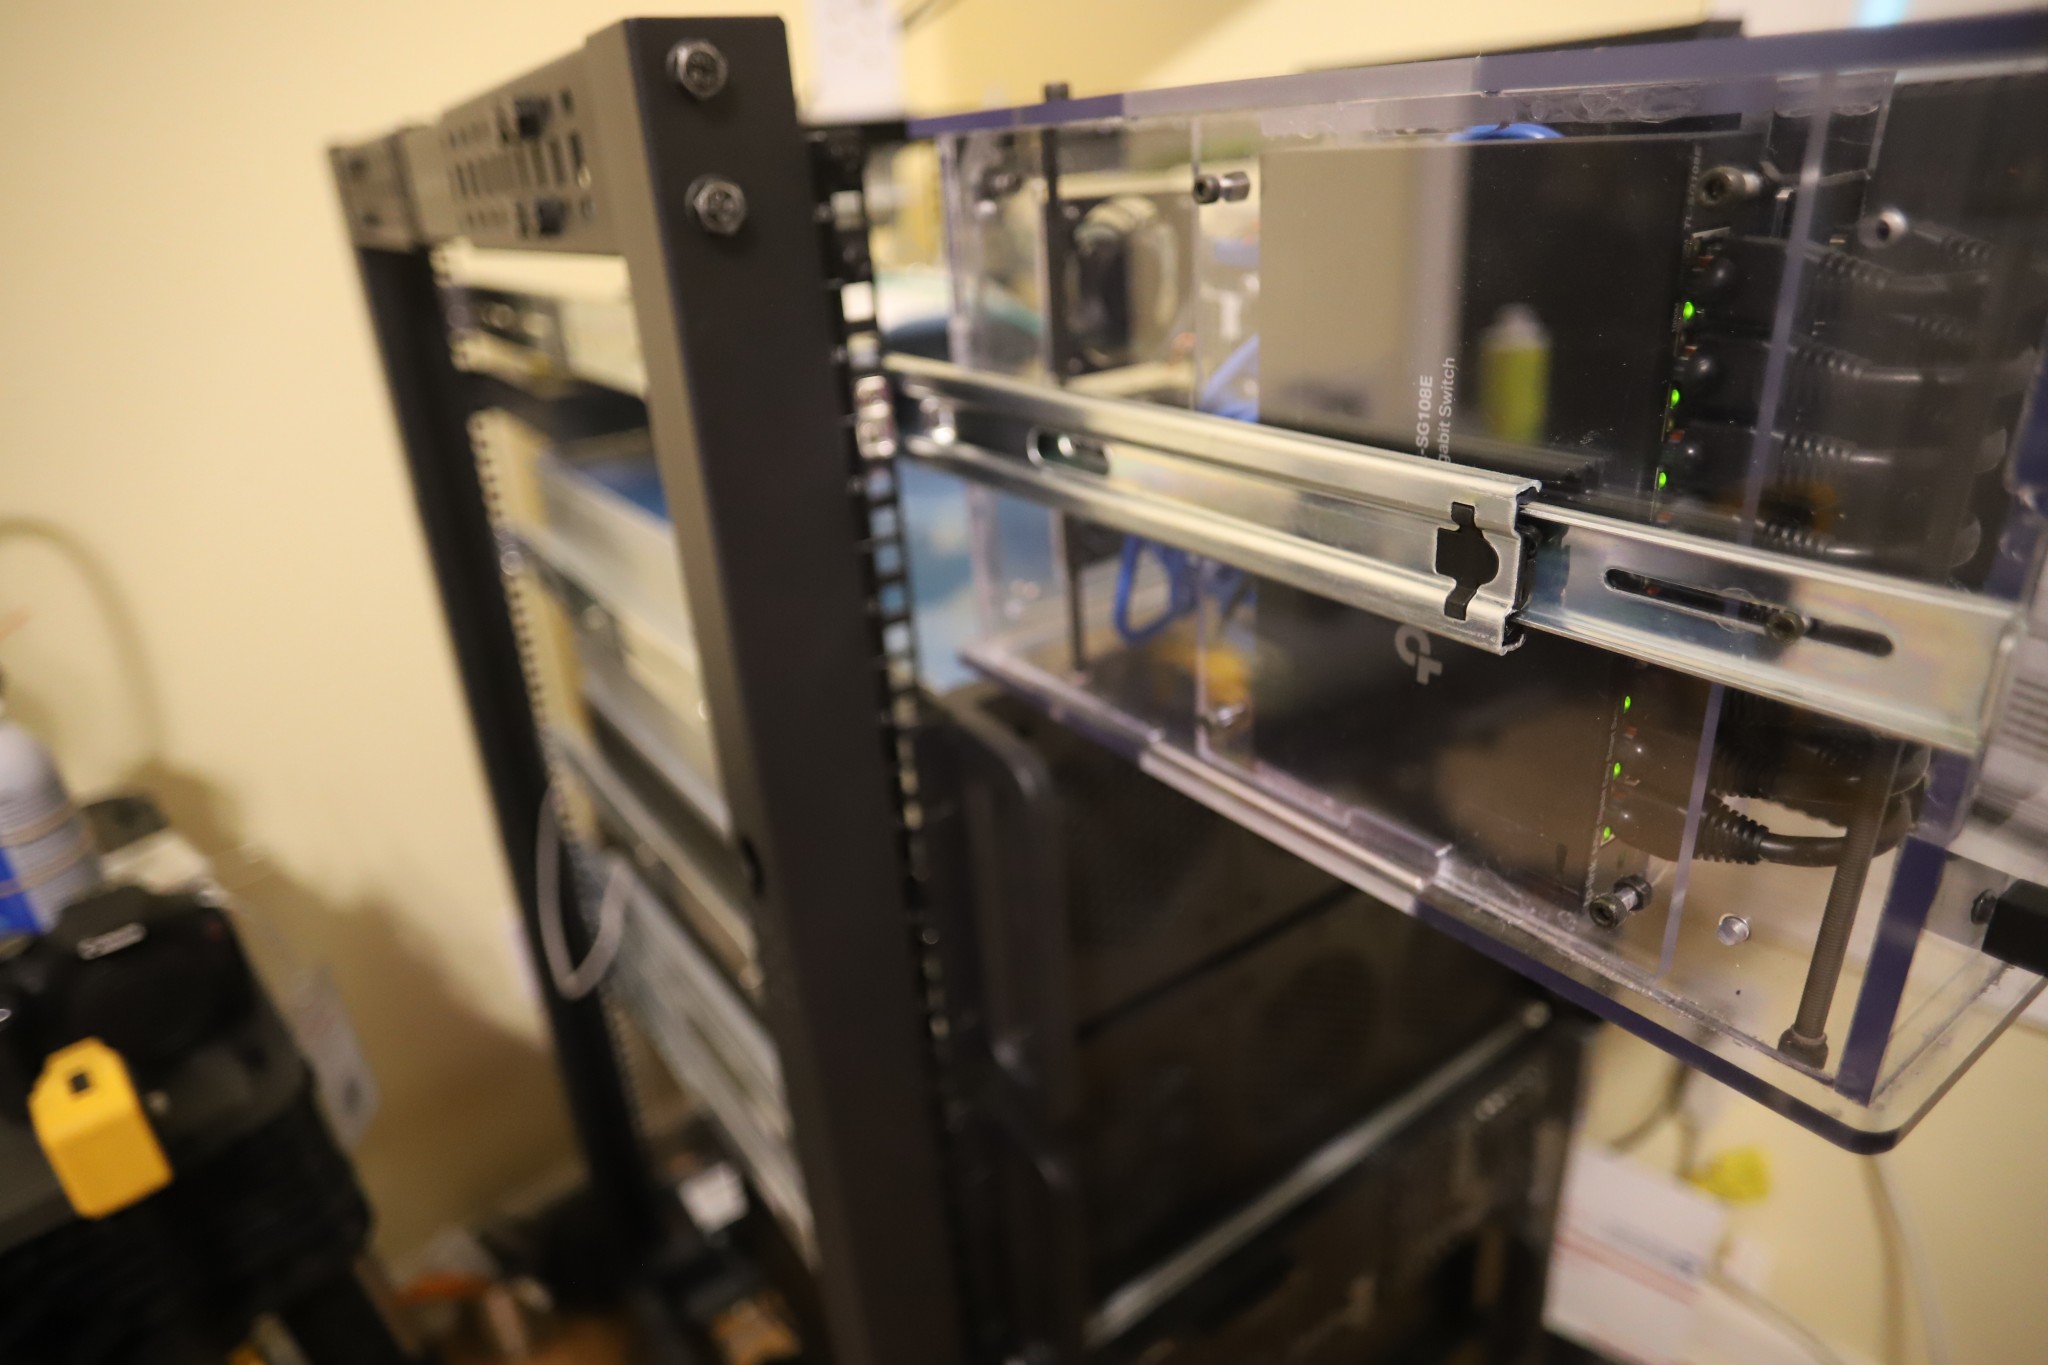
The heart of the networking is an 8-port patch panel and an 8-port TP-Link TL-SG108E managed switch – seven ports for the seven nodes and one back haul connection. I used a patch panel mainly for presentation. I liked the way it looked with the small patch cables in front.
I thought about adding a second USB network adapter to each node so Cephs traffic and VM traffic could be segregated, but the extra costs and space required put me off the idea.
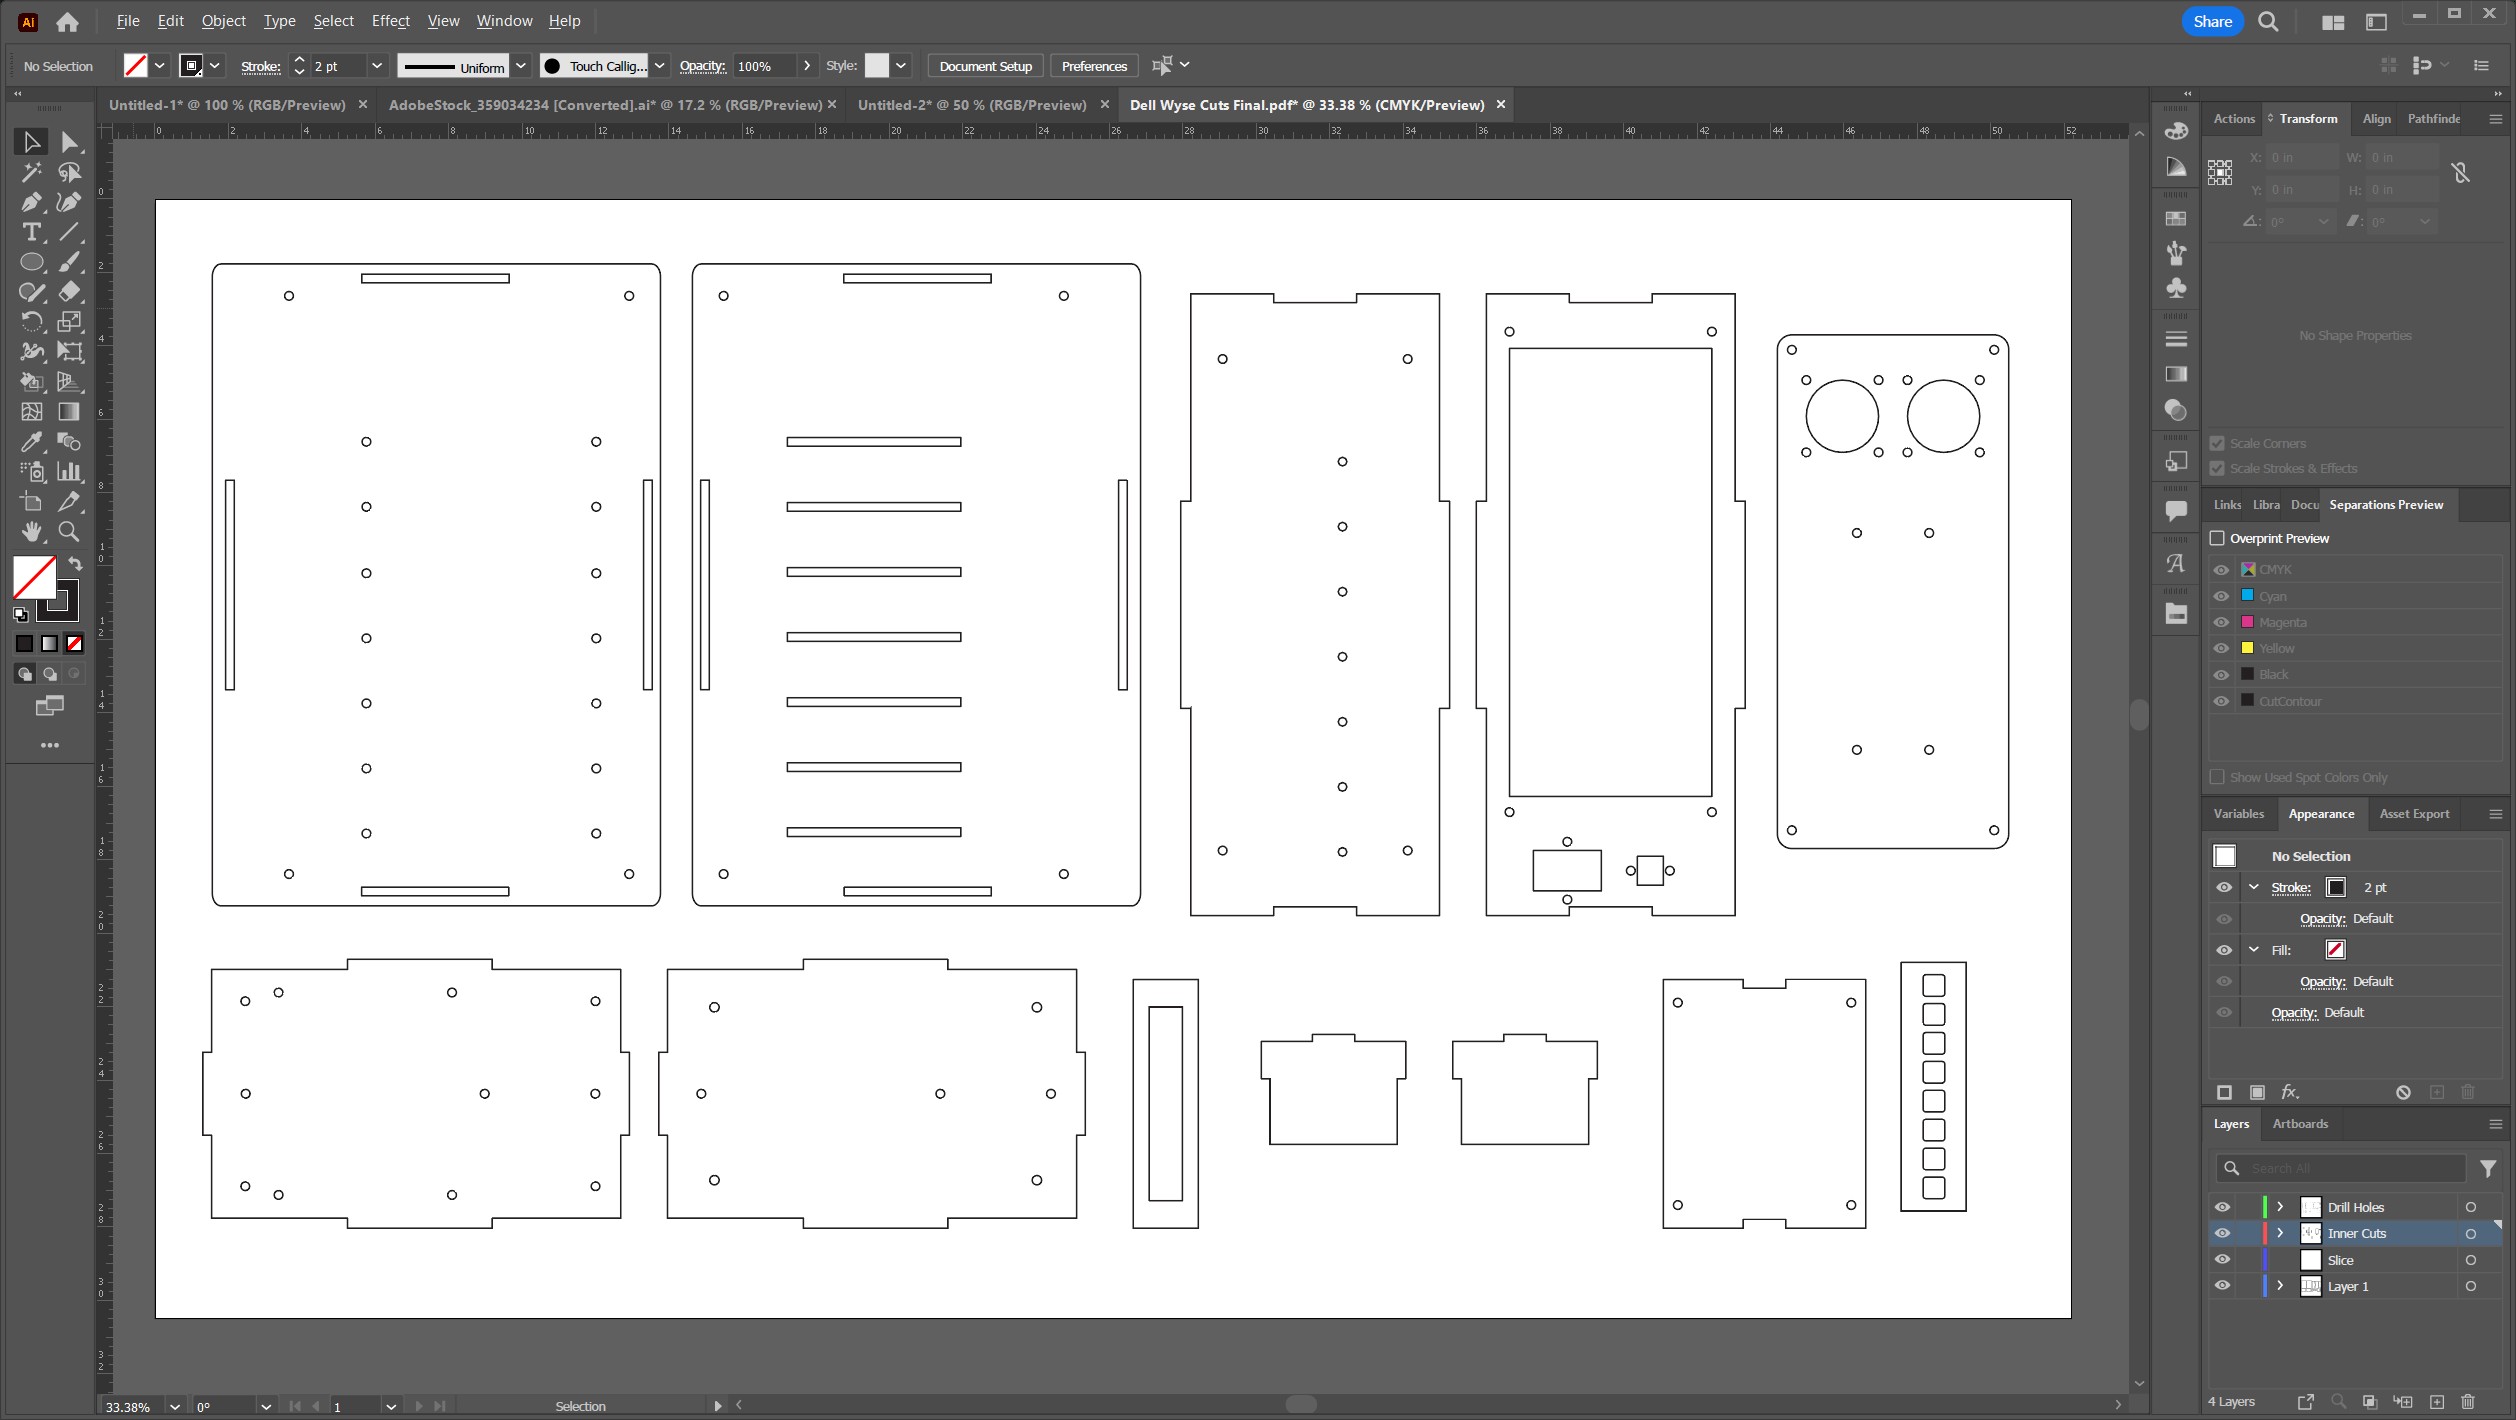
Cutting the enclosure
Once the design was finalized, I exported the vectors using a Blender add-on called ‘Outline To SVG’ (found here). The outlines exported perfectly down to the millimeter.
Dry fit and gluing
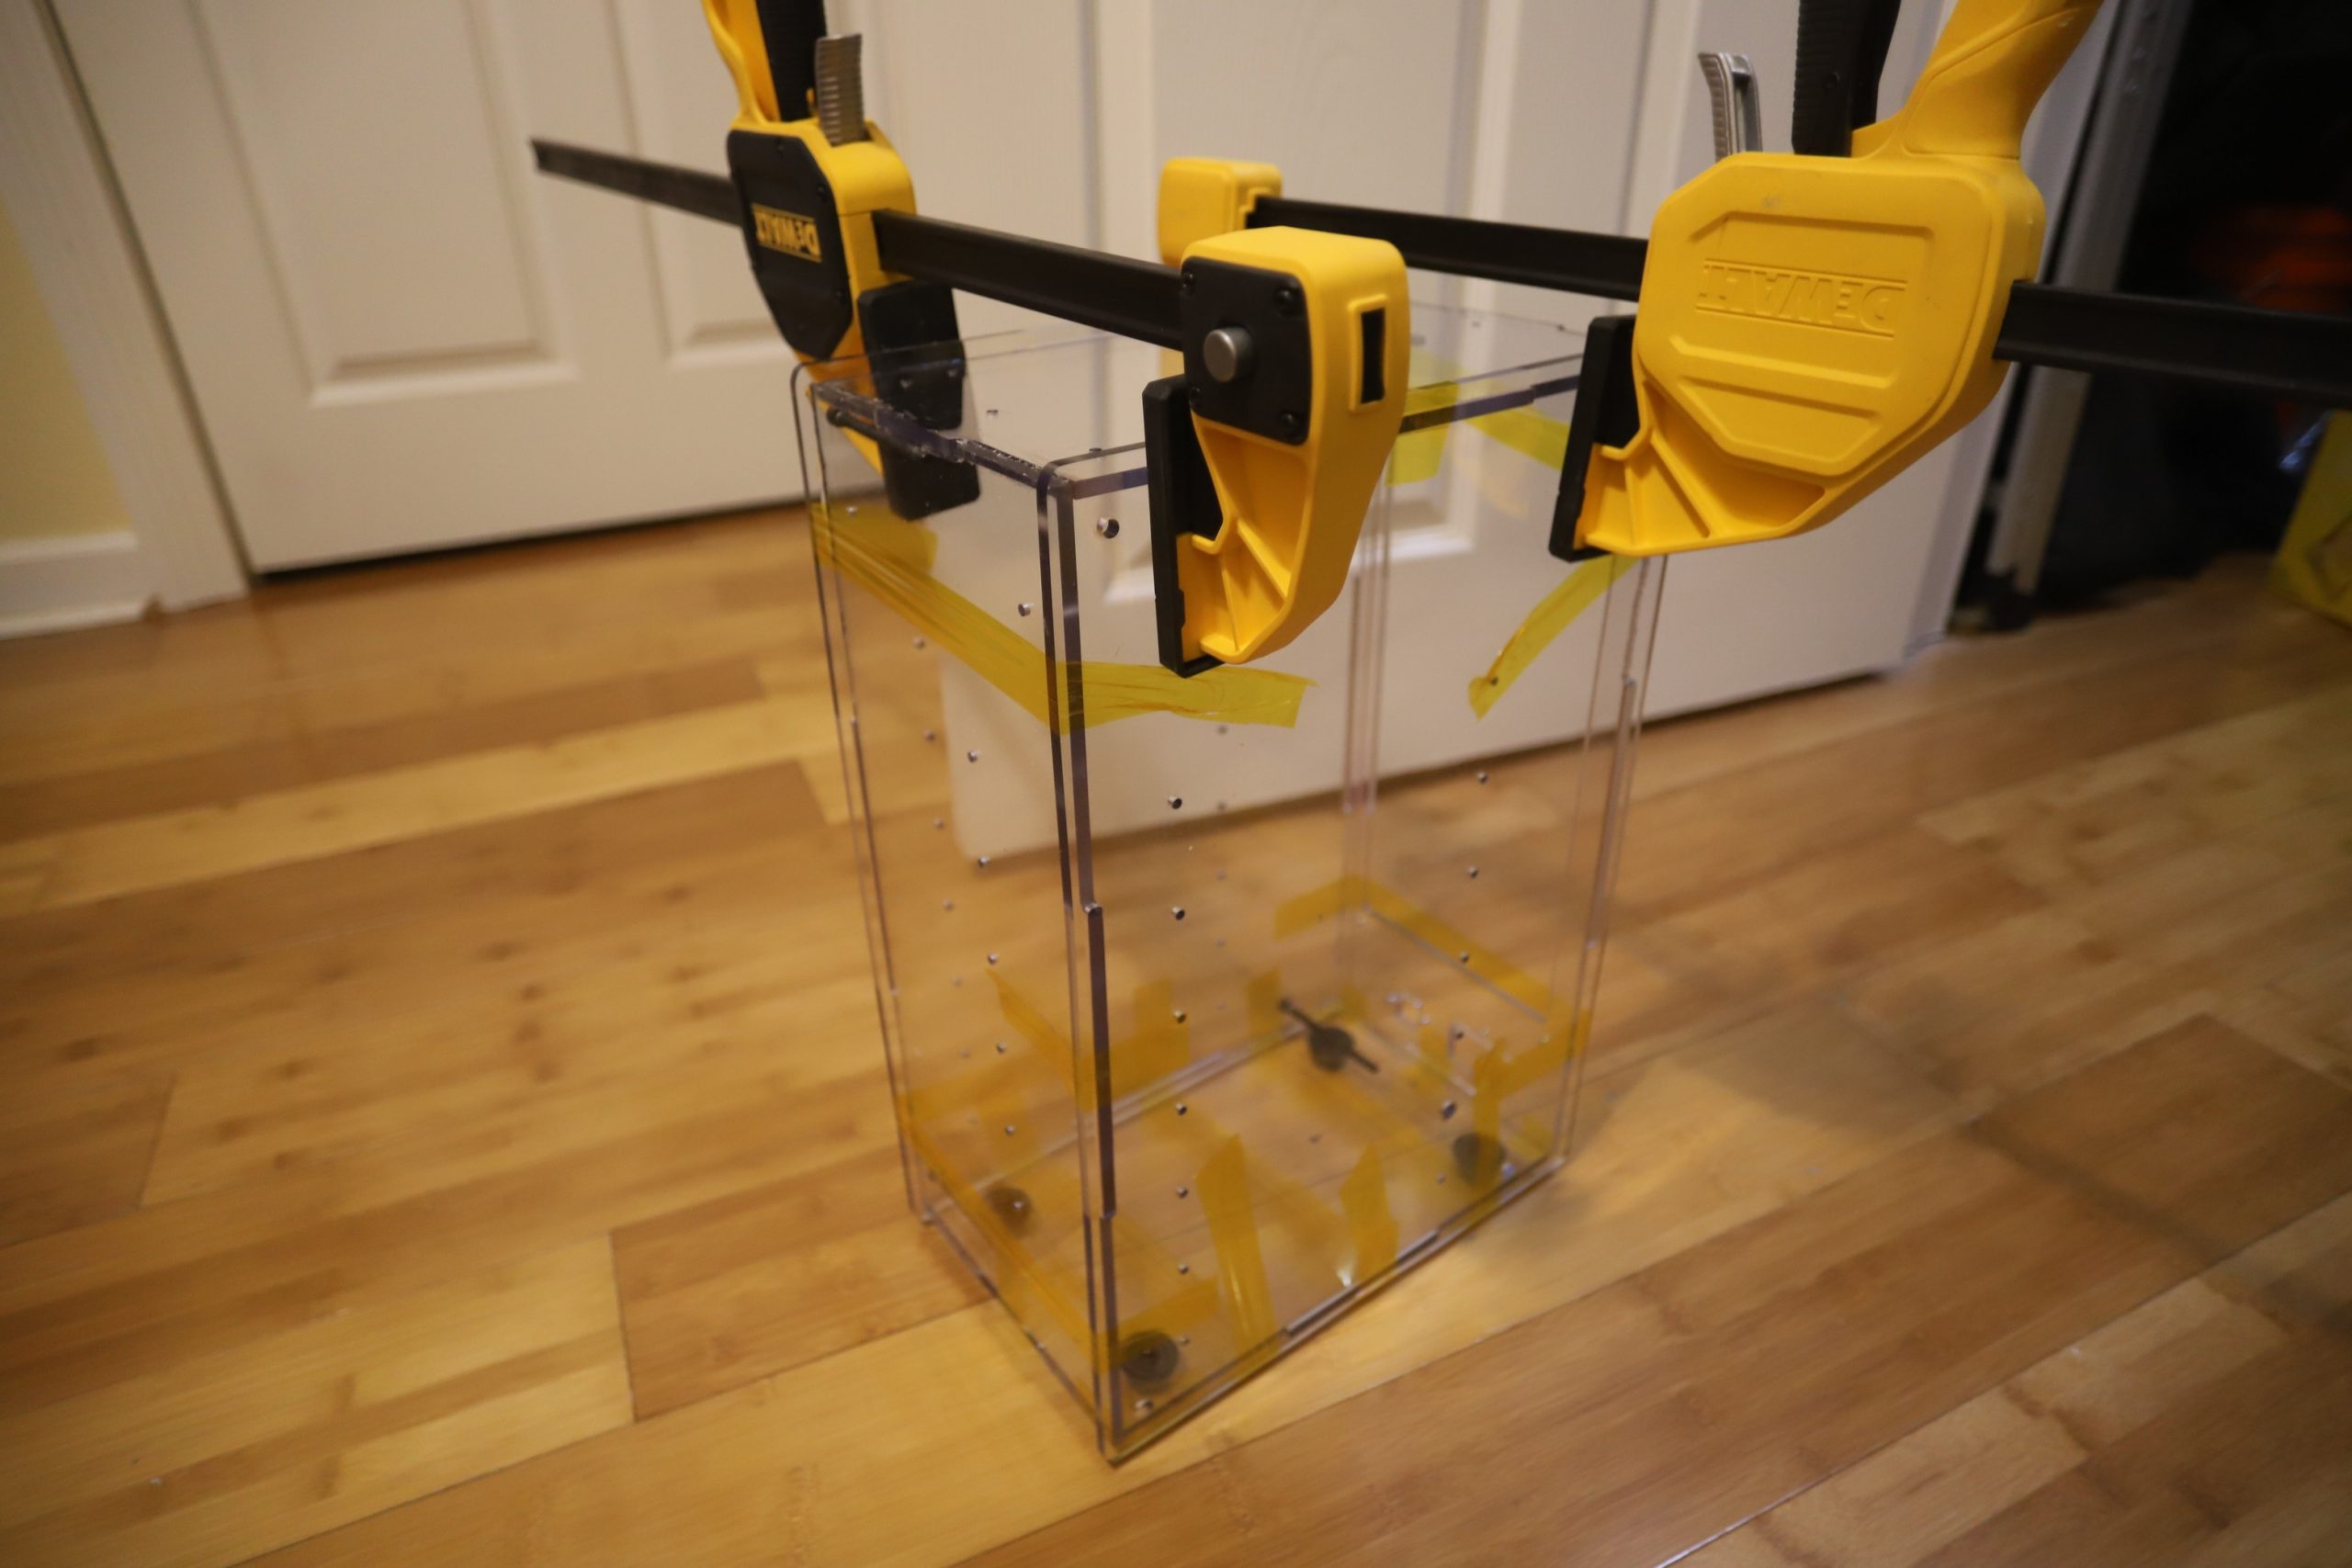
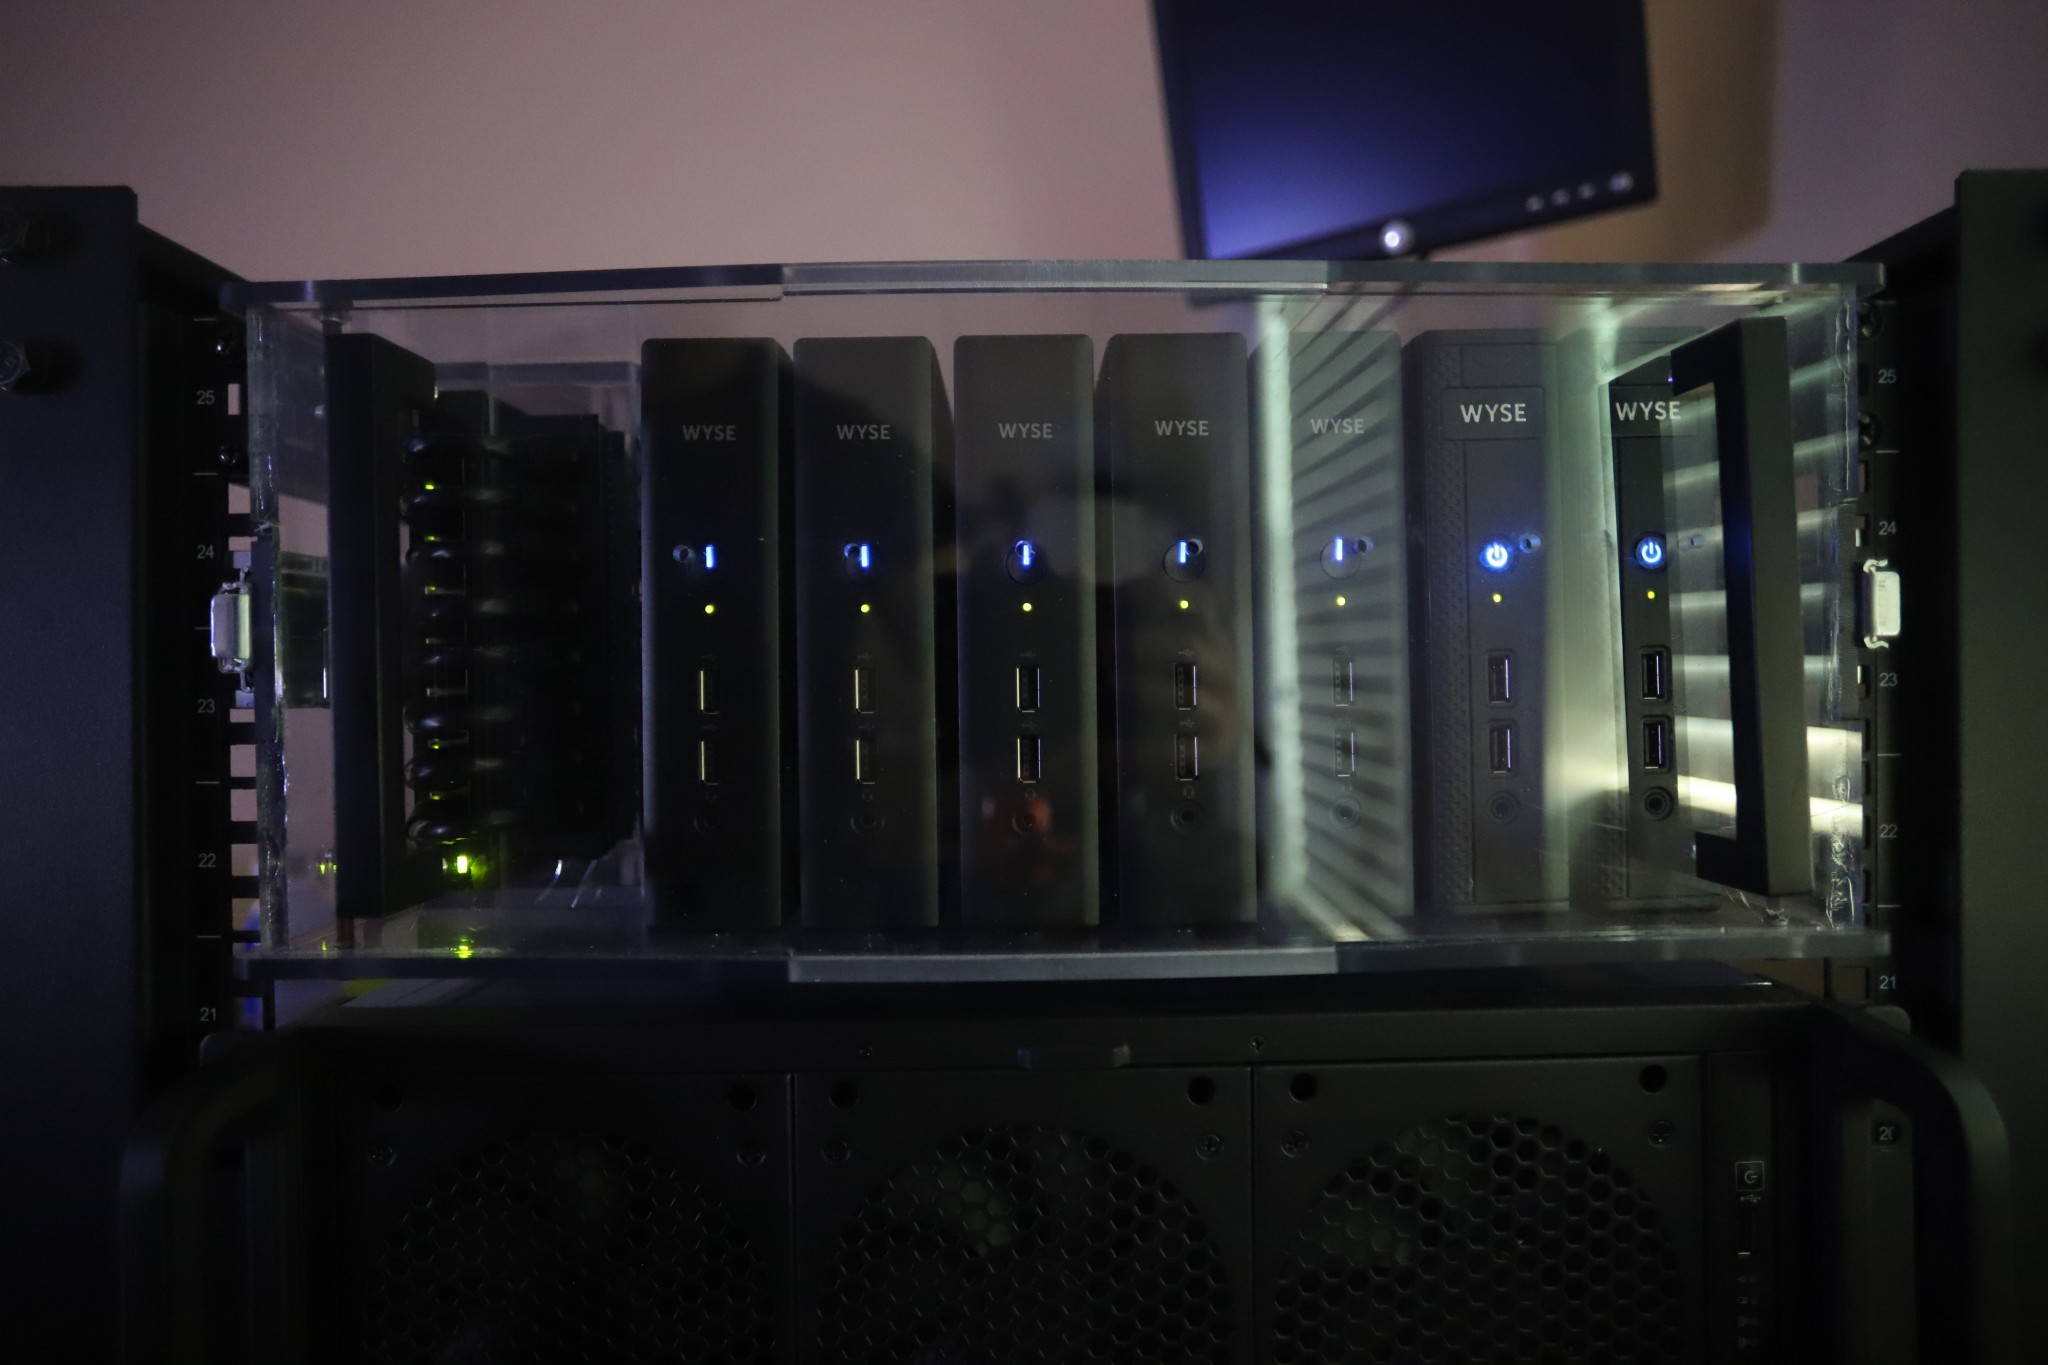
The thin clients usually mount to a base with some M3 screws. I used these holes to secure the nodes in the case.
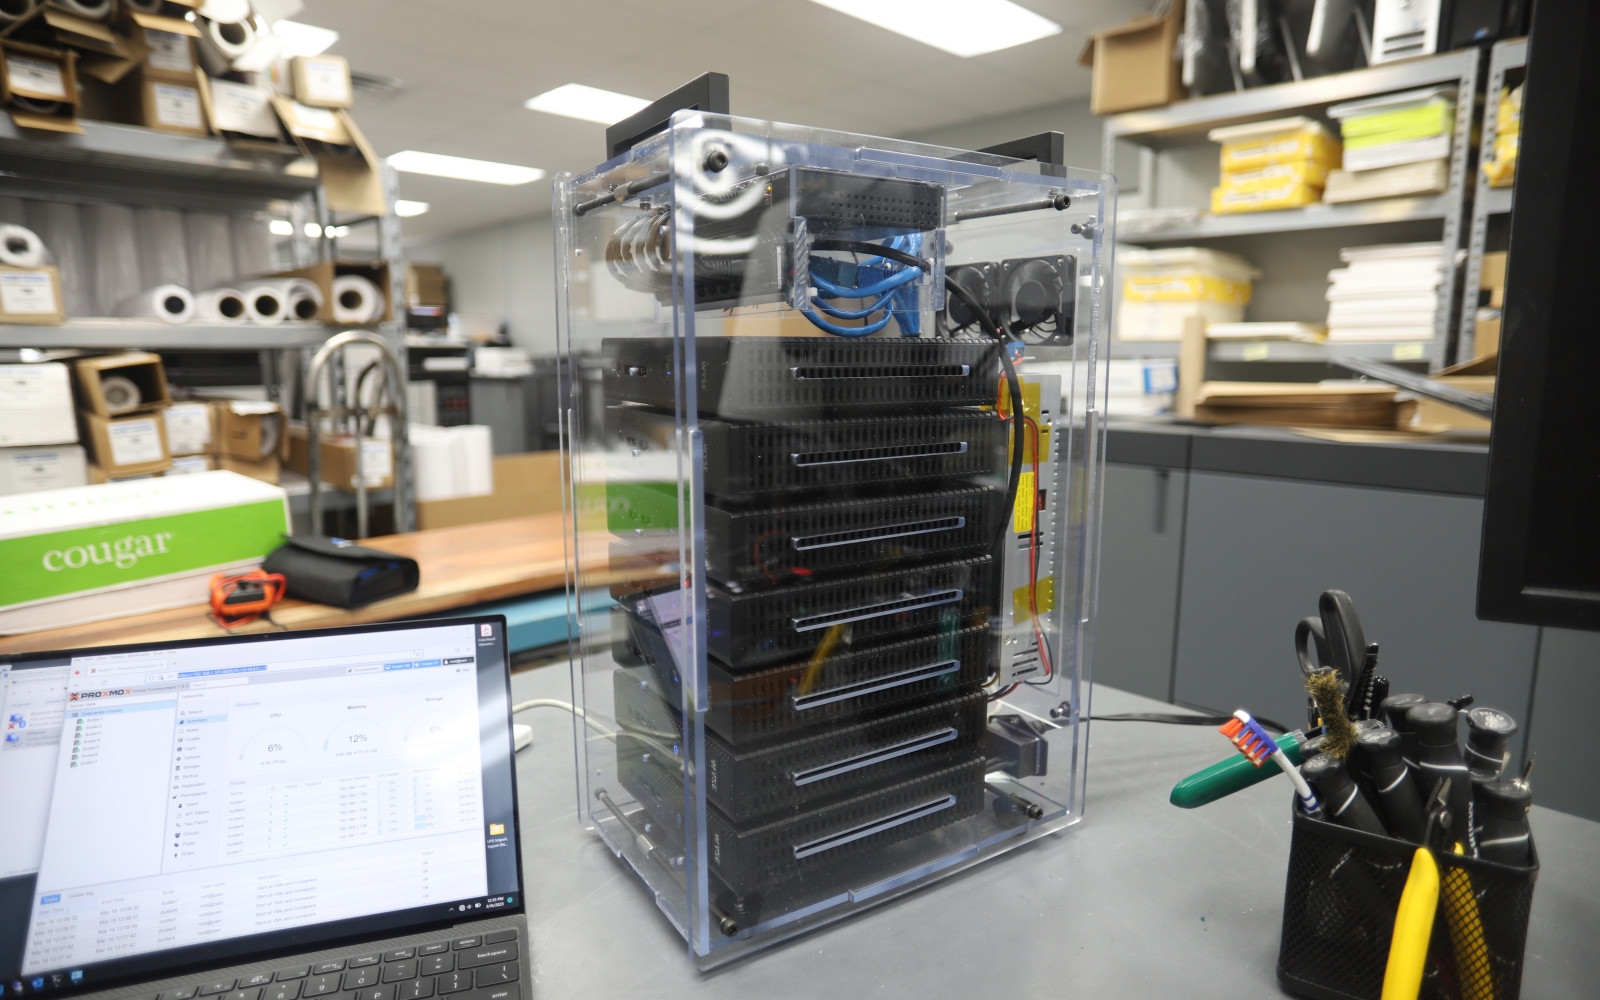
The polycarbonate housing is very rigid. Once everything is assembled, the nodes are bolted to one side of the case with two M3 bolts each.
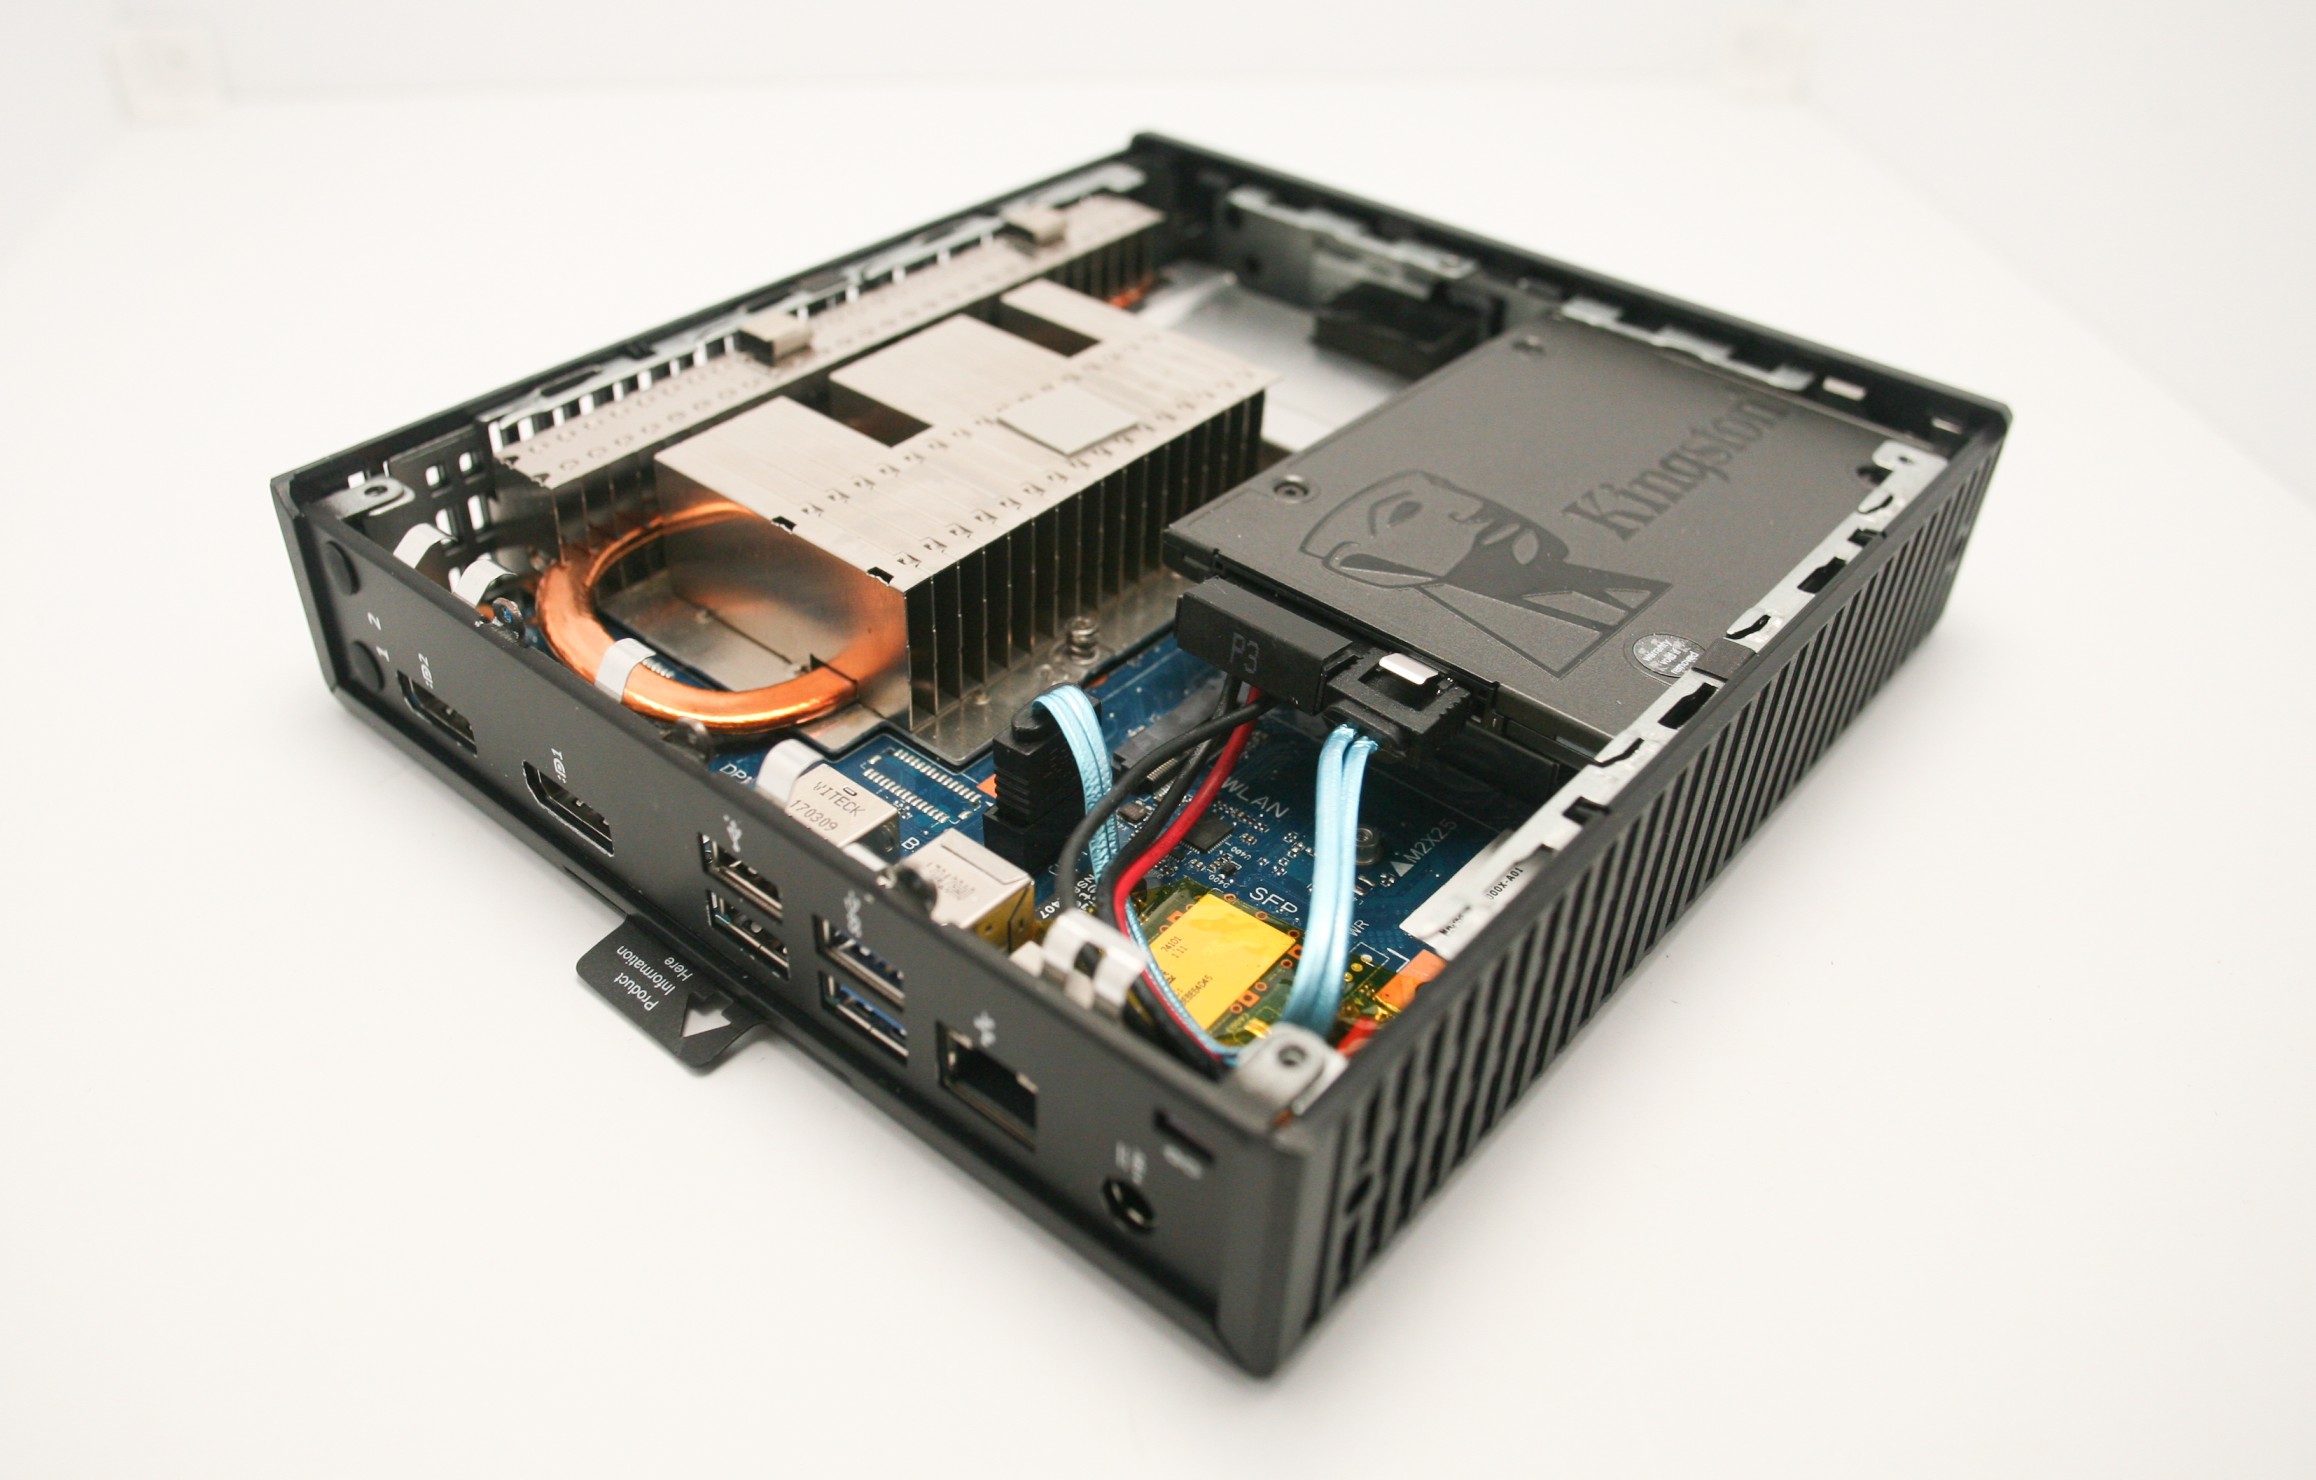
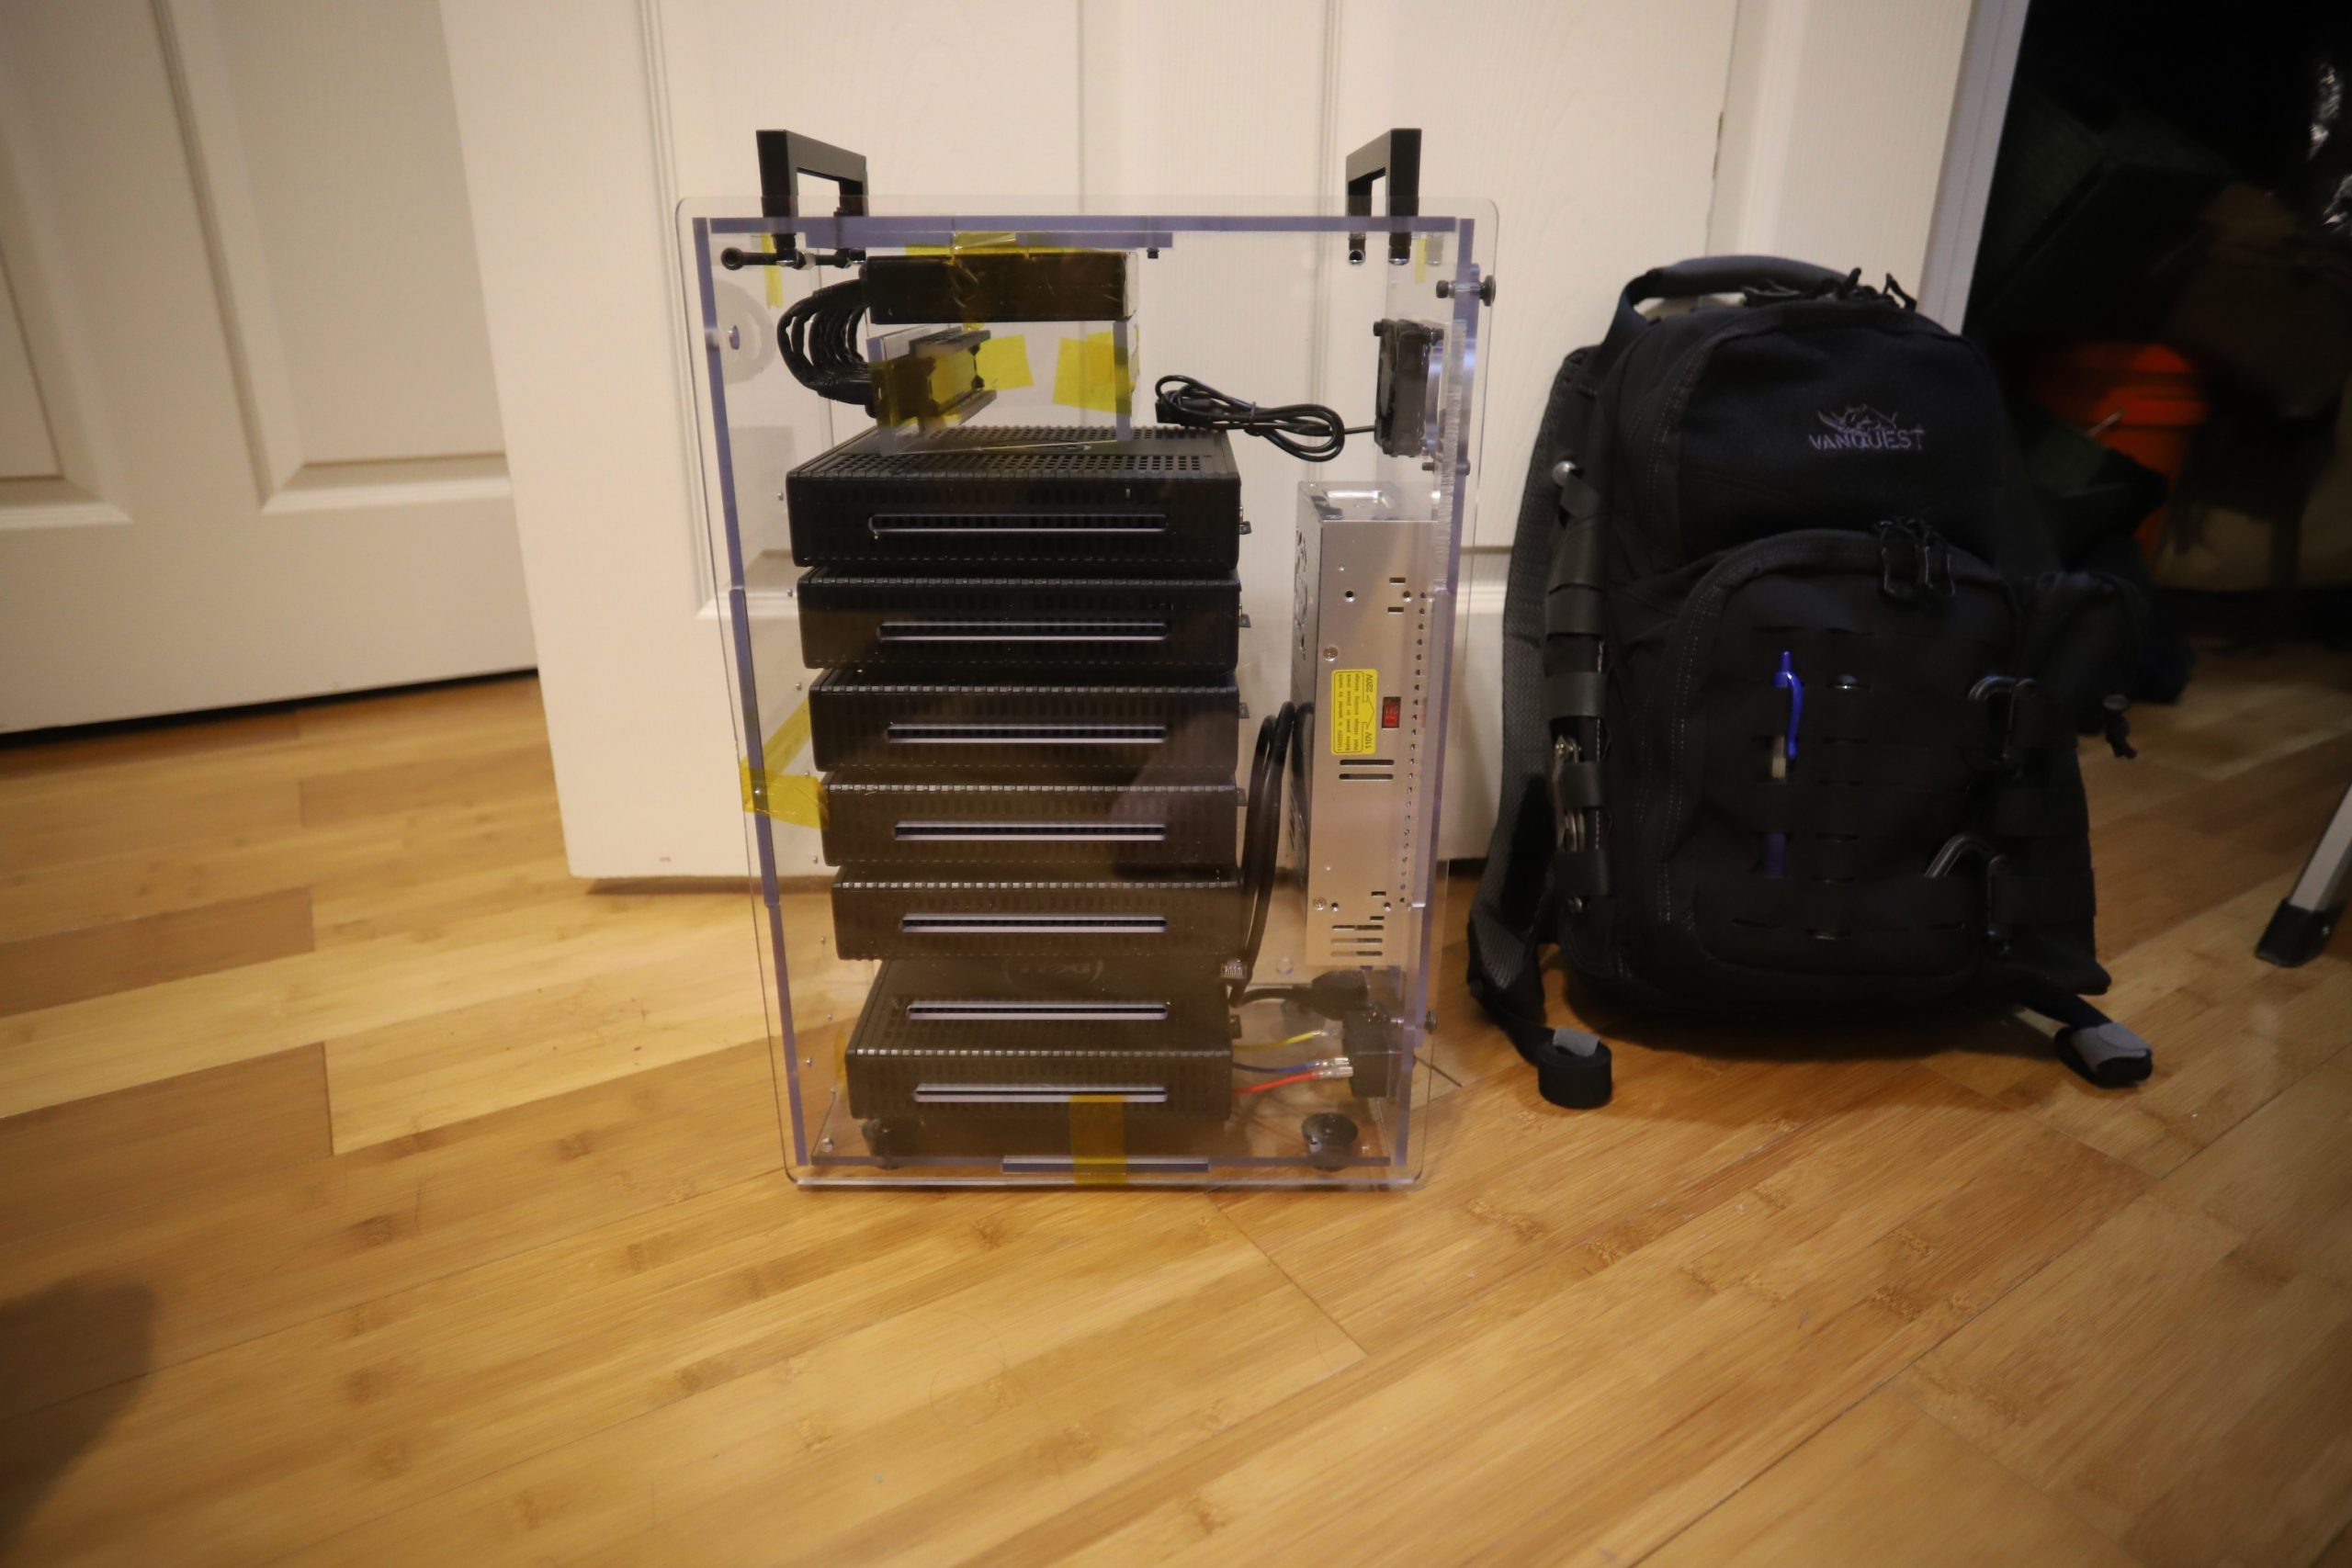
Here’s a rear view of when I was configuring Proxmox. This view is with the power supply panel removed. It is sitting in the bottom of the picture out of frame.
Final Shots
Tower Mode
Rack Mode


Cooling
After final assembly, I learned that I needed active cooling. Without at least one of the exhaust fans running, the nodes would overheat under load. I really wasn’t sure about this since all the nodes are passively cooled — I even cut air vents slits above the heatsinks.
So instead of the top slits being passive heat vents, they are now the main air intake. The air that is sucked in comes though the heatsinks of all the nodes.
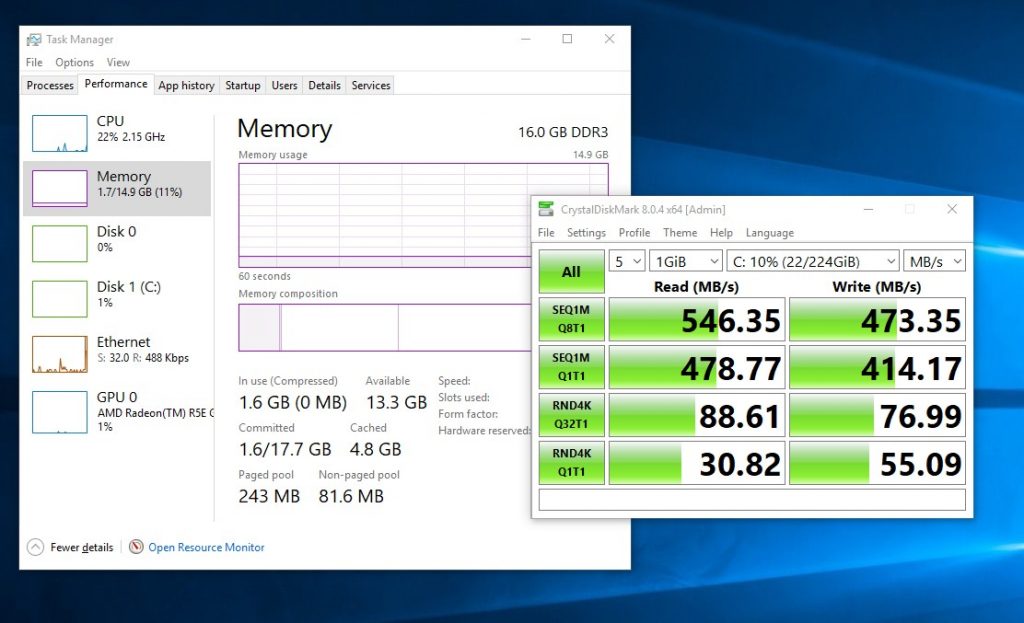
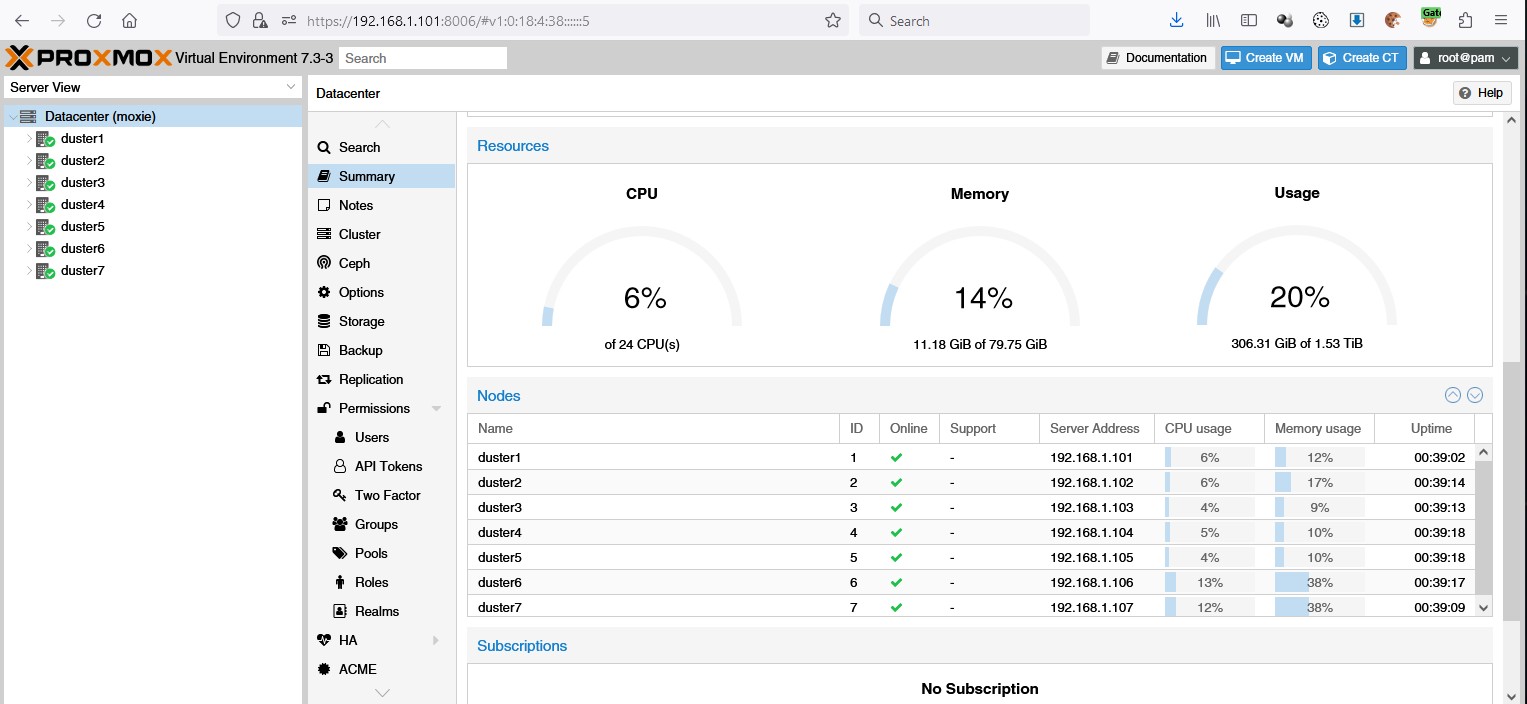
Proxmox Dashboard
Cost Breakdown
| Description | Cost (USD) |
|---|---|
| (5) Dell Wyse 5060 | $75.64 |
| (2) Dell Wyse 5010 | $30.00 |
| (1) 20A Power Supply | $39.99 |
| (7) 5.5×2.5mm Barrel Jacks | $15.99 |
| (10) 8GB DDR3 RAM | $173.80 |
| (7) 240GB SSD | $109.98 |
| (1) TP-Link TL-SG108E Switch | $26.99 |
| (1) 8-Port Patch Panel | $12.99 |
| $485.38 | |
I decided not to include some things I either already had or stuff that didn’t cost me anything.
Final Thoughts
I do realize that for the same money I could have gotten a very nice rack mount server — a Dell PowerEdge R730 for example. I have Dell rack mounts running Hyper-V and they’re great.
I wanted to see Proxmox and Ceph up close. My end-goal was a cheap, small, multi-node setup and I think I did okay.