
Table of Contents
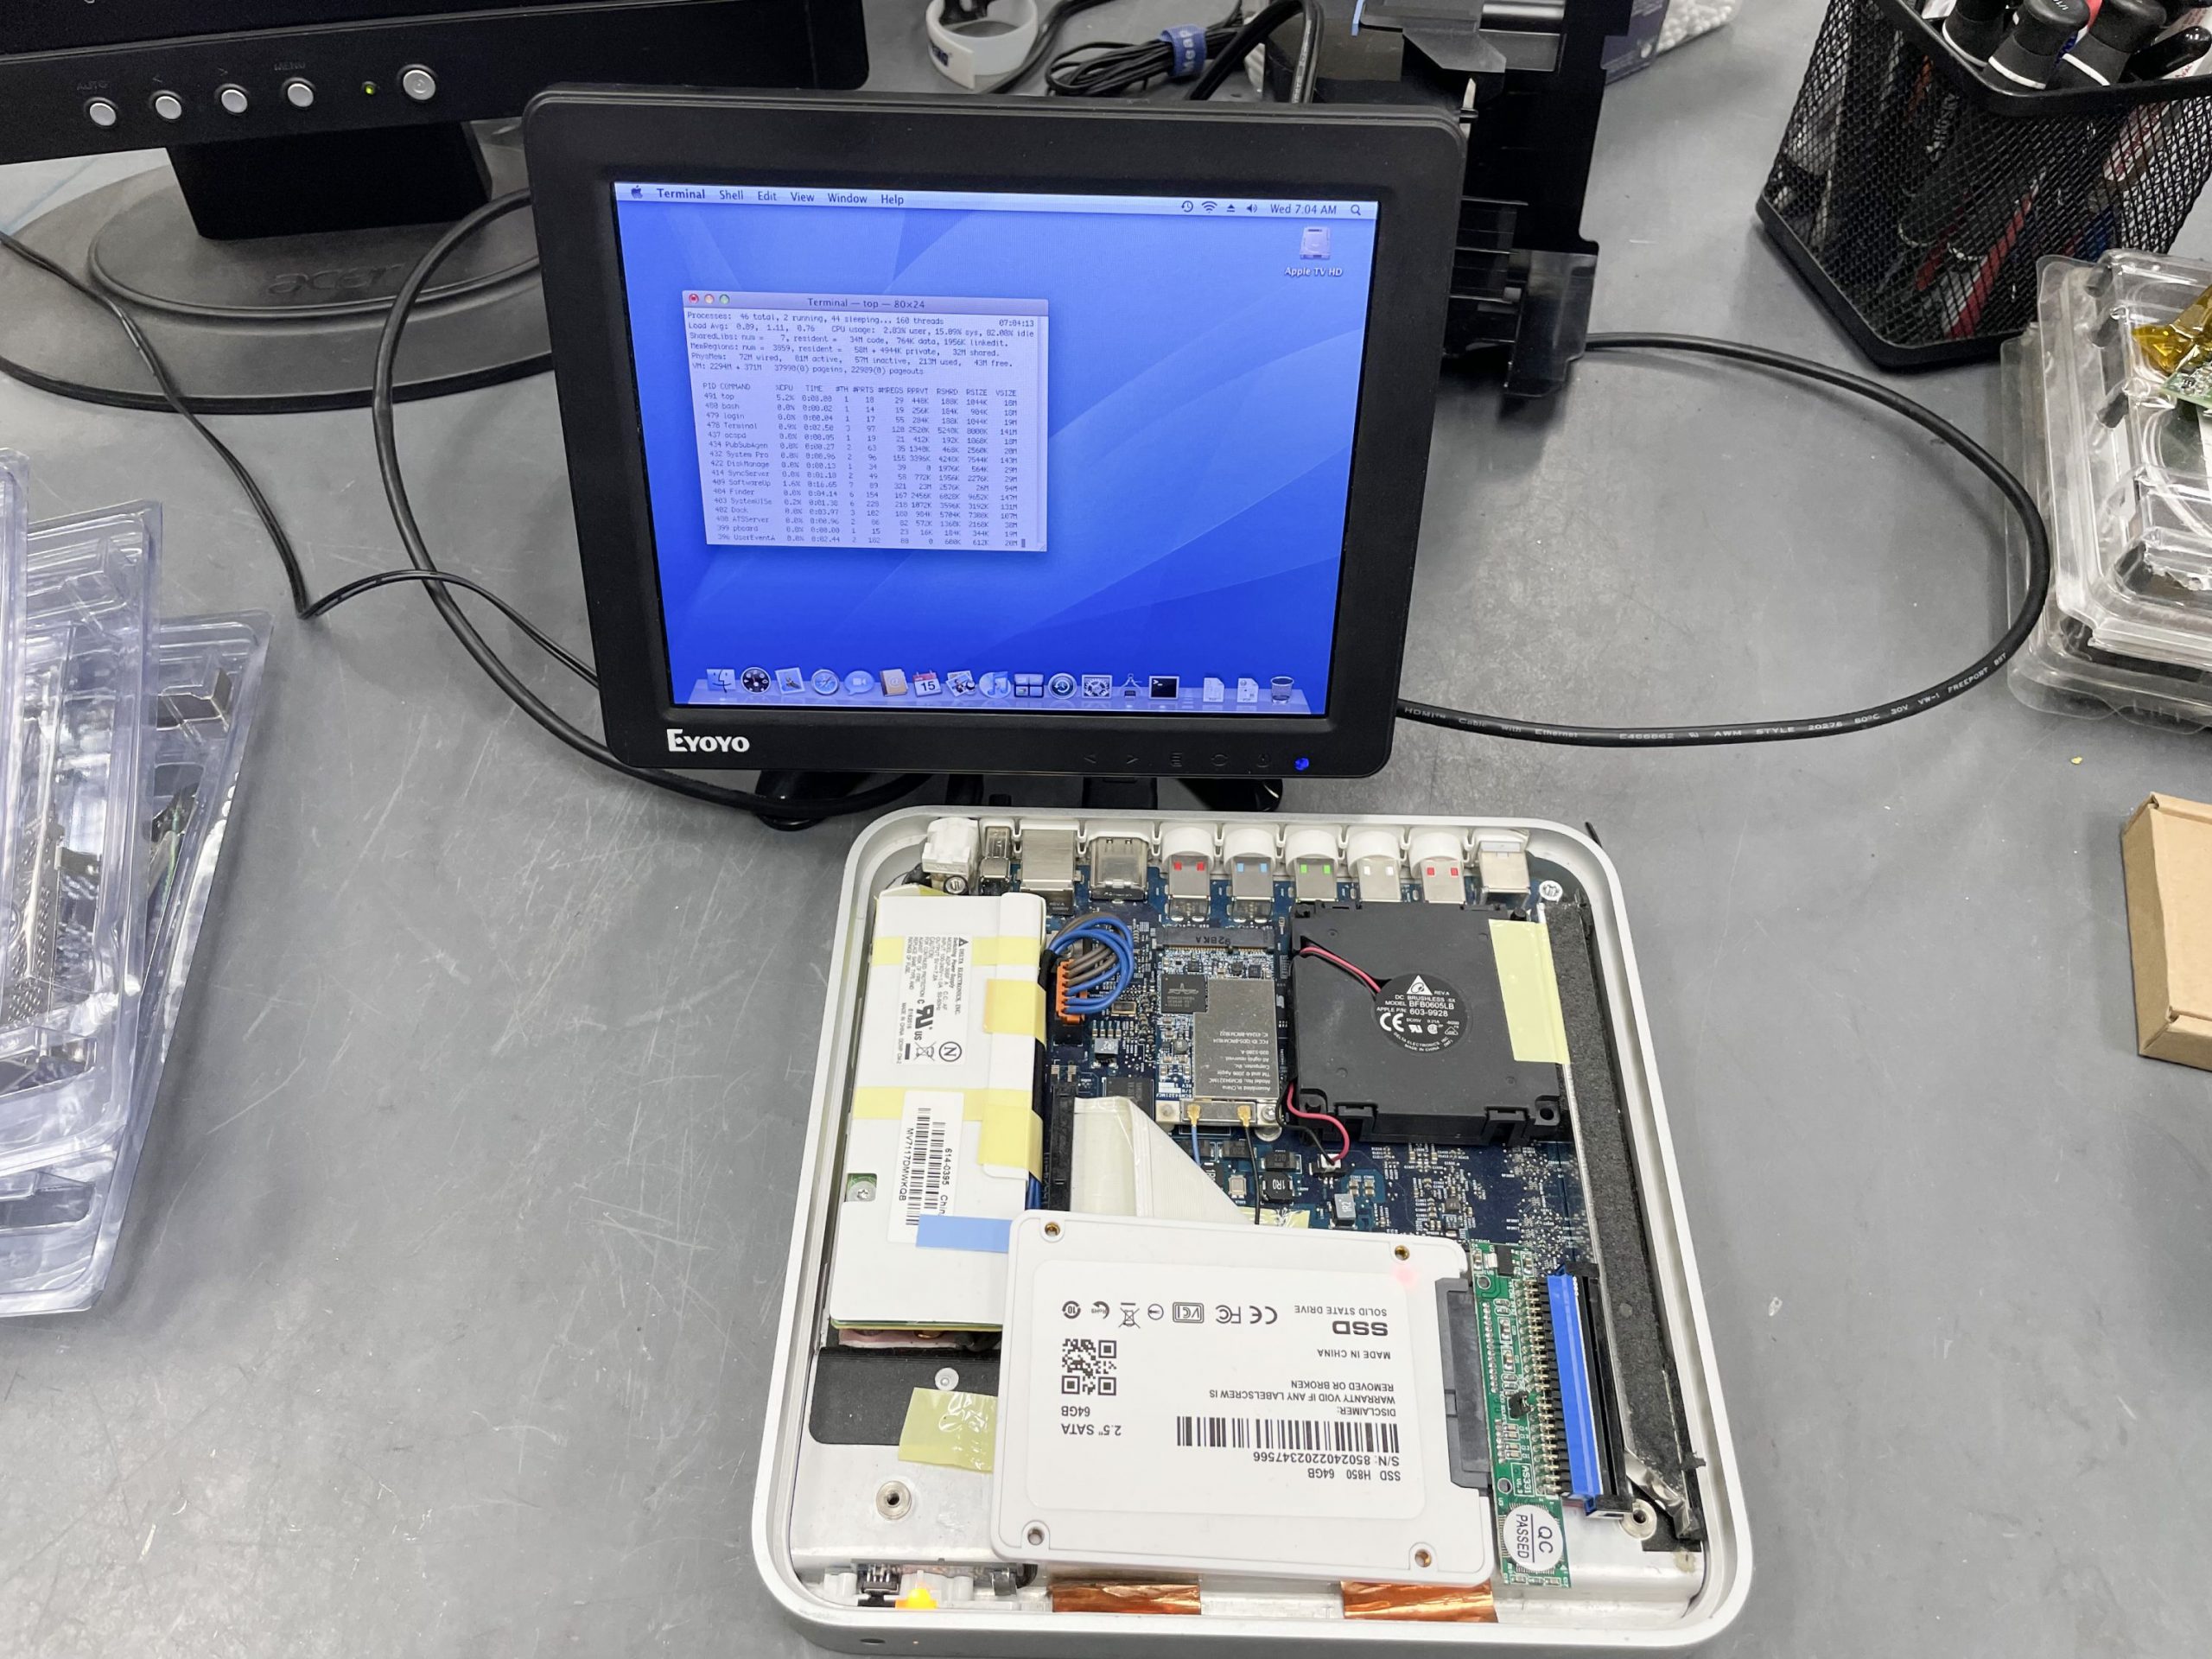
Apple TV System Specs (A1218)
- Intel Pentium M 1.0GHz (Dothan)
- 256MB DDR2
- 10/100Mbit Ethernet
- 802.11n WiFi
- GeForce Go 7300 w/ 64MB GDDR3
- 2.5″ 40GB PATA HDD
- USB 2.0 (1)
- HDMI
- Component Video Out
- RCA 2-channel Audio Out
- Optical Audio out
Quick Overview of Installation
- Download the installation image
- Decompress the image with ‘xz’ or 7zip
- Write the image to a 4GB USB drive
- Insert the USB drive into the Apple TV and power on.
- Apple TV boots and writes OS X to internal hard drive.
Installation speed run — stock Apple TV Gen 1, unmodified.

This system image was designed for the original Apple TV — the 1st Generation launched in 2006 — and not the Apple TV 4K 1st Generation.
The original Apple TV has a light gray shell. Every other Apple TV is black/dark gray.
Important note: Outputting HDMI video to my ATEM Mini Pro stopped working where the OS X desktop should have been. Outputting to an HDMI capture and OBS did work.
If you don’t see an image, the issue might be with your monitor or video output device.
Download the Image
atv-osx-installer.img.xz – 2.5GB
md5: 74cf292363b17479fce487abf379715f
Writing the Image
The atv-osx-installer.img.xz image file will need to be decompressed using the Linux ‘xz’ command or other program (e.g. 7zip) and the decompressed image is written to a USB drive of at least 4GB. I’ve used a few Sandisk, Kingston, and some no-name USB drives and they all worked.
I use ‘dd’ to write the images. Balena Etcher is also a good choice for those who want a GUI tool.
USB Image Tool is a small Windows application that doesn’t require installation. Basically, you can use any tool that can write binary data to disk.
Installing OS X Leopard 10.5.5
Once you’ve written the installation image to a USB drive, you will need to plug it into the Apple TV and power it on. No mouse or keyboard is needed. The USB drive will automatically install OS X.
I’ve tested this on 3 different Apple TVs and they all worked without issue.
How Does it Work?
This isn’t a standard OS X installer. The USB boot drive contains a bootloader for a simple Linux environment and a complete OS X hard drive image file. A script is executed at boot which images OS X to the Apple TV’s internal hard drive. The Apple TV hard drive will be overwritten. There is no prompt.
This method saves you from having to remove the internal hard drive to image it manually. The script uses xz to decompress the image and pipes it into dd. Here is the command:
xz-static -dc atv-usb.img.gz | dd-static of=/dev/sda status=progress
The two programs used here — xz-static and dd-static — are i386 static builds of the regular ‘xz’ and ‘dd’ programs. I built them separately because the Linux shell in the bootloader doesn’t have ‘xz’ and the included ‘dd’ doesn’t support the ‘status=progress’ flag.
How Long Does it Take?
The decompression/imaging takes 45 minutes. The OS X image was compressed with xz -9 so I’m sure it’s taxing on the Apple TV’s Dothan chip.
Performance
I owned the original Mac Mini from 2005 (1.25GHz PowerPC G4) and the Apple TV has a comparable feel. This shouldn’t be a surprise since both machines are clocked at around the same speed and both have 256MB of RAM.
The hard drive is a 2.5″ IDE. You can get a 44-pin IDE to SATA adapter on Aliexpress for $5 if you ever decide to upgrade to an SSD.