
If you’re looking for a full, bootable Linux image my post RetroArch on the 1st Generation Apple TV has a Debian Stretch build available.
You have two options for Linux.
- OSMC (https://osmc.tv/download/). Downloading the Apple TV images to a USB drive and booting is the easiest path to get Linux on the Apple TV. It is the method I would recommend.
- Install vanilla Linux
Option 2, creating a ‘patchstick’ — a bootable USB drive where you can launch a Linux installer. The ‘patchstick’ software is located at https://github.com/davilla/atvusb-creator.
Getting the original github version of this to work is tricky, because some of the creation scripts (Windows batch files) contain dead hyperlinks. If you choose this method, you will have to fix the broken links like I did.
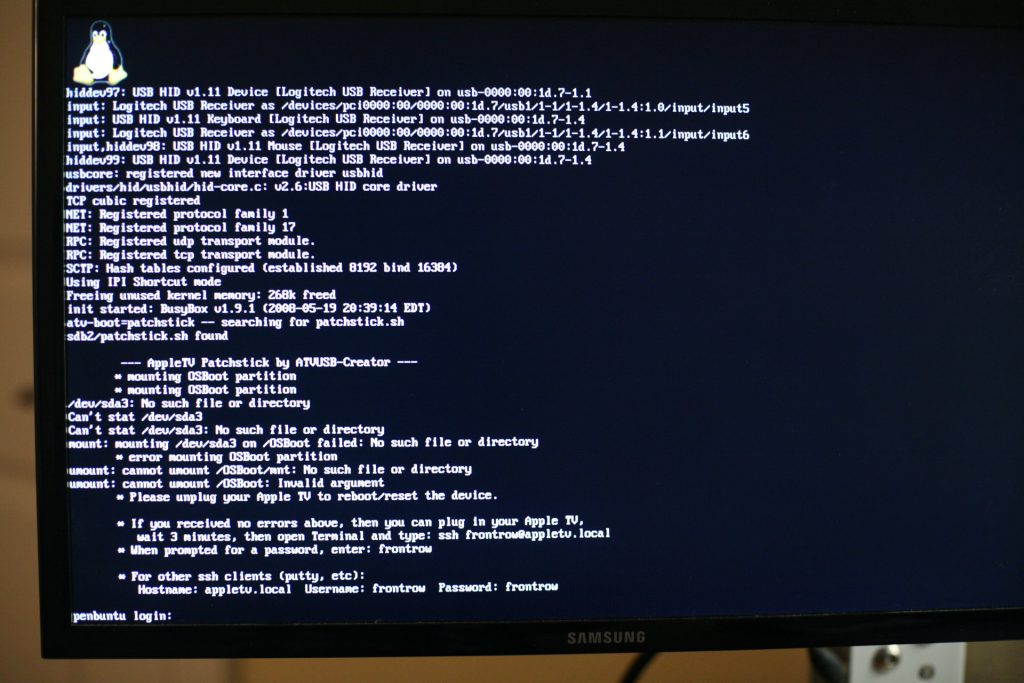
The ‘patchstick’ has a “boot.efi” file that the Apple TV can boot from. Contained within the boot.efi file is a Linux kernel and ramdisk.
- Download the complete image file here
- Download the software to write the image to USB here. Note: This tool was packaged with the original GitHub project.
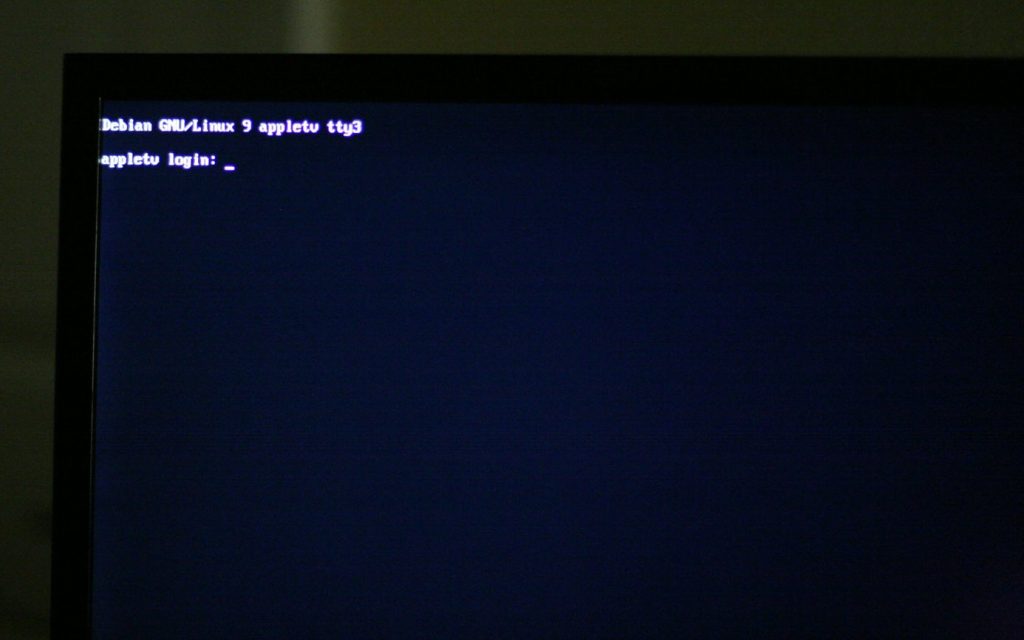
Write the image to a 512MB+ USB drive. After booting from the USB drive, login with the username and password root/root.
From this Linux environment, you can do as you please. I opted to copy the USB drive to the internal hard drive using dd. Something like…
dd if=/dev/sdb of=/dev/sda bs=1M count=300Where /dev/sdb is the USB drive and /dev/sda is the internal hard drive.
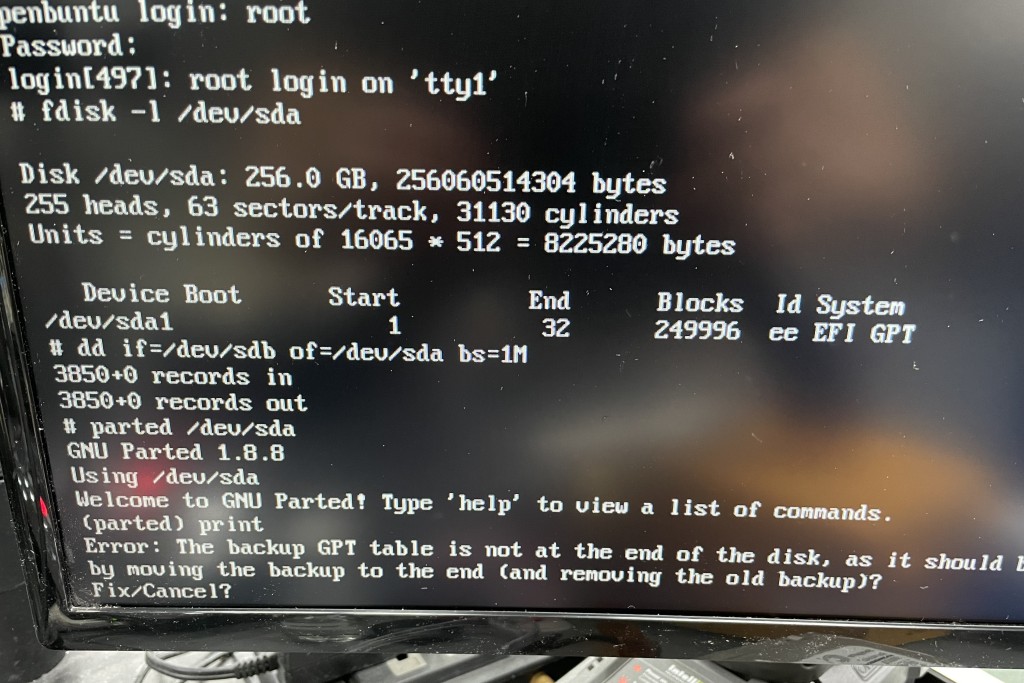
Once ‘dd’ is finished, run ‘parted /dev/sdb’ and type ‘print’ at the prompt. ‘parted’ should show a warning, asking you to fix your GPT table. Type ‘fix’ here. The Apple TV should be bootable from the internal hard drive at this point.
The patchstick is designed to load a simple Linux environment to bootstrap a proper Linux kernel with “kexec.” In my case, I loaded the Debian Net Installer, but you can probably load any kernel and ram image.
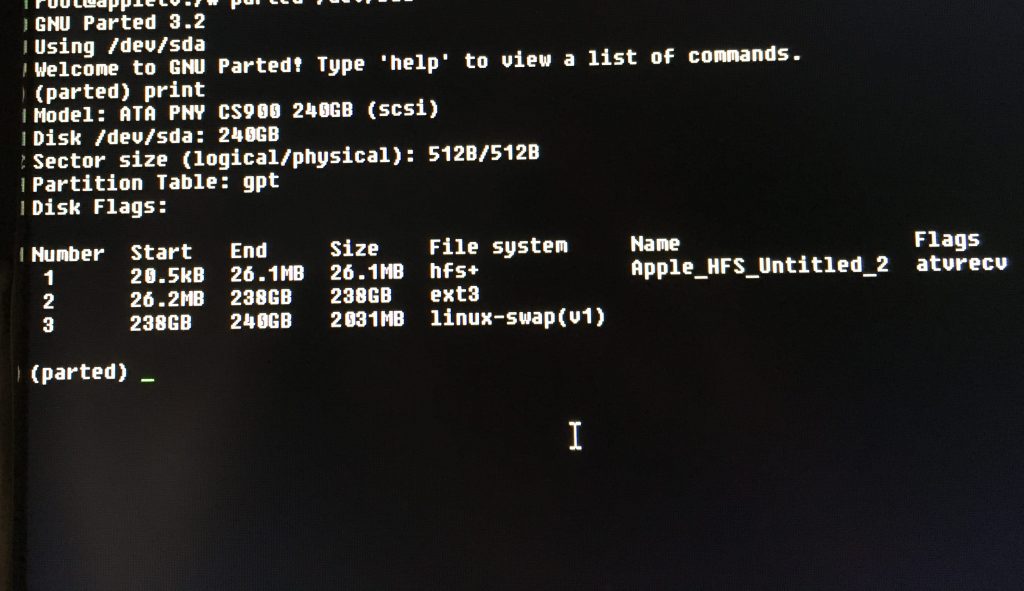
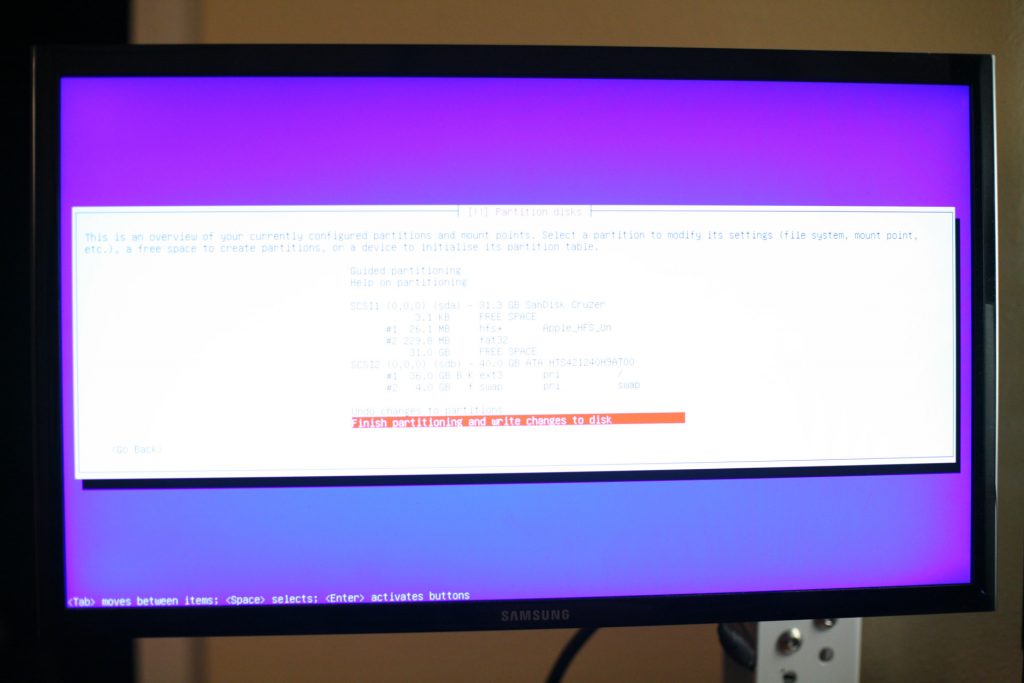
After installing Debian, my partition table had the Apple HFS+ boot partition, the main Linux ext3 root, and a swap.
Final thoughts.
This box will mainly be my SSH tunneling machine, though I installed the larger storage for torrenting and SABnzbd. My main server could do these things, but it’s not on 24/7.
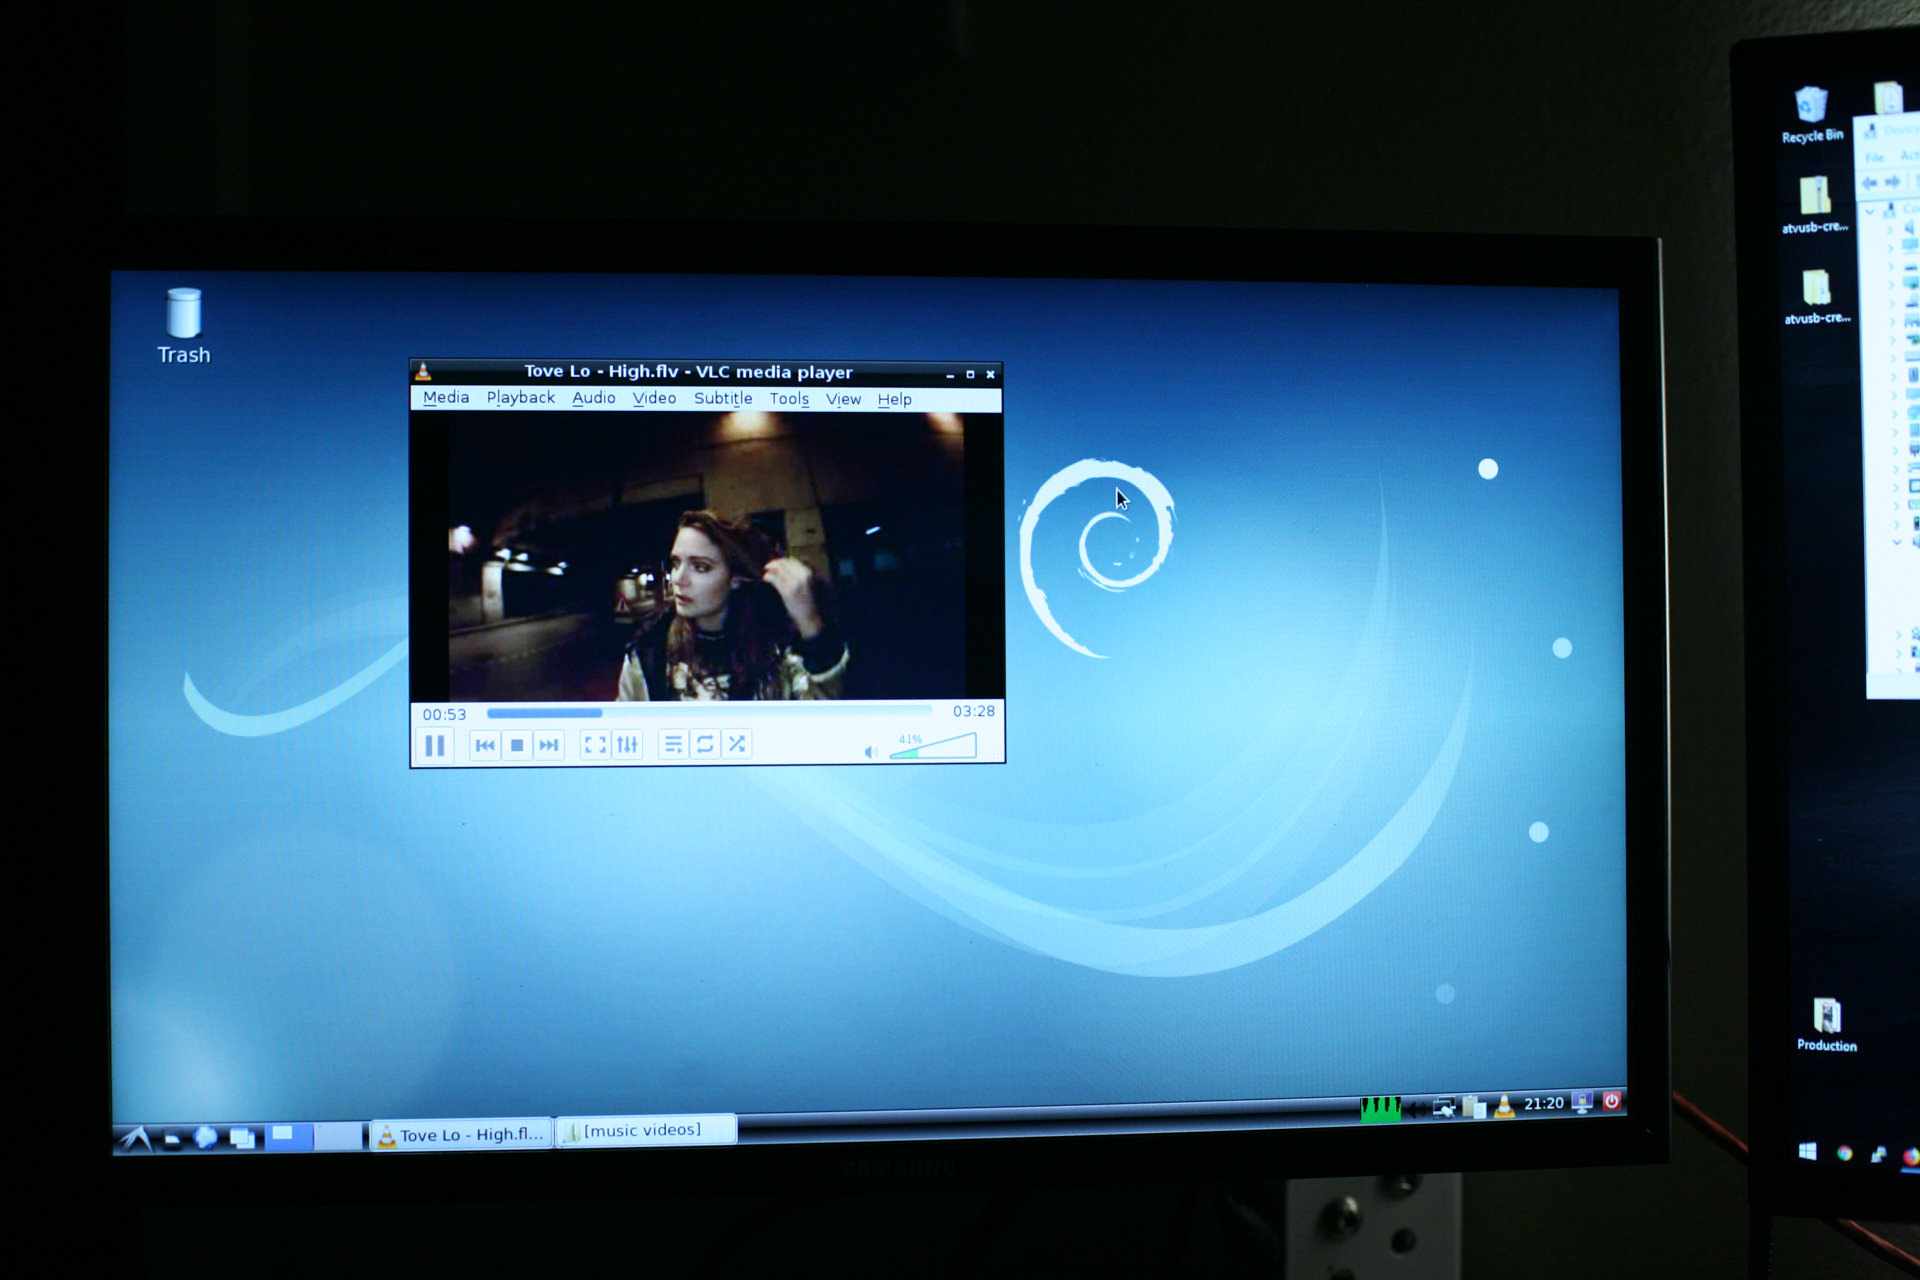
It was neat to get this up and running. Debian runs as it normally would with HDMI output and WiFi working (I won’t need either). Again, OSMC is the easiest way to get Linux onto this machine.
The biggest drawback is a lack of gigabit ethernet. I will have to buy a USB2.0 ethernet adapter. The noise is minimal. There is a small fan, but you only hear it in a dead quiet room.
- Part 1 – The Hardware
- Part 2 – The Software